Eneo iNEX Client User Manual
Page 132
iNEX Standard
127
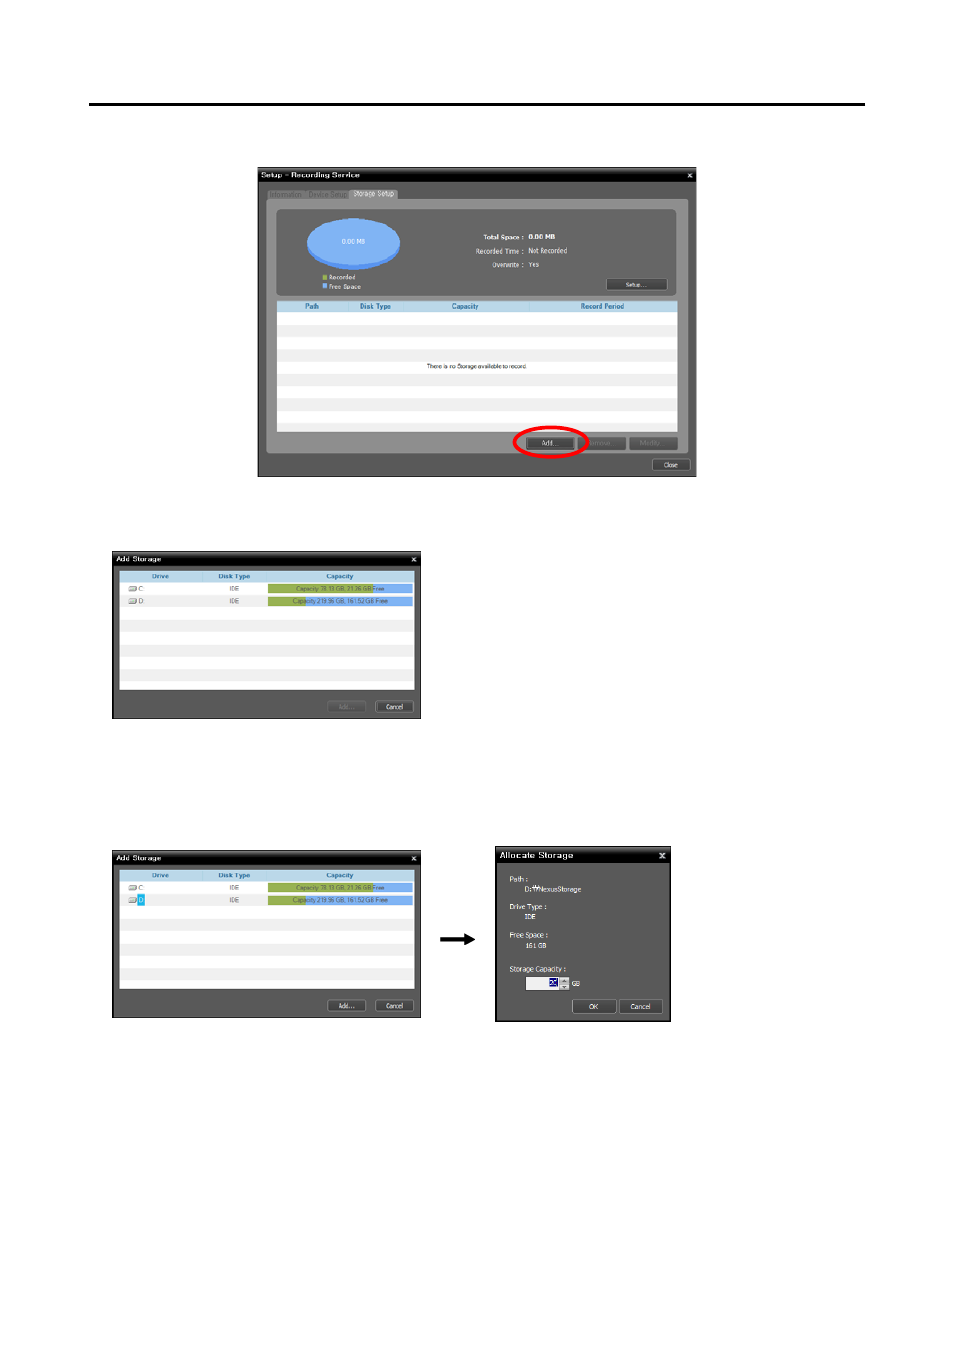
2. Select the Storage Setup tab and click the Add button at the bottom.
3. The Add Storage window appears, and a list of available hard disk drives is displayed with information
about each drive.
Drive: Displays the drive name and volume label. If a
file system has not been created on a hard disk drive,
‘PHYSICALDRIVE No.’ will be displayed instead of
the drive name and volume label. The iNEX program
considers any hard disk drive that does not use Windows
file system (FAT32, NTFS) as if no file system has been
created.
Disk Type: Displays the type of hard disk drive.
Capacity: Displays the total storage capacity and
available storage capacity.
4. Select a hard disk drive to allocate storage and click the Add button at the bottom. The Allocate Storage
window appears.
Path: Displays the storage folder path.
Drive Type: Displays the type of hard disk drive.
Free: Displays the available storage capacity.
Storage Capacity: Sets up the storage capacity to be allocated to the hard disk drive (Min. 20GB). If
the Windows operating system is installed on the hard disk drive, you must reserve more than 10GB
of free hard disk for proper system operation. If no file system has been created on the hard disk drive,
the recording server automatically creates a proprietary video database file system when storage is
allocated to ensure more stable recording and allocates storage to the entire hard disk drive automatically.