Setting up time-lapse recording – Eneo iNEX Client User Manual
Page 75
User’s Manual
70
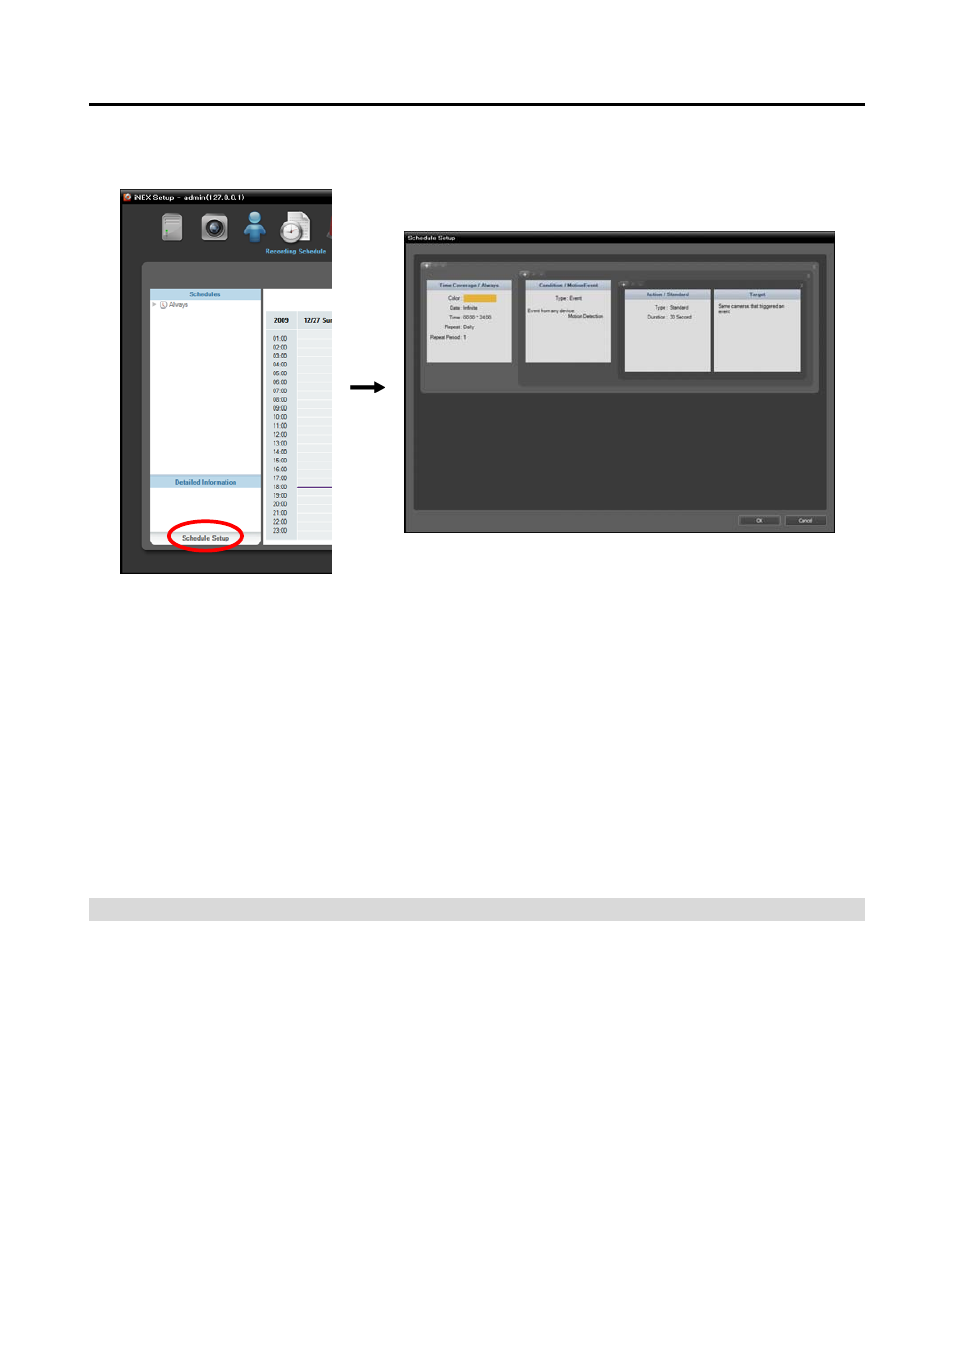
Click the Schedule Setup button at the bottom. The Schedule Setup window appears, and schedule
windows are displayed with the current settings for each Preset.
Time Coverage: Sets up the schedule time. You can set up more than one time range. The higher the
schedule position is in the Schedule Setup window, the higher its priority is.
Condition: Sets up the recording type. You can set up more than one recording type for the same recording
period. The higher the schedule position is in the Schedule Setup window, the higher its priority is.
Some of recording types may not be supported depending on the protocol that the device uses (supported
for the iNEX protocol and some versions of the Axis protocol).
Action: Sets up the stream to use for recording (network cameras only) or the recording settings (network
video transmitters only). You can set up more than one recording setting for the same recording type.
This function is supported only for devices which use the iNEX protocol.
Target: Sets up the cameras to be recorded.
NOTE:
In the schedule setup, “Preset” indicates a single setting in which the setting values of Time Coverage,
Condition
or Action are saved.
Setting up Time-Lapse Recording
During Time-Lapse recording, the recording server performs recording continuously based on the schedule
settings for the scheduled time (supported only for devices registered on one of recording services).
1. Set up the schedule time by double clicking the Time Coverage schedule window, and then selecting
a desired Preset.