Eneo iNEX Client User Manual
Page 86
iNEX Standard
81
(Jog Shuttle – Play panel): You can adjust the playback direction and speed by using the
jog shuttle. The vertical line in the jog shuttle indicates the current playback direction and speed. Video
is played backward when the vertical line is to the left of center and video is played back forward when
the vertical line is to the right of center. The farther the position is from the center, the faster video is
played back. Clicking the vertical line and dragging it to the desired position on the jog shuttle and holding
it plays video at a constant speed. Releasing the mouse button causes the vertical line to return to the
center position. Clicking the
(Play) button plays video at normal speed. Clicking the (Shuttle Lock)
button and dragging and dropping the vertical line to a desired position fixes the vertical line in that position.
(Jog Shuttle – DVR Search panel): You can adjust the playback speed by using the
jog shuttle. The vertical line in the jog shuttle indicates the current playback speed.
(Save to User Layout): Saves the current screen format.
(Screen Format): Changes the screen format. Clicking the button
displays additional screen formats. Clicking the or button moves to the previous or next camera groups.
Timetable/Event List
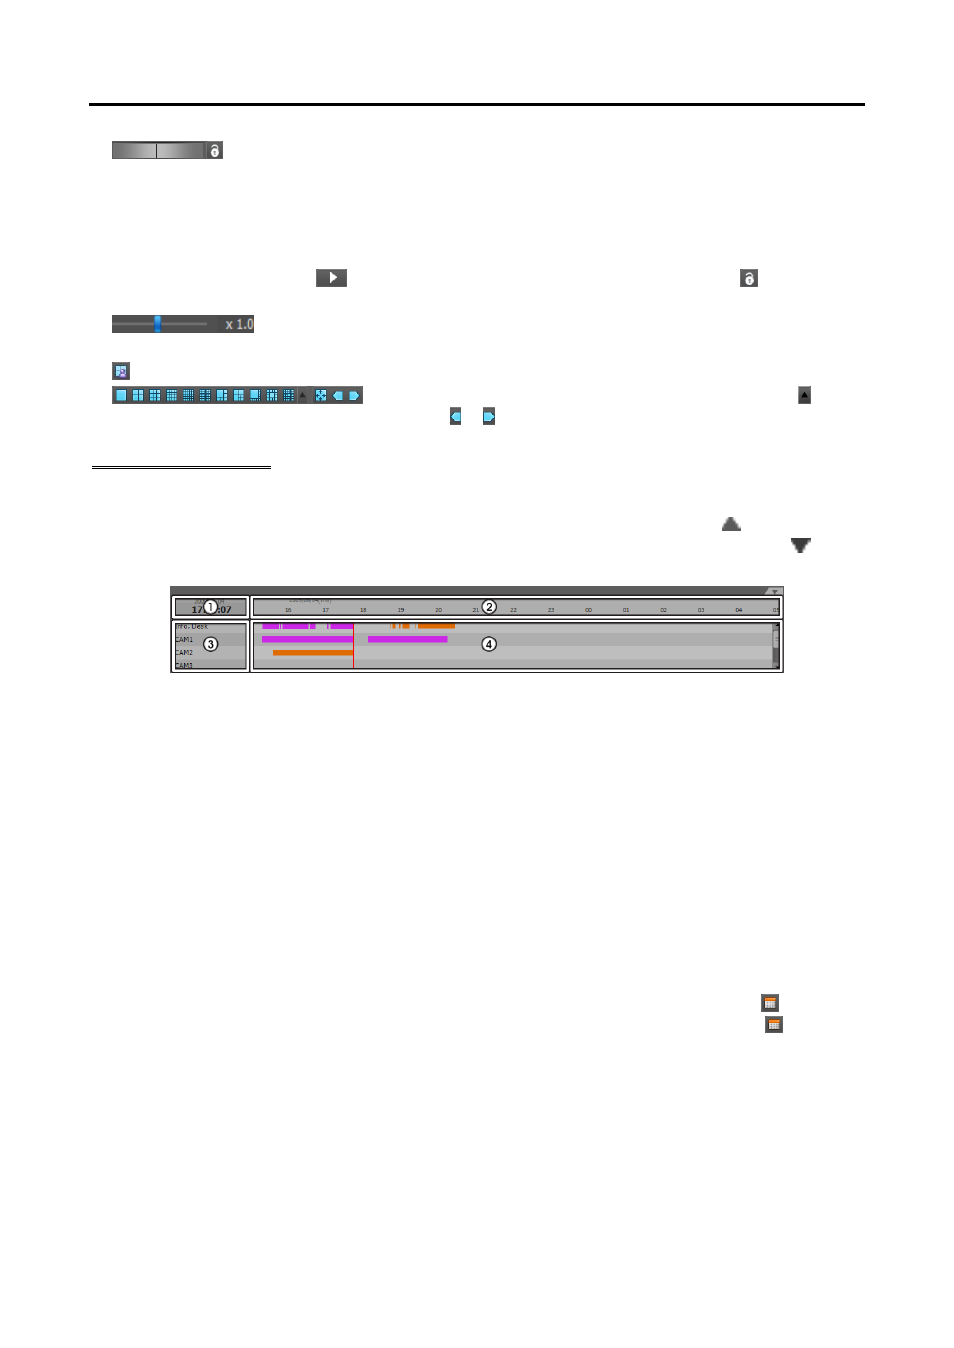
Time-Lapse Search Mode: When in the time-lapse search mode, the timetable is displayed at the bottom
of the screen and it displays the recording information for each camera. Clicking the button in the top
right corner of the timetable displays the recording information for all cameras. Clicking the button
displays the recording information for the selected camera on the screen.
NOTE:
The timetable will differ depending on the model of the device.
① Current Playback Date/Time: Indicates the video time for the current playback location on the
timetable.
② Recorded Period: Displays the date and time period of the recorded data. Clicking anywhere in the
empty space and dragging it to the left or right moves to the earlier or later date or time. Scrolling
the mouse wheel while holding the Ctrl key on the keyboard zooms in and out the time section.
③ Camera Title: Displays the camera title.
④ Recorded Data: Displays the recorded data by time in one minute or one hour segments depending
on the device.
Minute Segments Timetable (all devices except some DVR models)
− Red vertical line: Indicates the current playback location of video on the timetable. Clicking the
mouse on the desired time displays the first image recorded within the time.
− Yellow separation line: Separates segments when time overlap occurs. In this case, the recorded
data in the time range located after the separation line is the latest. Clicking the (Calendar)
button in the Play panel allows you to move to a specific segment directly (Click the (Calendar)
button → Select a date → Select a segment → The first image recorded within the selected segment
is displayed on the screen).
− The color of the bar: Indicates different recording modes (Navy blue for Time-lapse, Pink for Event,
Purple for Pre-event, Sky blue for Instant Recording and Orange for Irregular recording caused
by temporary disconnection from the device).
Hour Segments Timetable (some DVR models only)
− Yellow color bar: Indicates the current playback location of video on the timetable.