Plugging in the feeder and tabber, Caution, Do not use outlets controlled by wall switches – Rena T-650 User Manual
Page 15
GETTING ACQUAINTED
Plugging in the Feeder and Tabber
Make sure that the emergency stop button, on the T-650, is pressed down and the main power
switch above the power cord receptacle is in the OFF position. Make sure that the power switch
on the feeder is in the OFF position also.
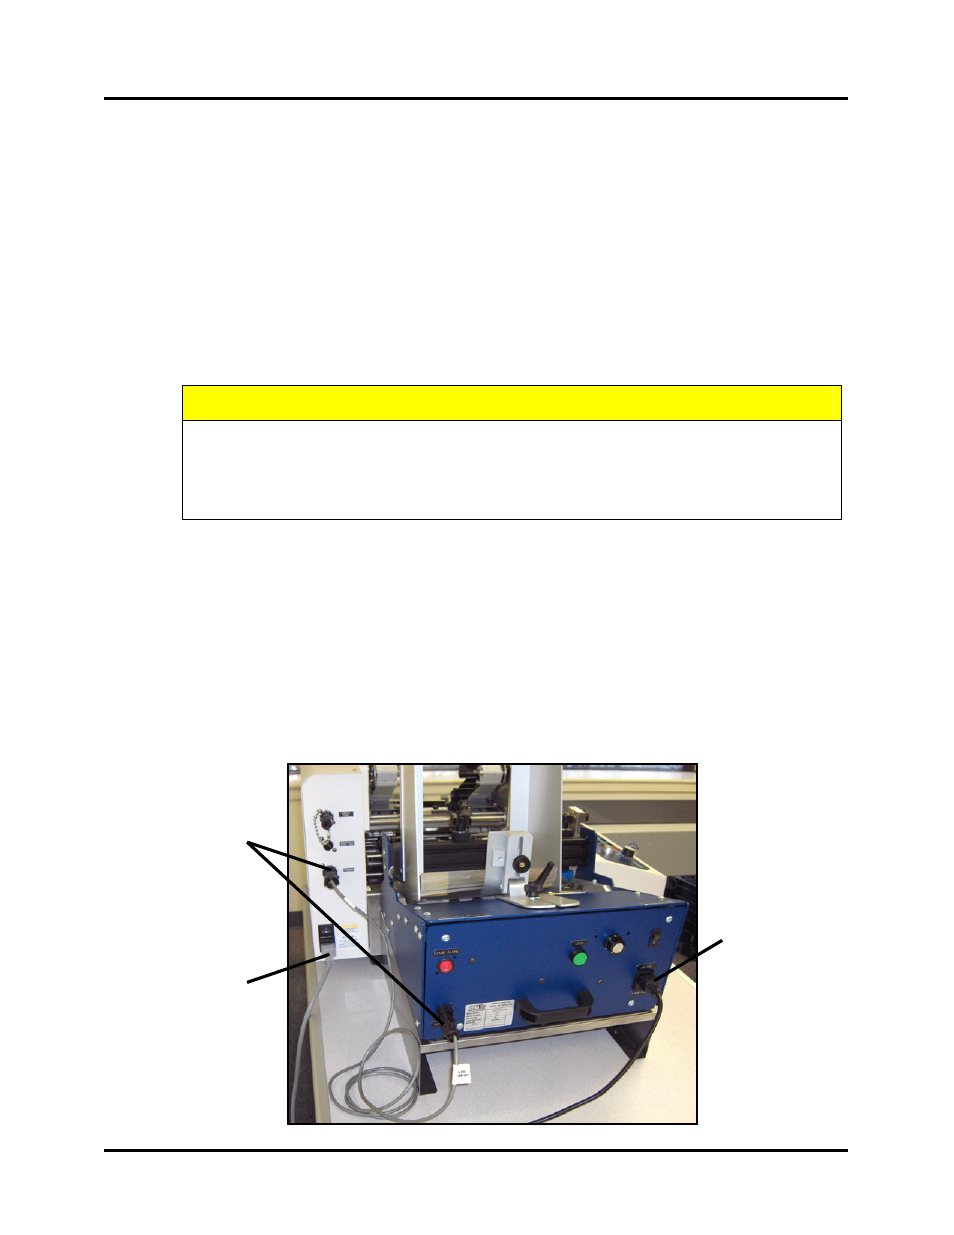
1. Connect one end of the Tabber power cord [1] to the rear of the T-650 in the
corresponding receptacle.
2. Connect one end of the Feeder power cord [2] to the rear of the Feeder in the
corresponding receptacle.
3. Plug the other end of each cord into a 115 Volt AC, 50/60 Hz. Grounded outlet.
CAUTION
DO NOT USE ADAPTER PLUGS OR EXTENSION CORDS TO CONNECT THE TABBER OR THE
FEEDER TO THE WALL RECEPTACLE.
DO NOT USE OUTLETS CONTROLLED BY WALL SWITCHES.
DO NOT USE AN OUTLET THAT SHARES THE SAME CIRCUIT WITH LARGE ELECTRICAL
MACHINES OR APPLIANCES.
4.
Connect the appropriate Feeder Interface Cable [3] (see list below) to the Feeder and to
the lower connector on the Tabber.
Part #
Description
35E-500-191 Cable A (EasyFeed 120 Feeder <---> T-650). Cable included with T-650.
35E-500-196 Cable D (EasyFeed 120 Feeder <---> T-650 <---> Envelope Imager XT3.0/XT4.0)
CAUTION! Be sure you are using the appropriate cable with the appropriate
feeder/tabber/printer or damage may result.
3
1
2
T-650 Operations REV. 8/25/2010
15