Rena T-650 User Manual
Page 82

OPERATION
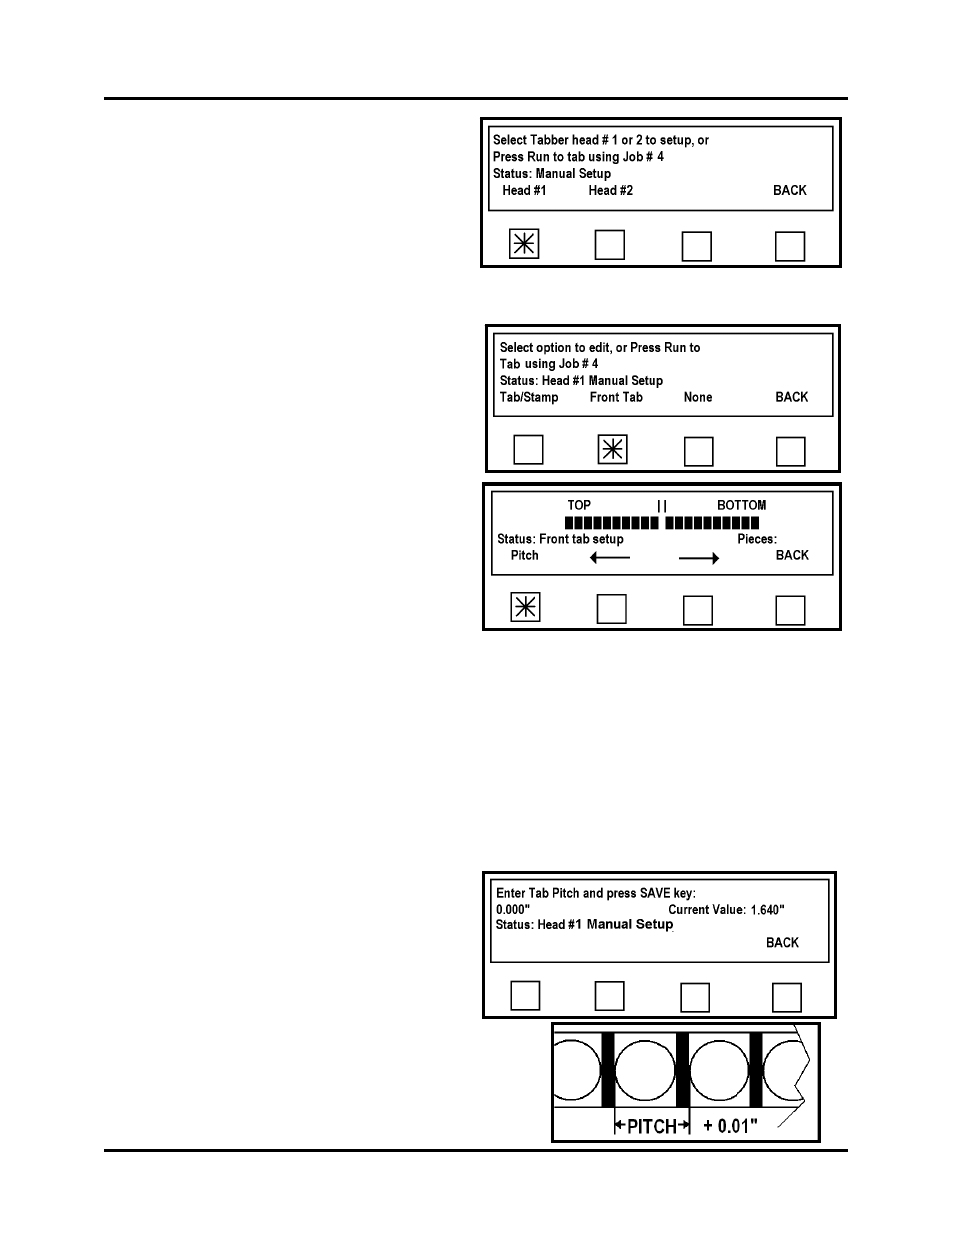
37. The Select Tabber Head screen will
appear.
Select Head 1.
38. Verify that the Peel Plate on Head 1 is set to the Front Tabbing Application position.
39. The Select Option screen for Head 1
will appear.
Select the Front Tab option.
NOTE: The Select Option screen for
Head 1 is different than for Head 2.
There are more choices for Head 1.
40. The Front Tab Positioning screen will
appear. This screen can be used to
adjust the amount of tab on the top or
bottom of the media.
Moving the line toward the right will
put more of the tab on the bottom of the
piece.
Moving the line to the left will put
more of the tab on the top of the piece.
Each segment of the line represents approximately 0.100”.
It is suggested to start with the tab position centered and after testing the tab placement,
readjust accordingly to try to obtain a 50/50 tab fold.
Note: In some cases it will not be possible to get a 50/50 tab fold.
41. It is from this screen that the Pitch of the Tab is also set.
Select Pitch.
NOTE: Whether programming manually or automatically you must set the pitch to
ensure good registration of the tab.
42. The Pitch of the tab is the distance
measured from the top of one tab to the
top of the next tab.
Measure the pitch of the stock you are
using and add 001”.
In this case it was 1.630, plus 0.01” for
a total of 1.640”.
Enter the pitch value using the number keys on
the Control Panel and then pressing the Save
key.
T-650 Operations REV. 8/25/2010
82