Rena T-650 User Manual
Page 48
OPERATION
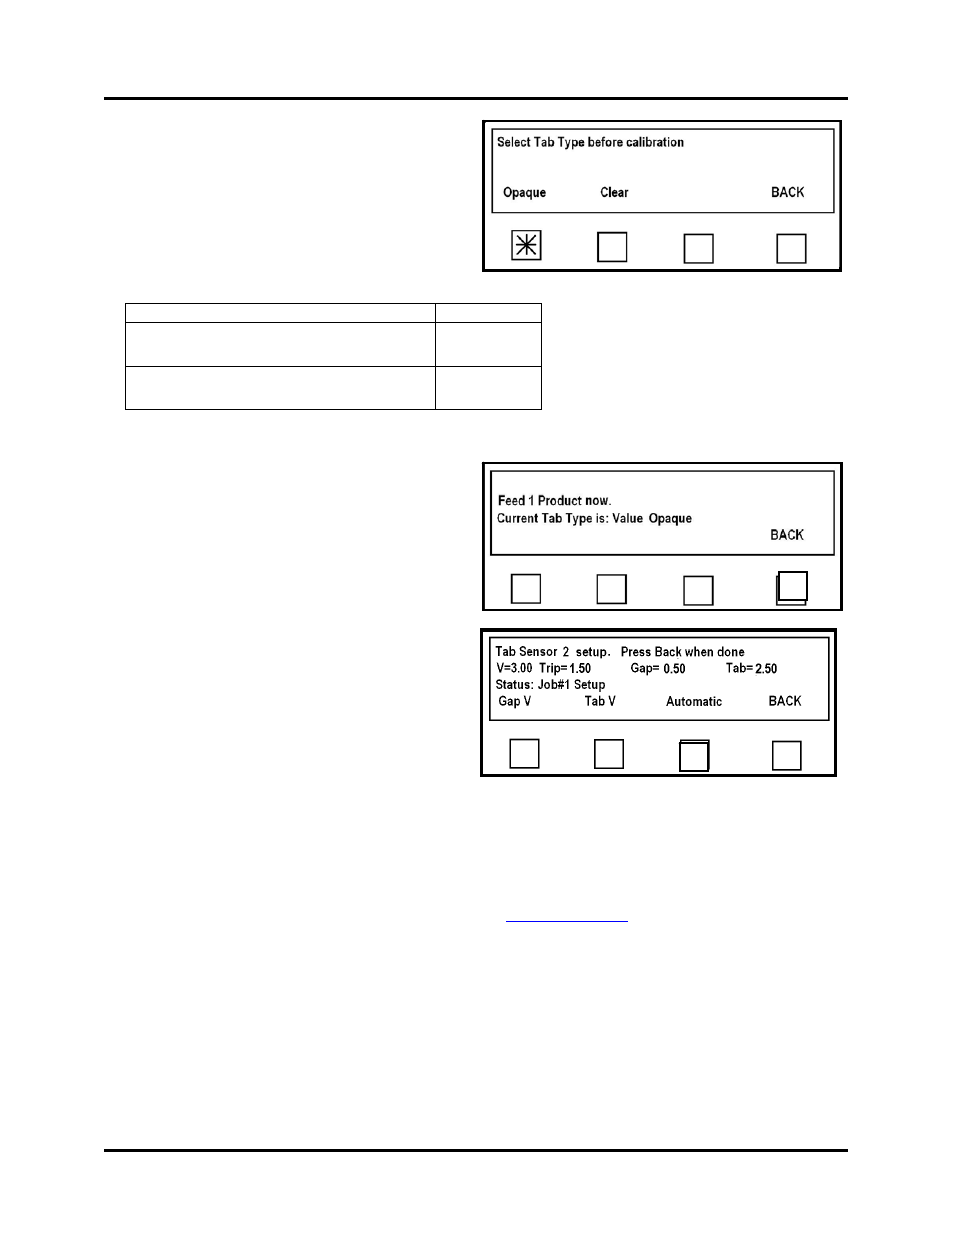
7. The Select Tab before calibration
screen appears.
Select the type of tab either Opaque or
Clear based on the table below:
For the purpose of this example we
will select Opaque.
TAB TYPE
LECT
SE
Stock that has a wh
between each tab/s
ite space (gap)
tamp.
Opaque
Stock that has a bla
between each tab.
ck space (gap)
Clear
See “Appendix C” for additional help.
ear.
Once the Tab Type is selected, the
tabber transport will start and the
screen at the right will app
Adjust the speed control on the Tabber
either up or down until “Feed 1 Product
now” appears in the display.
Feed one piece, from the feeder, into
the tabber. Two or three tabs will be
applied to the piece and then the tabber
will stop and display the new V-Tab
values. The Tab sensor is now setup for
this tab stock.
Tip: In order for the tabber to distinguish between the Tab and Backing, the voltage
difference between the Gap V and Tab V must be 0.80 volts or greater. If the difference
is lower, check/clean the sensor and then repeat the V-Tab adjustment. If the difference in
these values is still less than 0.80 volts, then you may need to use another tab stock that
has a greater density difference.
To check the function of the tab sensor, see “
8. Test the T-650 for proper operation. If you experience tab advancement or positioning
problems, verify proper threading, transport setup, media length, tab type, and tab pitch
settings.
Important! If the tab type or tab pitch values need to be changed, then you may also
need to repeat the automatic tab sensor setup procedure.
T-650 Operations REV. 8/25/2010
48