Side tab, Position tab on side of media, To adjust the tab position – Rena T-650 User Manual
Page 94: Select job, Select your desired job number, Select manual, Select head #1 or head #2, Select tab/stamp or side tab, Select position, Press run, to feed and tab at least two pieces
OPERATION
Side Tab:
Position Tab on Side of Media:
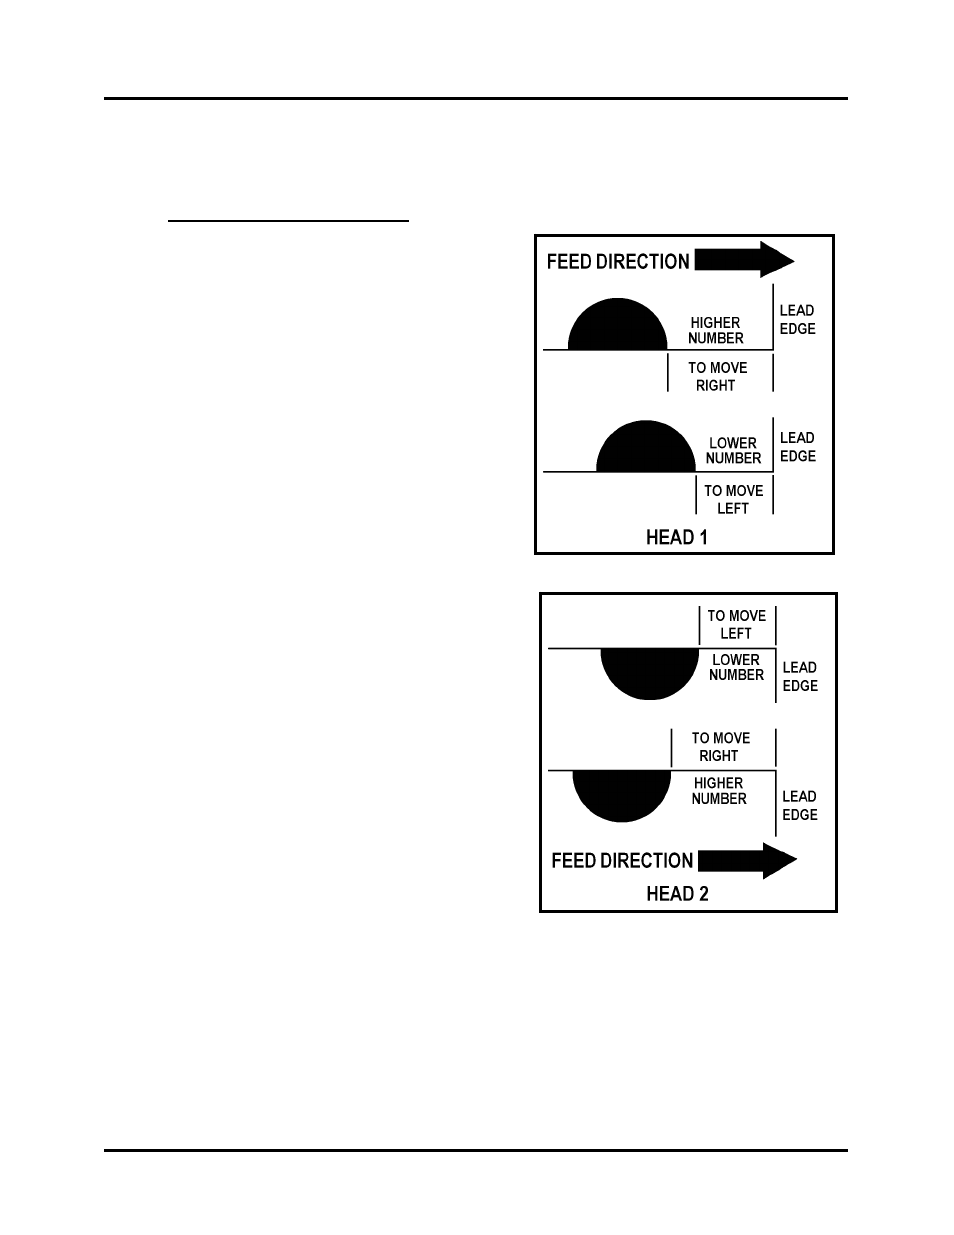
Whether you are using Head 1 or Head 2
adjustments to the tab position, from the lead
edge of the piece, is done in the Tabbers Menu
(Job Programming).
Regardless of whether you are placing one or
three tabs, increasing the number will move
the tab to the right and decreasing the number
will move it to the left of the original setting.
To adjust the Tab Position:
1. Select Job #
2. Select your desired Job number.
3. Select Manual
4. Select Head #1 or Head #2
5. Select Tab/Stamp or Side Tab
6. Select Position
7. Select the Tab number (Tab 1, Tab 2, Tab
3) you wish to adjust. The Current Value
(Tab Position) will be displayed.
8. Use the Numeric Keypad to enter a
different value, then press Save.
A larger number will move the tab position
to the right (towards leading edge).
A lower number will move the tab position
to the left (towards trailing edge).
9. When you are finished, press the BACK
key four times to return to the “Select
Taber Head” screen.
10. Press RUN, to feed and tab at least two
pieces.
11. Check the new tab position on the second
piece. If you require adjustment repeat
from Step 4 above.
NOTE: The maximum amount of tab that can be wrapped onto the bottom side of the
media is ¾”. If you exceed this maximum, the tab will be damaged/torn or wrinkled.
T-650 Operations REV. 8/25/2010
94