Head 1 adjustment – side tabbing, Unlatch the exit roller assembly and swing it open, Lower the pressure roller release latch – Rena T-650 User Manual
Page 23
MECHANICAL SETUP
Head 1 Adjustment – Side Tabbing
This procedure will walk you through the process of adjusting Head 1 for Side Tabbing.
1. Adjust the tab applicator’s Peel Plate to the proper position for “side tabbing”.
IMPORTANT! The position of the Peel Plate is critical. Always check this when you
change Head 1 from Side Tabbing to Front Tabbing.
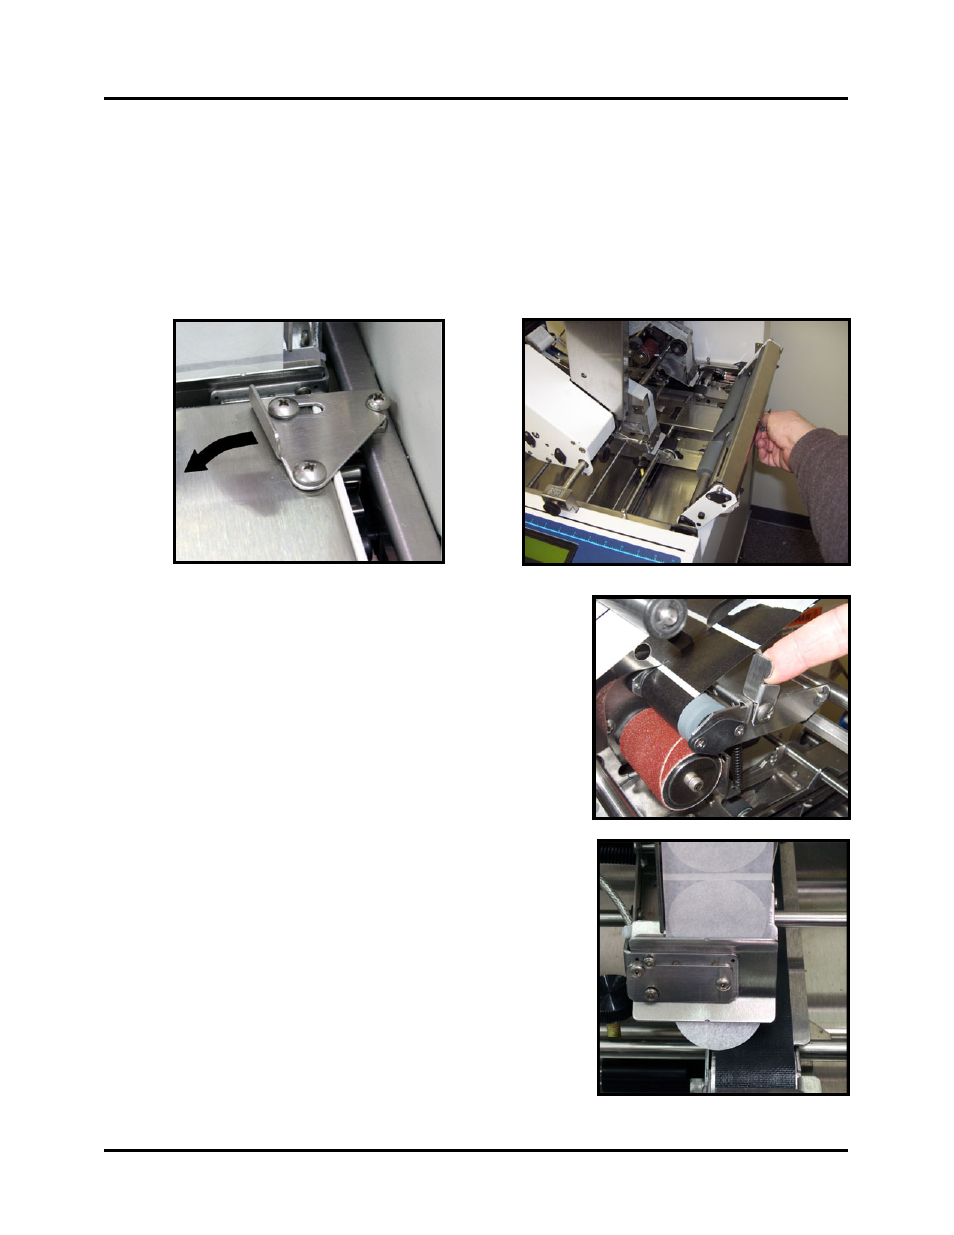
2. Unlatch the Exit Roller Assembly and swing it open.
3. Lift the tab drive Pressure Roller Release Latch on
Head 1, to release the pressure between the tab stock
and the Tab Drive Roller.
4. Pull on the backing untill a tab is starting to protrude
from the appllicator (peel point).
5. Lower the pressure roller release latch.
6. Loosen the Head Position Minder so it does not hinder
you from repositioning Head 1.
7. Loosen the Head 1 Securing Knob and slide Head 1
over the Right Media Guide Assembly as shown.
Center the tab on the outer edge of the guide, as
shown, and then tighten the securing knob.
NOTE: This image shows how the center point of the
tab should align with the exit end of the Right Media
Guide Assembly. Please note that the tab in this image
is protruding further than necessary. When initially
adjustint the tab starting point, the tab should just starts
to protrude from the applicator.
T-650 Operations REV. 8/25/2010
23