Install the gas filter assembly – Hypertherm Powermax125 Service Manua User Manual
Page 224
224
Powermax125 Service Manual 808070
9 – Power Supply Component Replacement
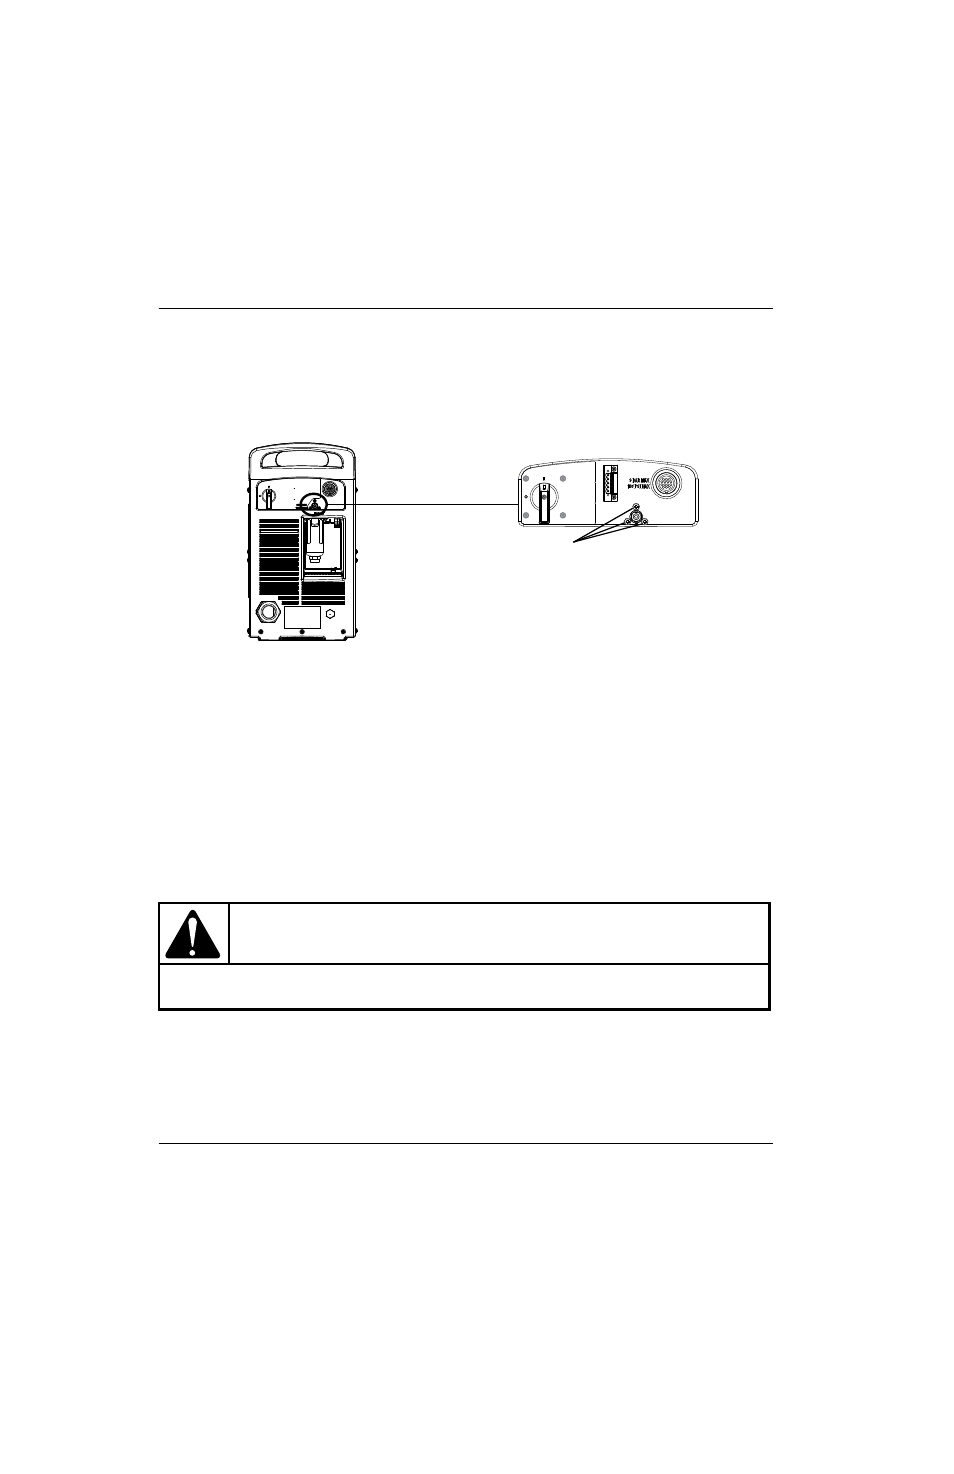
5. Remove the gas fitting from the rear panel.
6. Remove the 3 mounting screws around the gas fitting on the rear panel.
Figure 83
7. Remove the gas filter assembly from the power supply.
Install the gas filter assembly
1. Remove the filter bowl, retaining nut, and filter element from the new gas filter assembly. (See Figure 32 on
2. Position the new gas filter assembly in the power supply.
3. Tighten the 3 mounting screws in the rear panel to 23 kg-cm (20 inch-pounds).
4. Lightly apply thread sealant to the gas fitting threads, and tighten the gas fitting into the bracket on the rear panel.
If applied too heavily, excess amounts of thread sealant can contaminate the gas line.
5. Align the end of the gas tube with the push-to-connect fitting, and gently push the rear panel toward the power
supply until the gas tube is fully seated.
6. Secure the ground wires to the gas filter housing by tightening the ground wire screws to 11.5 kg-cm
(10 inch-pounds).
CAUTION!
Never use PTFE tape on any joint preparation. Use only a liquid or paste thread sealant on male
threads.
Mounting screws