Replacing the solenoid valve, Remove the solenoid valve – Hypertherm Powermax125 Service Manua User Manual
Page 225
Powermax125 Service Manual 808070
225
9 – Power Supply Component Replacement
7. Connect the wire terminals to the top of the pressure switch (blue wire closest to the center panel).
8. Install the filter element, retaining nut, and filter bowl. See Install the gas filter element on page 167.
9. Complete the following procedures:
a. See Install the end panel bracket on page 175.
b. See Install the power supply cover on page 172.
c. Reconnect the power and gas supply.
Replacing the solenoid valve
Remove the solenoid valve
1. Complete the following procedures:
a. See Disconnect the power and gas supply on page 166.
b. See Remove the power supply cover on page 172.
c. See Remove the end panel bracket on page 174.
d. See Remove the fan shroud on page 216.
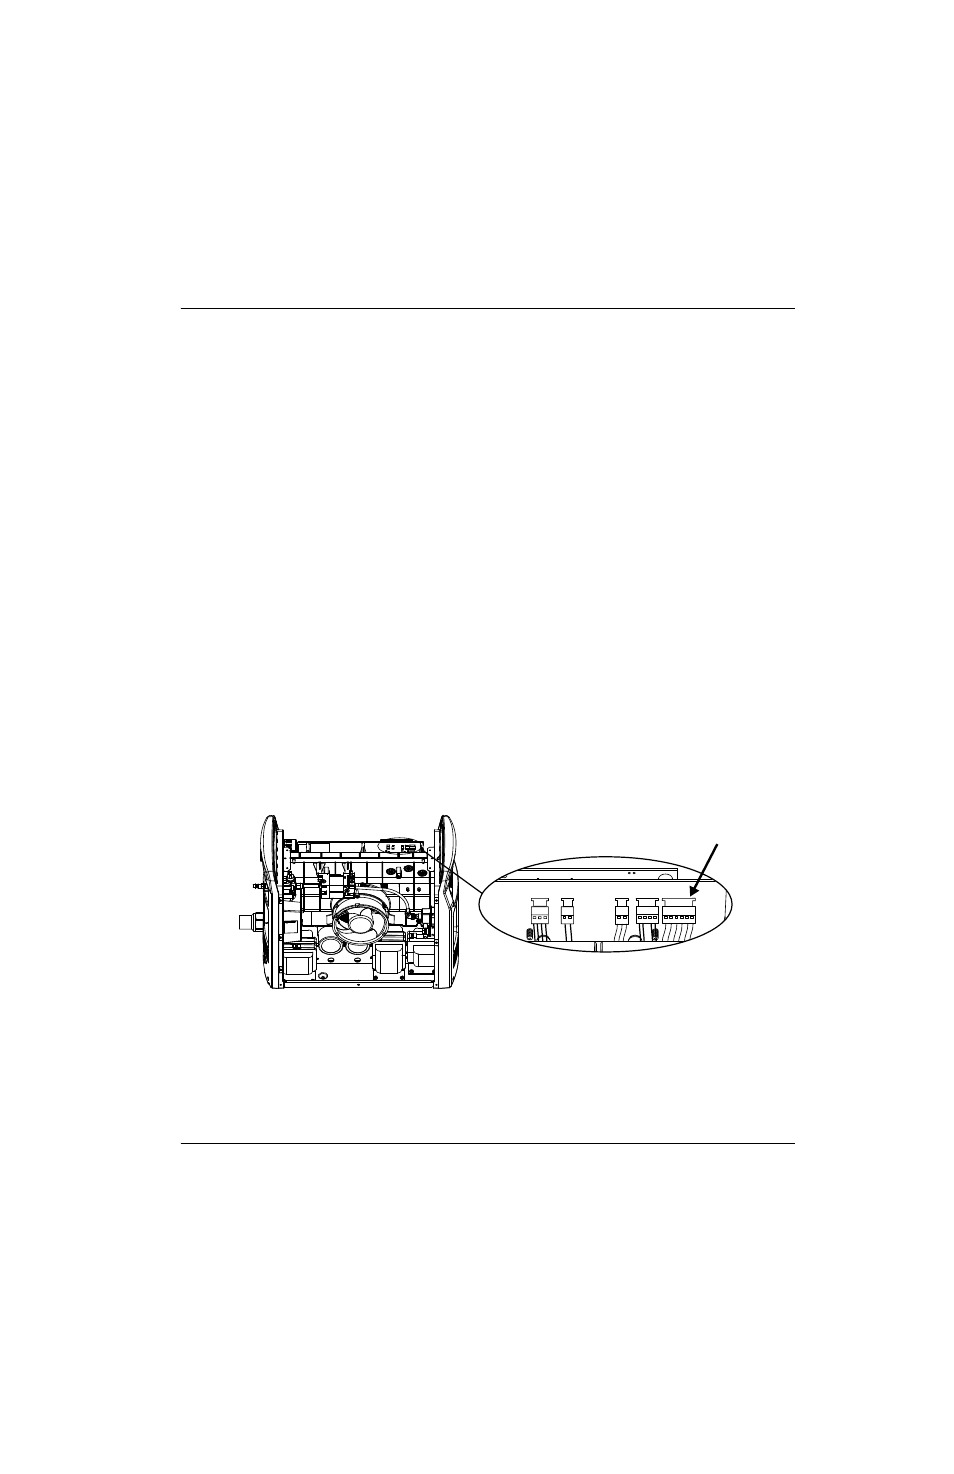
2. Unplug the J6 connector from the back side of the power board.
Figure 84
3. Pull the solenoid valve power wires and connector through the left grommet from the fan side of the power supply.
4. Push in the plastic ring on the pressure transducer fitting while pulling the pressure transducer out of the solenoid
valve.
Kit number
Description
Kit: Powermax105/125 regulator/solenoid valve
J1
J2
J3
J5
J6
J1
J2
J3
J5
J6