Unrestrained functional test procedure, Pickup verification, Harmonic restraint functional test procedure – Basler Electric BE1-11t User Manual
Page 422
410
9424200995 Rev H
Unrestrained Functional Test Procedure
Pickup Verification
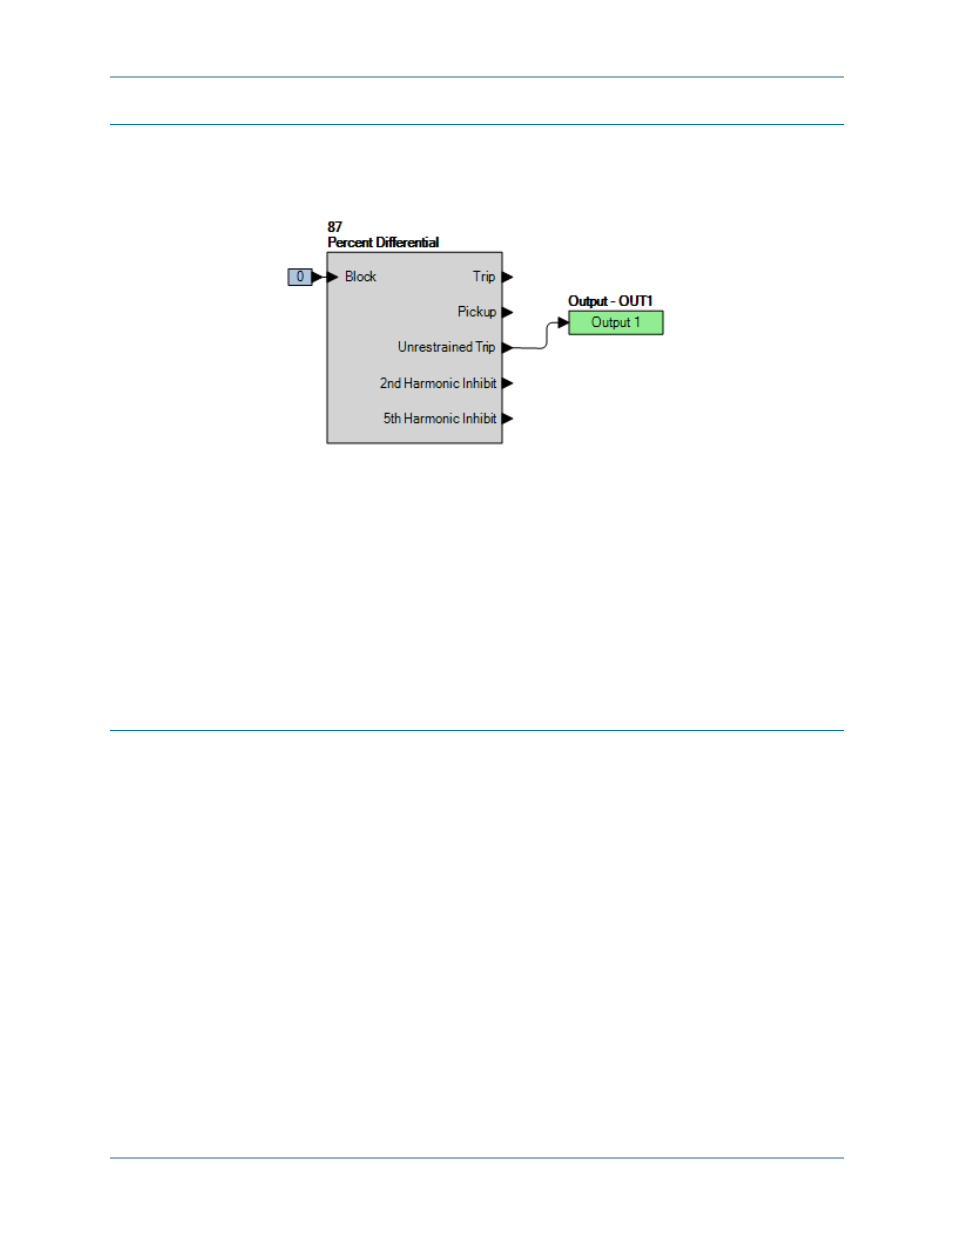
Step 1: Use BESTCOMSPlus to verify the operational settings in Table 194 and logic in Figure 266.
Reset all targets.
Figure 266. BESTlogicPlus Settings (87U)
Step 2: Prepare to monitor the unrestrained 87 element. Operation can be verified by monitoring OUT1
Step 3: Connect a single-phase current source to terminals D1 (A-phase polarity) and D2 (A-phase non-
polarity).
Step 4: Slowly increase the current magnitude until OUT1 closes and record the pickup. This should
occur at 4.0 A
±0.08 A. Verify that there is an 87 Unrestrained A target on the HMI screen.
Step 5: (Optional.) Repeat steps 1 through 4 for B-phase (terminals D3 and D4) and C-phase (terminals
D5 and D6).
Step 6: (Optional.) Repeat steps 1 through 5 for settings group 1, 2, and 3.
Harmonic Restraint Functional Test Procedure
Second Harmonic Restraint Verification (Independent)
Step 1: Use BESTCOMSPlus to send the operational settings in Table 193 and verify the logic in Figure
265. Reset all targets.
Step 2: Connect in parallel an A-phase current source of 50 or 60-hertz and a second A-phase current
source of twice the applied fundamental (100 or 120-hertz) to terminals D1 (A-phase polarity)
and D2 (A-phase non-polarity).
Step3:
Apply 2 amps at 0
° of the 50 or 60-hertz source. OUT2 should close immediately and OUT1
after the programmed time delay of 100 ms. Verify that there is an 87A target on the front-panel
display screen.
Step 4: Increase the second harmonic current source until OUT1 opens and record the magnitude of
the second harmonic source.
Step 5: To calculate the second-harmonic Restraint percentage, divide the second-harmonic current
measured in step 4 by the current applied in step 3. (Divide the harmonic current by the
fundamental current.). This should be 12% or 0.24 A
±0.05 A.
Step 6: (Optional.) Repeat steps 1 through 5 for the B-phase (terminals D3 and D4) and C-phase
(terminals D5 and D6) current inputs.
Step 7: (Optional.) Repeat steps 1 through 6 for settings group 1, 2, and 3.
Phase Current Differential (87) Test
BE1-11t