Simple capture example – Teac GigaStudio 3 User Manual
Page 139
138
139
Be sure to click the “Apply” or “OK” to verify the changes you have made. Any System
Settings affecting the audio hardware will require that you shut down the GigaStudio
and then open it again for the changes to take effect. It is not necessary to restart the
computer.
Simple Capture Example
Load an instrument of your choice on MIDI port 1, channel 1, with the default routing
assignment to the DSP Station Input channels 1:2. The default routing of its outputs will
be routed to the DSP Station Output Master channels 1:2. Switch to the Output Masters
view and click the REC button on output H 1:2 (the wide view of this track will actually
list the name of your GSIF hardware interface as well).
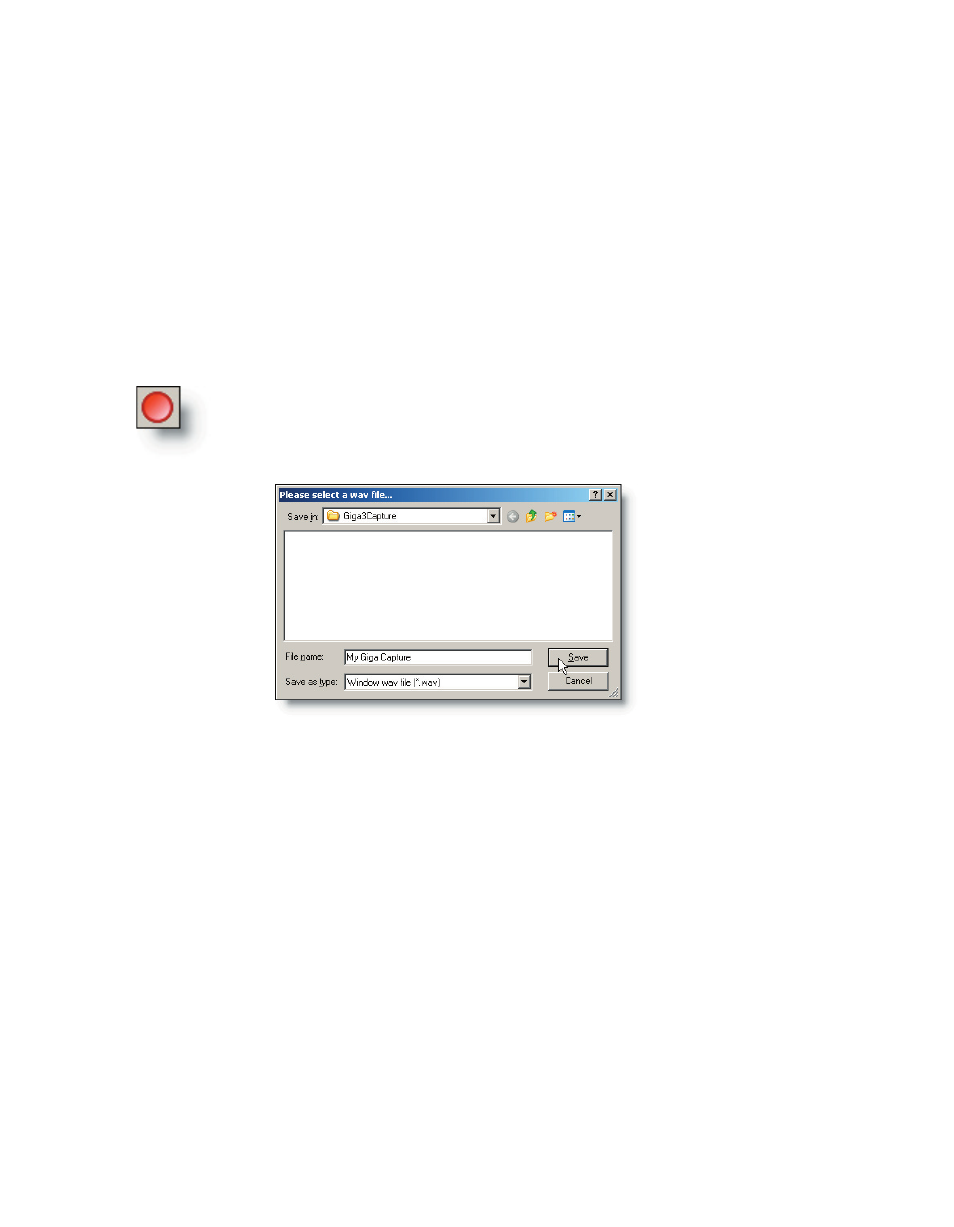
Browse to a drive and folder location, type in a name for the track(s) and when you
are ready to record, click the Save button.
Note, if you are recording a demanding performance, with high polyphony or FX pro-
cessing, it is highly recommended that you choose to capture these audio recordings to
a separate physical hard drive than the hard drive streaming the samples for the perfor-
mance.
At this point recording begins and you will be able to visually monitor the status of
the capture on the audio capture status display.
With the track armed and ready to record, click the Capture Tool icon on
the tool bar. You will then be presented with a save dialog where you can
give your captured track a name and a location where it will be saved.