Tutorial 6-3: photo stitch 1 – Baby Lock Palette 10 (ECS10) Instruction Manual User Manual
Page 140
139
Tutorial 6-3: Photo Stitch 1
Tutorial 6-3: Photo Stitch 1
By using the Photo Stitch 1 function, embroidery patterns can be created from photos. This type of embroidery
pattern created from a photo has detailed and overlapping stitching.
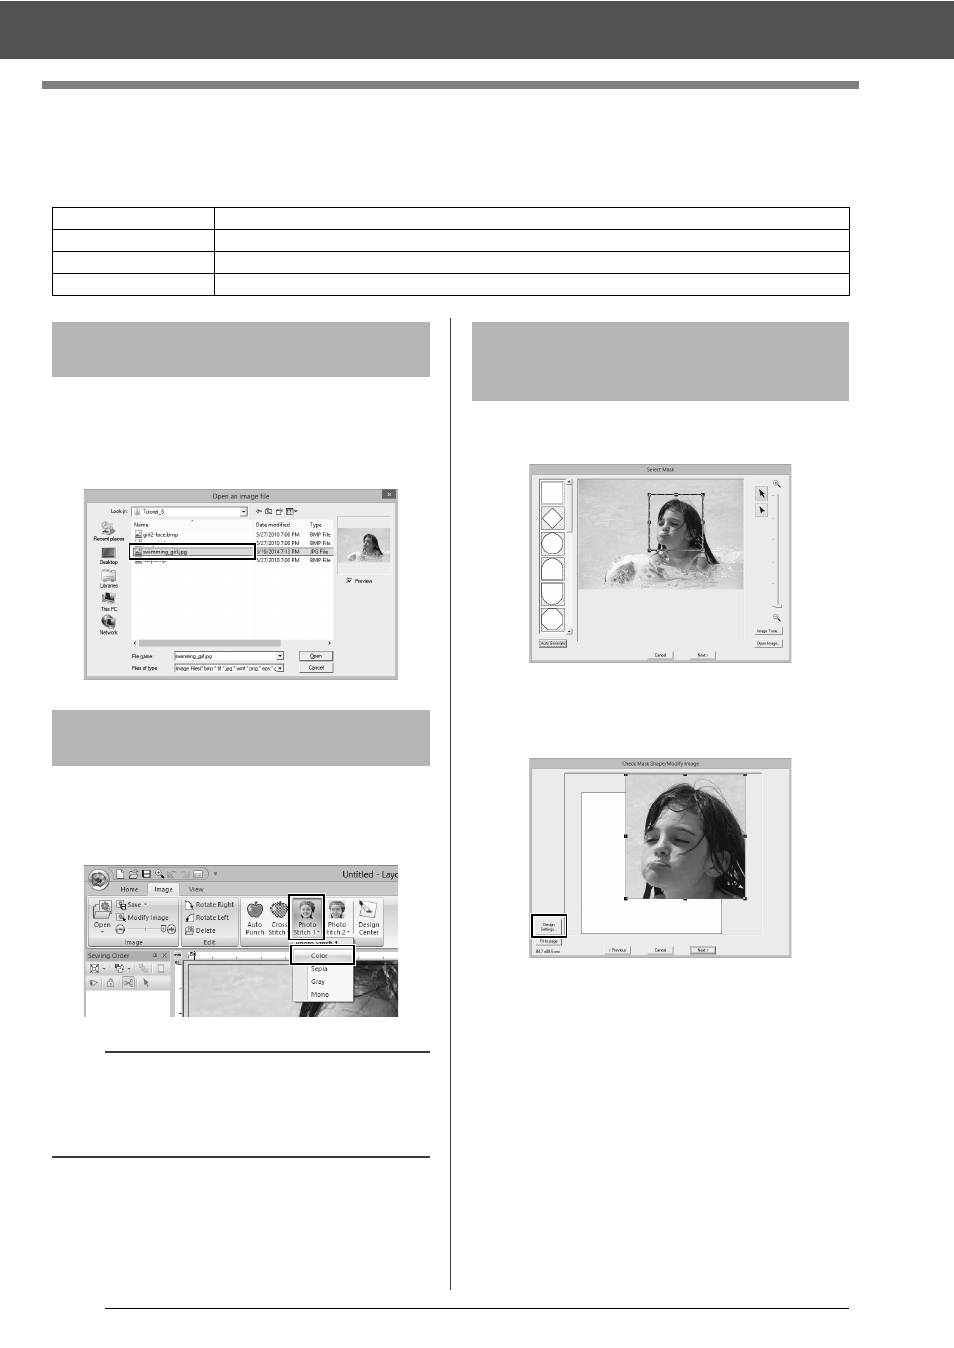
Select the [Tutorial_6] folder, and then select
[swimming_girl.jpg] as the image.
cc
"Importing image data into Layout &
Editing" on page 132
1
Click the [Image] tab.
2
Click [Photo Stitch 1] in the [Stitch Wizard]
group, and then click [Color].
1
Drag the handles to adjust the shape of the
mask. Drag the mask to adjust its position.
2
Then click Next.
3
Click [Design Settings].
Step 1
Importing photo data into Layout & Editing
Step 2
Starting the Photo Stitch 1 wizard
Step 3
Applying an image mask and adjusting its size and position
Step 4
Selecting appropriate thread colors and creating an embroidery pattern
Step 1
Importing photo data into
Layout & Editing
Step 2
Starting the Photo Stitch 1
wizard
b
With [Photo Stitch 1], an embroidery pattern can
be created in color (Color), sepia (Sepia),
grayscale (Gray) or one color (Mono). For this
example, select [Color].
Step 3
Applying an image mask
and adjusting its size and
position