Step 3 specifying hole sewing – Baby Lock Palette 10 (ECS10) Instruction Manual User Manual
Page 27
26
Tutorial 1: Drawing shapes to create an embroidery design
B
asic
L
ayo
u
t & E
d
it
in
g
Op
e
rat
io
n
s
2
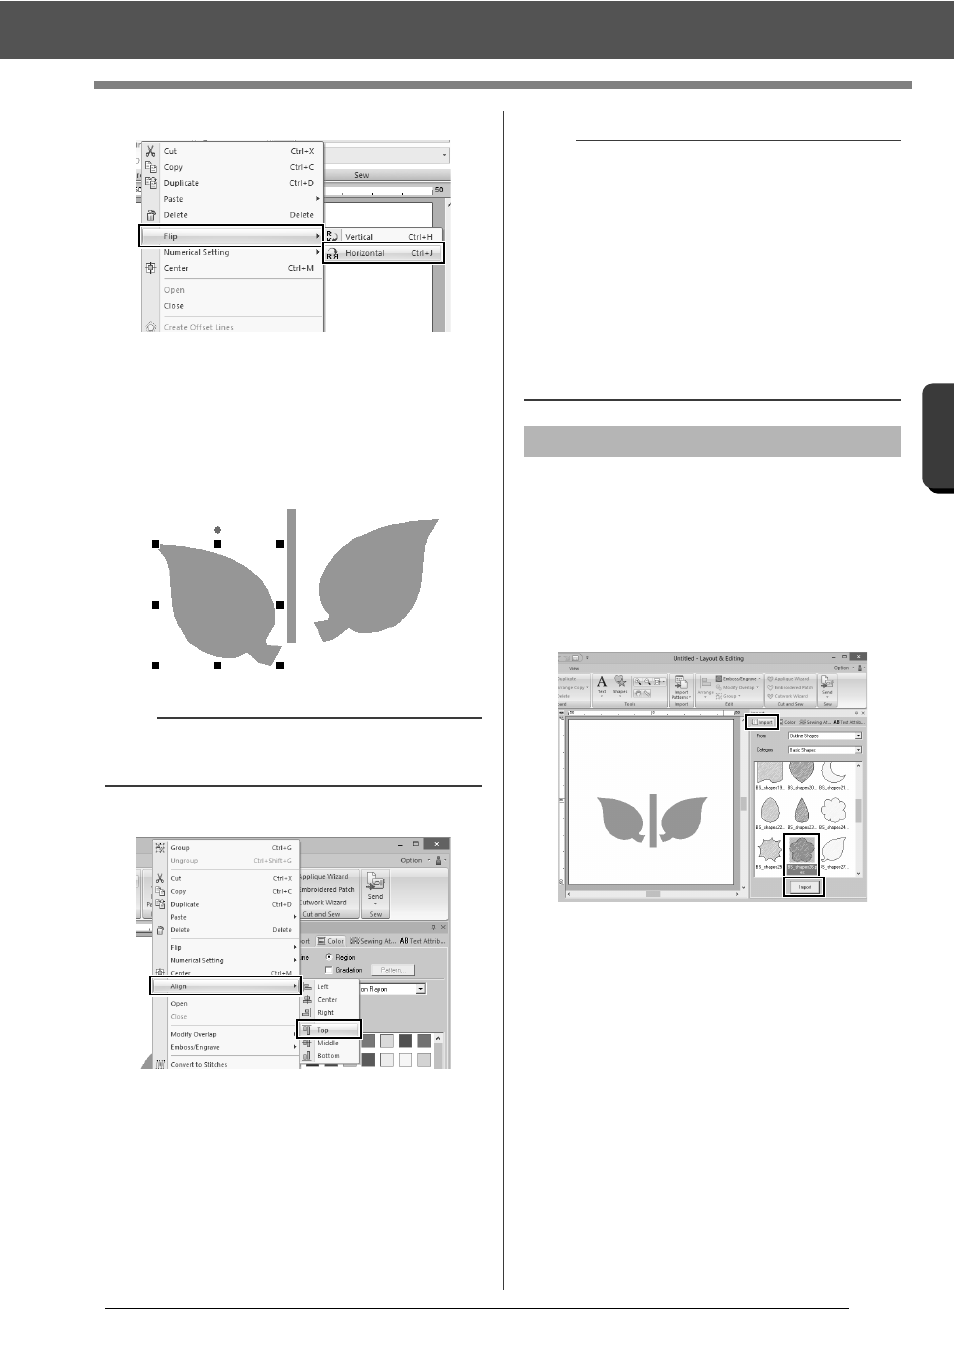
To flip the duplicated leaf horizontally.
(A) Right-click on the duplicated leaf.
A drop down menu will appear.
(B) Click [Flip], then [Horizontal].
3
Drag the duplicated leaf to the left side of the
stem.
4
Align the leaves on the left and right sides.
(A) While holding down the <Ctrl> key, click
the leaf on the right side, then the leaf on
the left side to select the two leaves.
Then, right-click the selected leaves.
(B) Right-click the leaves, and then click
[Align], then [Top].
Now, we will create the flower and a circle at the
center. Then, we will apply a setting so that the
overlapping areas are not sewn twice.
1
Create the flower petals.
(A) Click the [Import] tab.
(B) Select [BS_shapes26.pes], and then
click [Import].
(C) Click the [Shapes] tab.
b
To move an object horizontally, hold down the
<Shift> key while dragging the object.
b
• Multiple embroidery patterns can be selected in
any of the following ways.
Click the first pattern, and then, while holding
down the <Ctrl> key, click the next pattern.
Drag the pointer to draw a selection frame
around the patterns to be selected.
• Flipped copies can also be created by clicking
[Arrange Copy] in the [Clipboard] group of the
[Home] tab, then clicking [Vertical Mirror
Copy].
cc
"Using the Mirror Copy tool" on page 35.
Step 3
Specifying hole sewing