Step 2 creating the design, Ab c, Ab c 4 3 2 1 – Baby Lock Palette 10 (ECS10) Instruction Manual User Manual
Page 185
184
O
p
er
at
io
n
s f
o
r S
p
eci
fic Ap
p
lic
at
io
n
s
Tutorial 9-2: Creating Design for Multi-Position Hoops
1
The Design Page appears on the screen as
shown below.
2
Create the design, making sure that it meets
the following conditions.
• The size of one pattern must be no larger
than 100 × 100 mm (or 130 × 180 mm).
• Each pattern must completely fit within a
single area (a, b, or c).
b
• Settings for multi-position hoops are indicated
by " ".
• Choose the appropriate setting after checking
the size of the hoop available for your machine.
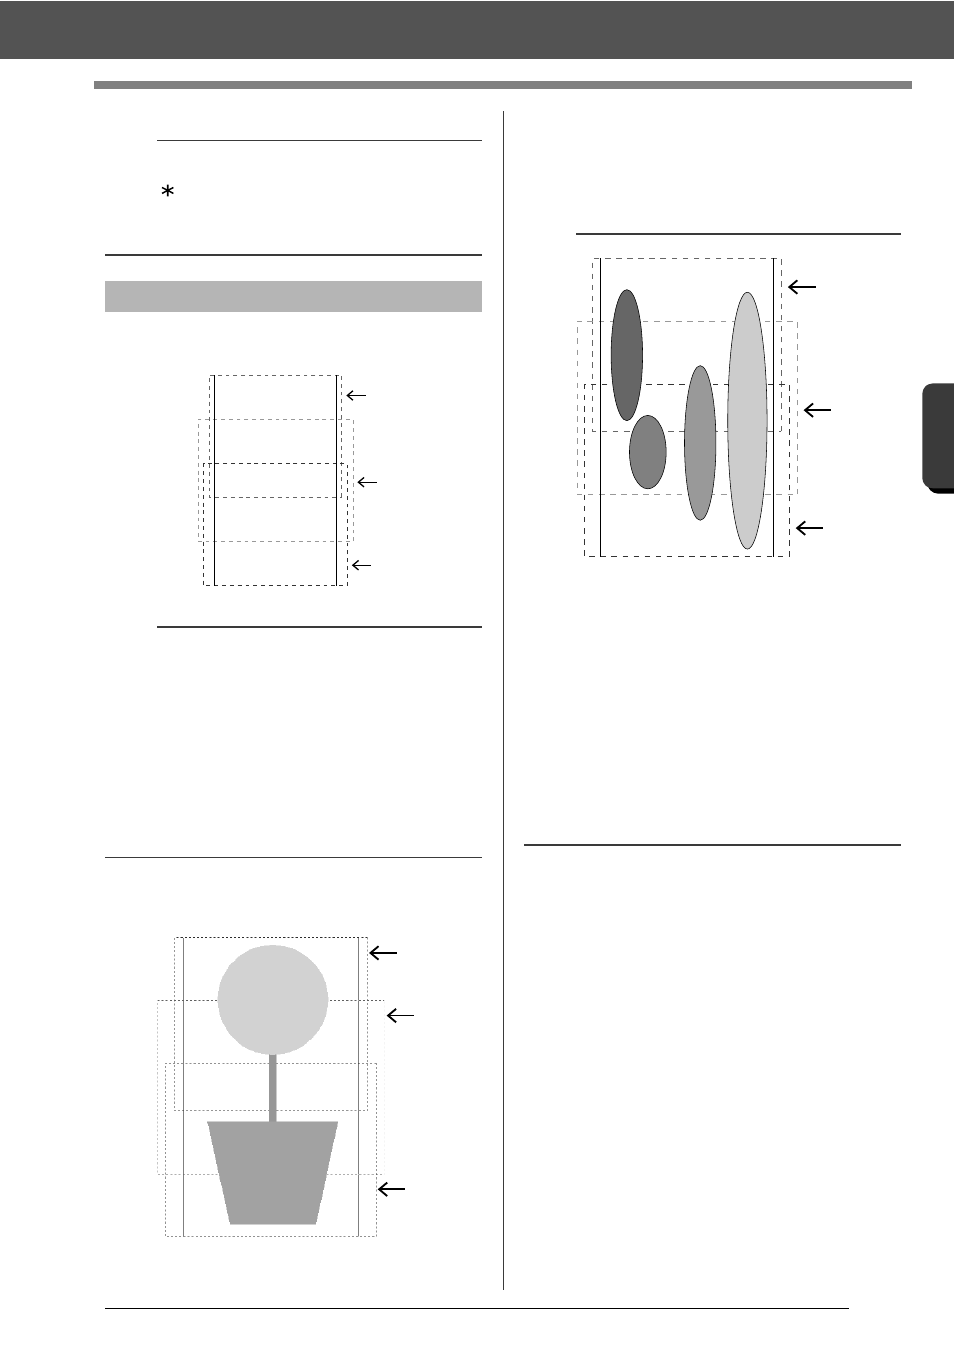
Step 2
Creating the design
b
• Area a
Embroidering area when the multi-position hoop
is installed at the top installation position.
• Area b
Embroidering area when the multi-position hoop
is installed at the middle installation position.
• Area c
Embroidering area when the multi-position hoop
is installed at the bottom installation position.
The dotted lines separate each area.
a
b
c
a
b
c
b
1: The position of this pattern is correct since it fits
completely within area a.
2: The position of this pattern is correct since it fits
completely within either area b or area c.
3: The size of this pattern is acceptable, but its
position must be corrected since it does not fit
completely within any of the areas.
(It will be necessary to correct the position in
order to fit in either b or c.)
4: This pattern must be corrected since it is too
large.
(It will be necessary to correct the position and
size in order to fit in either a, b, or c.)
a
b
c
4
3
2
1