Applying and editing stamps, Applying a stamp 1 – Baby Lock Palette 10 (ECS10) Instruction Manual User Manual
Page 59
58
Specifying Thread Colors and Sew Types for Lines and Regions
B
asic
L
ayo
u
t & E
d
it
in
g
Op
e
rat
io
n
s
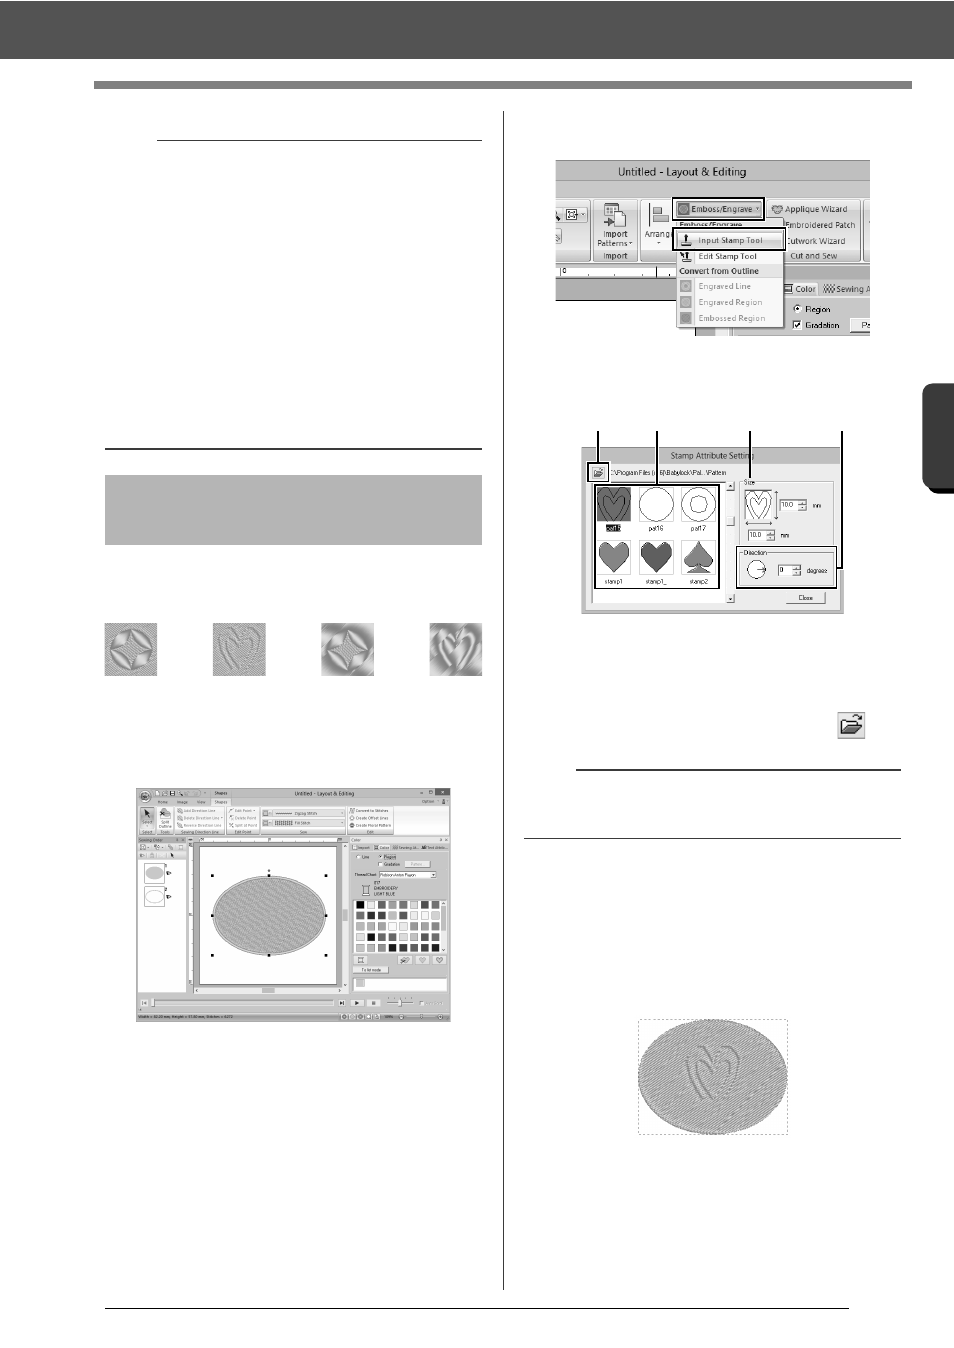
You can create engraved/embossed effects by
stamping stamp patterns into a shape. This appears
as stitching sewn in different directions.
■
Applying a stamp
1
Draw a shape.
2
Click the [Home] tab.
3
Click [Emboss/Engrave] in the [Edit] group,
and then click [Input Stamp Tool].
4
Select a stamp pattern (.pas file with stamp
settings applied).
a
Select a stamp pattern.
b
Specify the size of the stamp pattern.
c
Specify the direction of the stamp pattern.
d
To select a different folder, click
.
5
Click the shape pattern drawn in step 1 to
select it.
"Marching lines" appear around the
selected shape pattern.
6
Click the desired locations within the shape
pattern.
You can preview the effect of the created
stamp in Realistic View.
a
• These commands can only be used with shape
pattern.
• The bottom shape pattern must have one of the
following sew types specified for region sewing.
Satin stitch
Fill stitch
Programmable fill stitch
• In order to use the [Engraved Line] command,
[Line sew type] for the shape pattern must be
set to any setting other than [Not Sewn (Line)].
In order to use the [Engraved Region] or
[Embossed Region] commands, [Region sew
type] for the shape pattern must be set to any
setting other than [Not Sewn (Region)].
Applying and editing
stamps
b
Engraving and embossing stamp settings appear
as red- and blue-filled areas.
a
b
c
d