Using manual punch tool 3 – Baby Lock Palette 10 (ECS10) Instruction Manual User Manual
Page 199
198
O
p
er
at
io
n
s f
o
r S
p
eci
fic Ap
p
lic
at
io
n
s
Using Manual Punch Tool
3
Click points 1 through 4, in order.
4
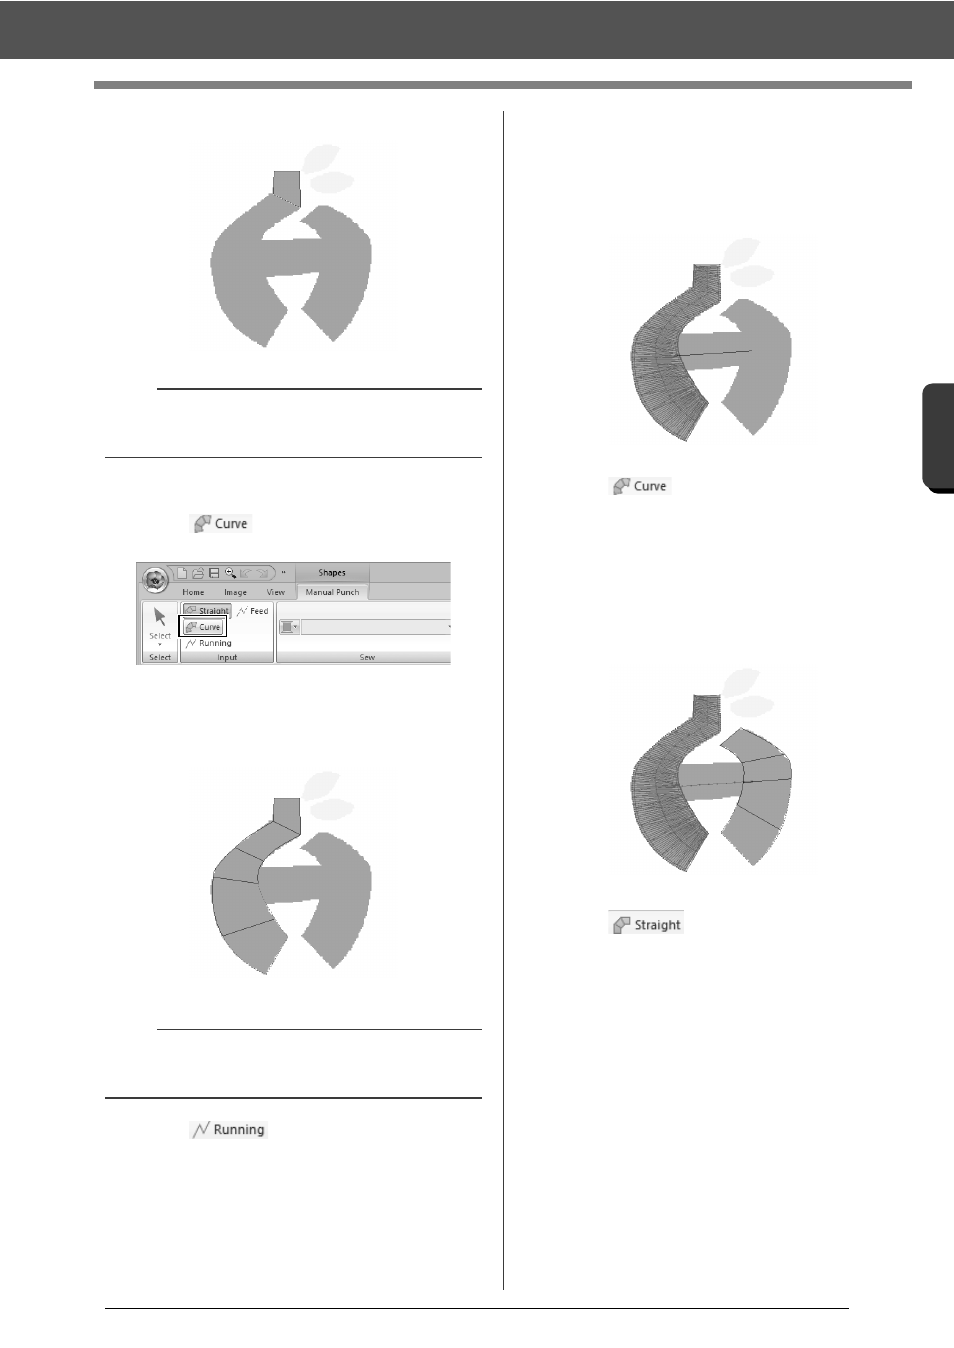
Select the Curve tool.
Click
in the [Input] group of the
[Manual Punch] tab.
5
Click points 5 through 11, in order.
Click point 12 (last point of the pattern part),
and then press the <Enter> key.
6
Click
in the [Input] group of the
[Manual Punch] tab.
7
Click point 13, then point 14 (last point of
running stitching connecting the parts), and
then press the <Enter> key.
Specify the point so that it overlaps/connects
the part created in step
5
.
8
Click
in the [Input] group of the
[Manual Punch] tab.
9
Click points 15 through 23, in order.
Click point 24 (last point of the pattern part),
and then press the <Enter> key.
Specify the point so that it overlaps/connects
the part created in step
7
.
10
Click
in the [Input] group of the
[Manual Punch] tab.
b
To remove an entered point, right-click it or press
the <BackSpace> key.
b
Instead of pressing the <Enter> key, the pattern
part can be completed by double-clicking.
1
2
3
4
6
5
10
7
8
9
11
12
13
14
16
15
19
17
18
23
21
22
24
20