Overlay – NewTek TriCaster 855 User Manual
Page 218
Page | 202
Drag up/down to rotate the source about the X (horizontal) axis.
Hold down Alt on the keyboard while dragging to rotate about the Z axis.
Drag on a single numeric slider below, or hold down Ctrl while dragging to constrain
rotation to one axis.
Dragging the mouse on the Size button (magnifying glass) affects the scale of the overlay. When
the nearby lock button is enabled, dragging in any direction affects size equally on both axes.
Otherwise, dragging vertically changes the height of the overlay, and dragging horizontally
affects its width.
Again, if you drag just one of the numeric gadgets below the Size button (with lock disabled), you
modify just one dimension of the overlay stream – width or height. Position and Size can be
reset by clicking Reset Positioning, and can be toggled on or off by clicking the Position button
located to the left of the Configure button (gear). You will likely have realized by now that simply
using the Virtual Input controls considered so far, you could scale a live video source down, and
position it above another source to create a picture-in-picture effect – or even two live insets
(with a black background).
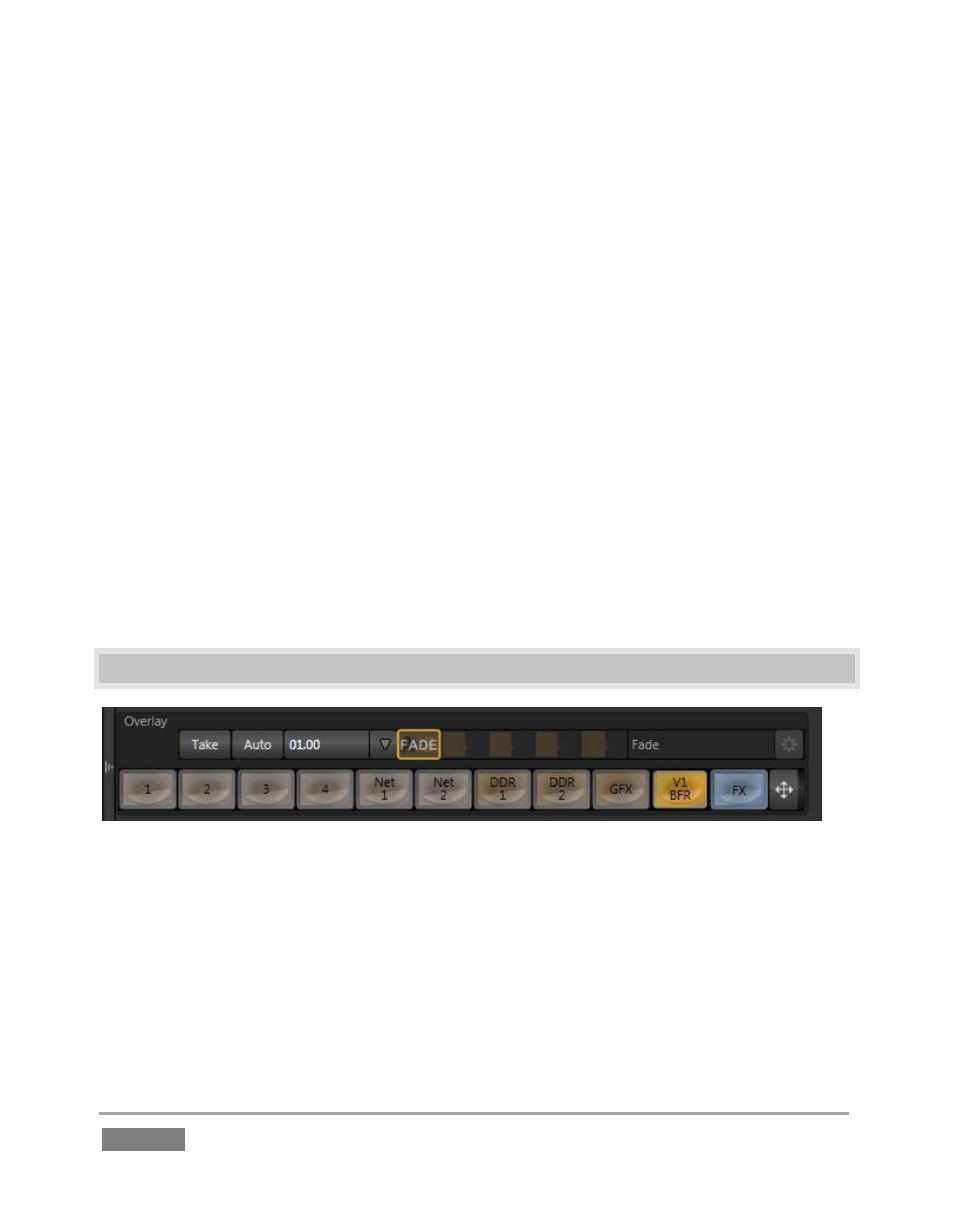
12.3 OVERLAY
Figure 194
Another switcher-style source selector is situated right above the Input A row in Virtual Input
tabs. It is labeled Overlay. Just above that at right, you will also see local transition controls that
are quite similar to those found in the Switcher’s Transition pane.
Really, the Virtual Input Overlay feature matches the DSK channels found in the Switcher’s main
Transition section in almost all respects. Unlike the DSKs, though, its inclusion in Virtual Input
tabs make it a ‘pre-Switcher’ sub-layer (along with Input A and B).