Pointmaker CPN-5000 User Manual
Page 146
Page 140 -
Pointmaker CPN-5000 Color Video Marker
Boeckeler Instruments, Inc.
Quick Reference for Devices Appendix
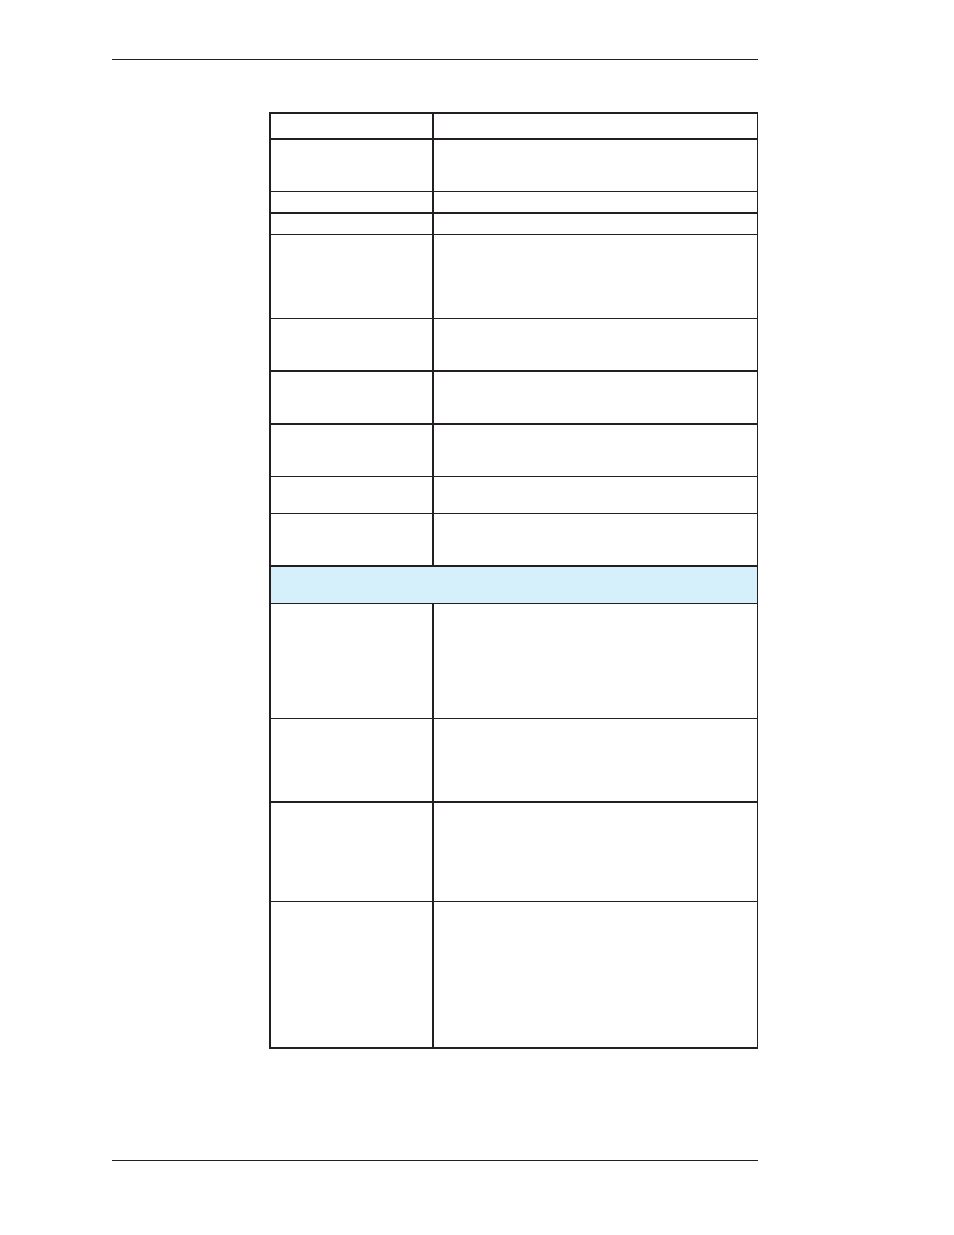
C
oMMand
o
peration
Control
Click Tip Button on Control icon to take control when multiple
tablets (or touch screens) are installed and you have activated
Selective or Priority User mode in the menu system.
Draw
Press Tip Button anywhere on Tracking Area of tablet and drag.
Line Thickness, Change
Click pen tip on icon displaying desired line thickness.
Pen Proximity
(Broadcaster Template only) Click pen tip on Pen Proxim ity icon
to turn this feature on or off. When activated, the active pointer
disappears as the pen tip is pulled away from the screen. The
pointer reappears when the pen tip is brought close again to the
screen.
Point
Lightly drag Tip Button across Tracking Area to position pointer.
To keep pointer positionable, do not click or press any stylus
button.
Pointer Selection
Broadcast Template: Click the pen tip on the pointer you desire.
Presenter Template: Click the pen tip on pointer icon. A panel of
pointers will appear for you to select from.
Undo/Erase Marker
Click pen tip on Undo icon. If Erase Mode is activated in the
menu system, this command activates Erase Mode instead of
undoing a marker.
Video Mode, Change
Click pen tip on icon displaying desired video format, for
example, Composite or Y/C.
Menu System, Access
(Operational only when keyboard not installed.)
Press Barrel
Button, then Tip Button, pressing both together for about 5
seconds.
Image Functions:
Commands to utilize marked video images. The barrel button must be depressed
as the button is selected.
Save
This button saves a copy of whatever image is displayed on your
monitor, to a USB memory device, at the moment the button is
selected. A counter will appear in the bottom right corner of the
screen, indicating the percentage of the image currently saved.
You must wait until the counter disappears before starting a new
save. The naming and location settings for saving images are
found in the menu system
.
This button prints a copy of whatever image is displayed on your
monitor at the moment the button is selected. A counter will
appear in the bottom right corner of the screen, indicating the
percentage of the image currently sent to the printer. You must
wait until the counter disap pears before starting a new print.
Send
This button sends a copy of whatever image is displayed on your
monitor, to a specified network location, at the moment the
button is selected. A counter will appear in the bottom right
corner of the screen, indicating the percent age of the image
currently sent to the location. You must wait until the counter
disappears before starting a new send.
Get
This button allows you to retrieve an image that has been saved on
your USB memory device. When it is selected, a menu dialog will
appear, allowing you to specify which image you desire. The
image will then be displayed on your monitor. A counter will
appear in the bottom right corner of the screen, indicating the
percentage of the image currently being retrieved. Then the image
will be displayed. You can return to a desired video input by
selecting the appropriate button. You must wait until the counter
disappears before starting a new “get” command.