Editing labels – Leprecon LP-X24 Manual v3.2 User Manual
Page 137
Creating Moving Light Labels
Chapter Six
133
LP-X24 and LP-X48 Users Manual
NoDws
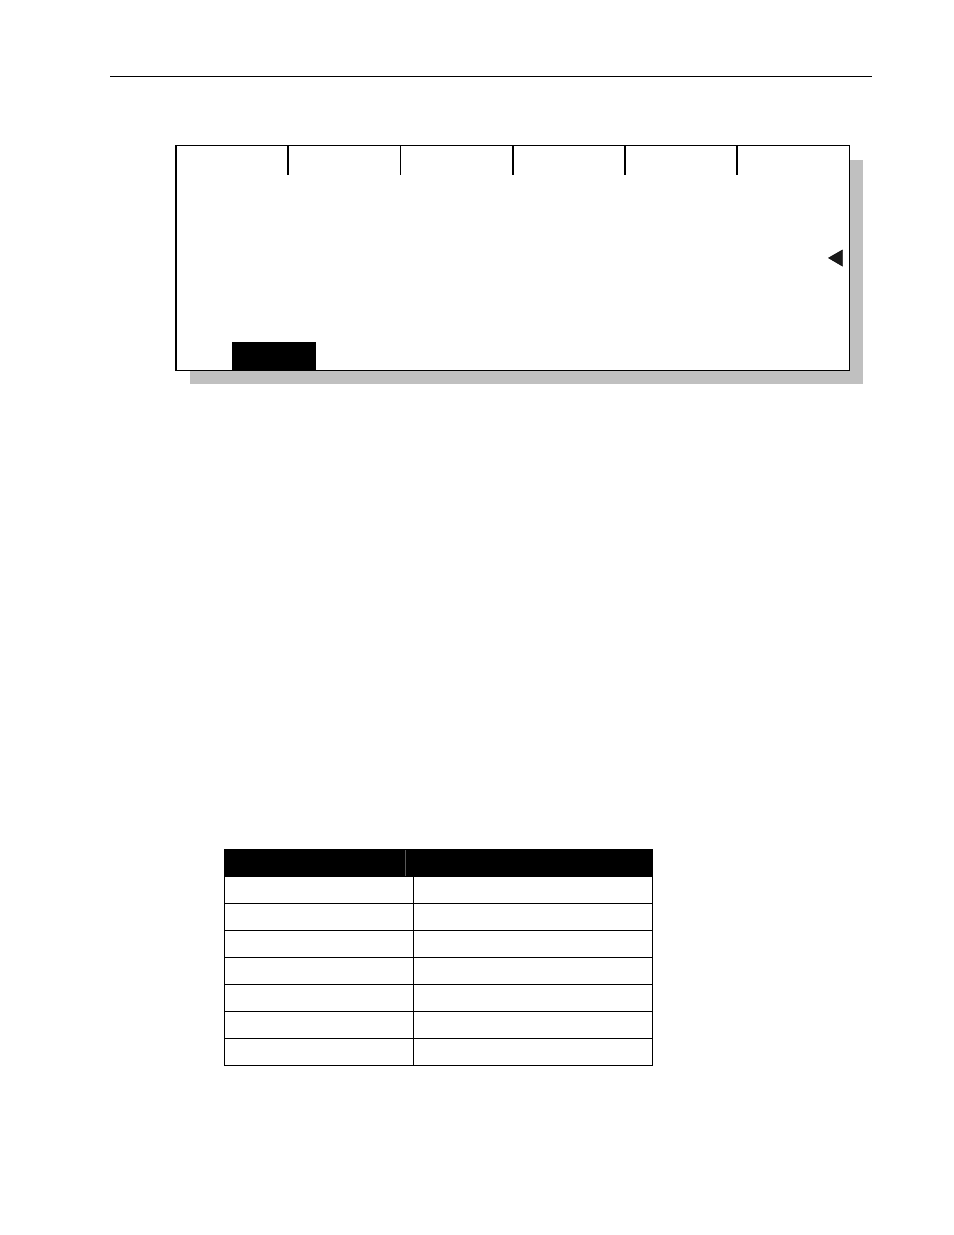
MY NEW LABEL: Studio Color 250
SaveAs
Save
Color mix Cyan
0
Color mix Magen
0
Color mix Yell
40
9. Use the left, center and right wheels to set the desired values.
You may turn the wheels to the desired values. You may also press a wheel, enter
the desired value on the numeric keypad and then press the Enter key.
Values typically range from 0 to 255.
To
select
No Change, enter a value outside the device's range
256 or greater. See
"No Change" beginning on page 85 for complete details about this option.
10. When you are done, press the Save softkey.
11. Press No/Esc twice to return to the ML Programmer.
Editing Labels
After you have created labels, you can easily make changes to their attribute values,
rename or delete them. You can also make changes to factory preset labels, if desired.
An important point is that all the looks that use the labels that you edit are automatically
updated to the new values.
To Modify a Label
1. Put the LP-X into the following modes for moving light recording:
Button/Fader
Setting
Modes Record and Scene
Display ML
Filter ML
Bump
Any setting
Master Fader
Up (typically full on)
Manual Fader
Any setting
Programmer Fader
Up
The LP-X displays the Moving Light Programmer.