Trim in the preview window, Preview a clip in the preview window – Adobe Premiere Elements 8 User Manual
Page 128
123
USING ADOBE PREMIERE ELEMENTS 8 EDITOR
Editing clips
Last updated 8/12/2010
6 If the audio and video get out of sync in step 4 (a red number appears next to the clip name in the track), right-click
the number on the audio clip (not the video clip), and choose Move Into Sync.
Trim in the Preview window
You can preview any clip and set new In and Out points for it before adding it to the Timeline or Sceneline. You might,
for example, preview your clips to determine their quality and trim unusable parts before arranging them. You can
preview and trim clips in the Preview window.
Trimming a clip in the Preview window sets its In and Out points for all subsequent instances placed in the Timeline
or Sceneline. It does not change the In and Out points of clip instances that are already in the Timeline or Sceneline.
If you want all instances of the clip to use the same In and Out points, set them before placing the clip in the Timeline
or Sceneline.
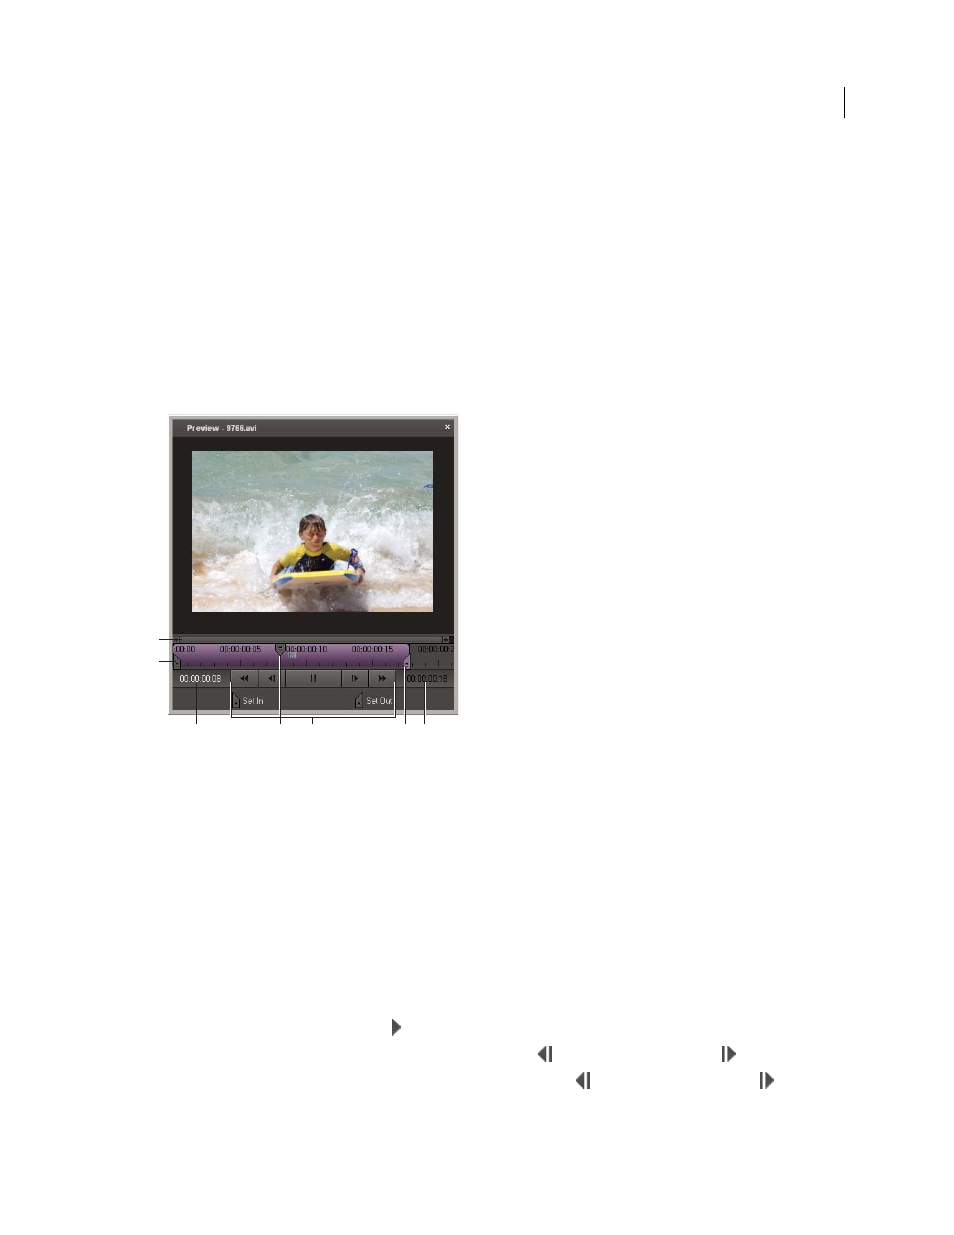
Preview window
A. Zoom control B. Clip In point C. Current time D. Current-time indicator E. Playback controls F. Clip Out point G. Clip duration
More Help topics
Preview a movie in the Monitor panel
Preview a clip in the Preview window
1 In the Tasks panel, click Organize, and then click Project to open Project view.
2 Double-click a clip in Project view and do any of the following in the Preview window:
•
To play the clip, click the Play button
.
•
To step back or forward one frame, click the Step Back button
or the Step Forward button
.
•
To step back or forward five frames, Shift-click the Step Back button
or the Step Forward button
.
A
B
C
D
F
G
E