Delete a picture-in-picture overlay, Arranging clips in the timeline, Timeline overview – Adobe Premiere Elements 8 User Manual
Page 95
90
USING ADOBE PREMIERE ELEMENTS 8 EDITOR
Arranging clips in a movie
Last updated 8/12/2010
Delete a picture-in-picture overlay
1 Make sure that the Sceneline is active.
2 Select the superimposed clip in the Monitor panel.
3 Right-click the lavender clip representation in the mini timeline of the Monitor panel.
4 Select Delete.
The superimposed clip disappears from the Sceneline and the Monitor panel.
Arranging clips in the Timeline
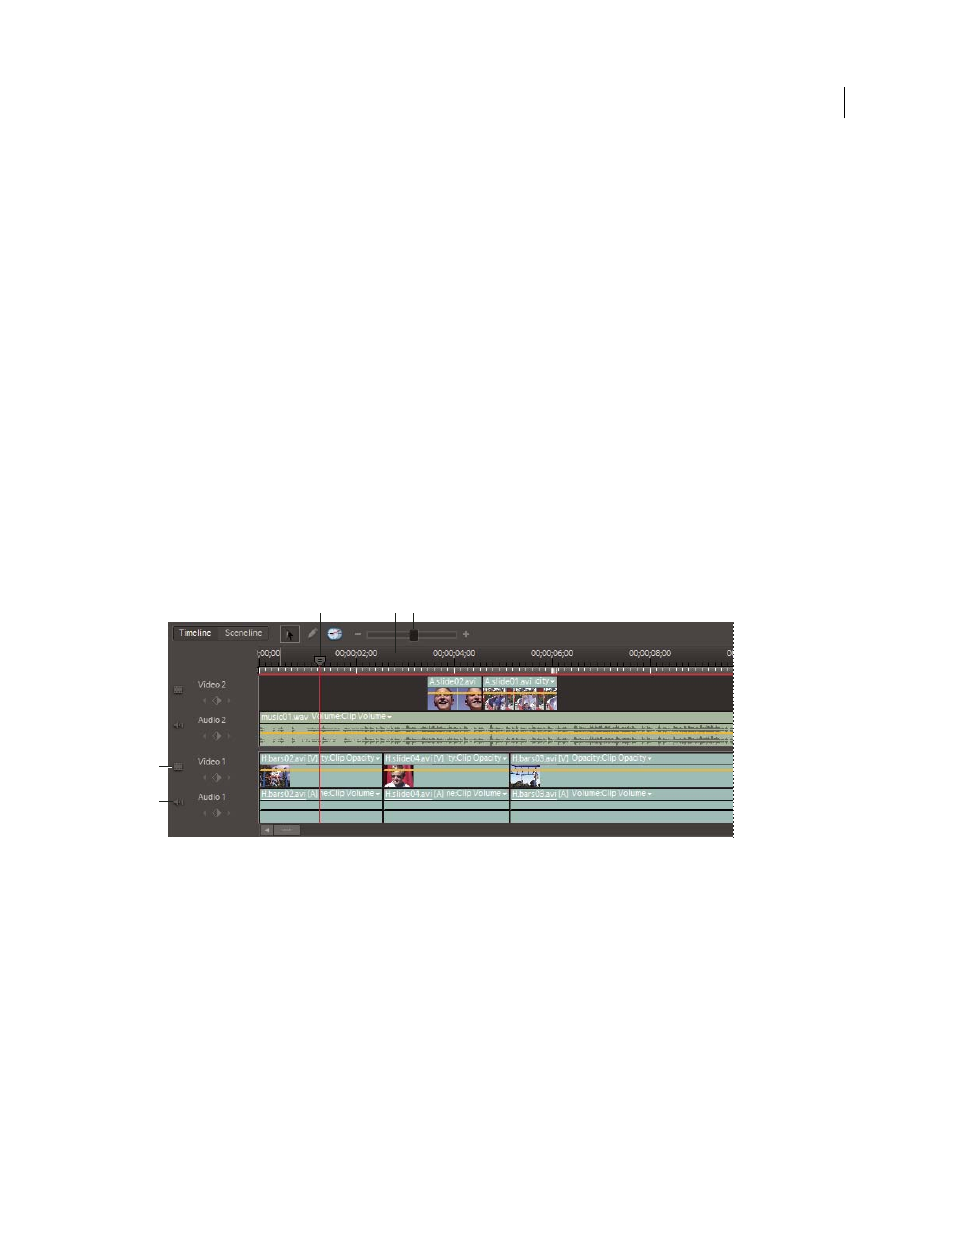
Timeline overview
The Timeline graphically represents your movie project as video and audio clips arranged in vertically stacked tracks.
When you capture video from a digital video device, the clips appear sequentially as they occur. The Timeline uses a
time ruler to display the components of your movie and their relationship to each other over time. You can trim and
add scenes, indicate important frames with markers, add transitions, and control how clips are blended or
superimposed.
The zoom controls in the Timeline allow you to zoom out to see your entire video, or zoom in to see clips in more
detail. You can also change how the clips appear in the tracks, and resize the tracks and the header area.
Timeline
A. Current-time indicator B. Time ruler C. Zoom control D. Video track E. Audio track
More Help topics
Customize how clips display in the Timeline
E
B
A
C
D