Overlay a clip in the timeline – Adobe Premiere Elements 8 User Manual
Page 99
94
USING ADOBE PREMIERE ELEMENTS 8 EDITOR
Arranging clips in a movie
Last updated 8/12/2010
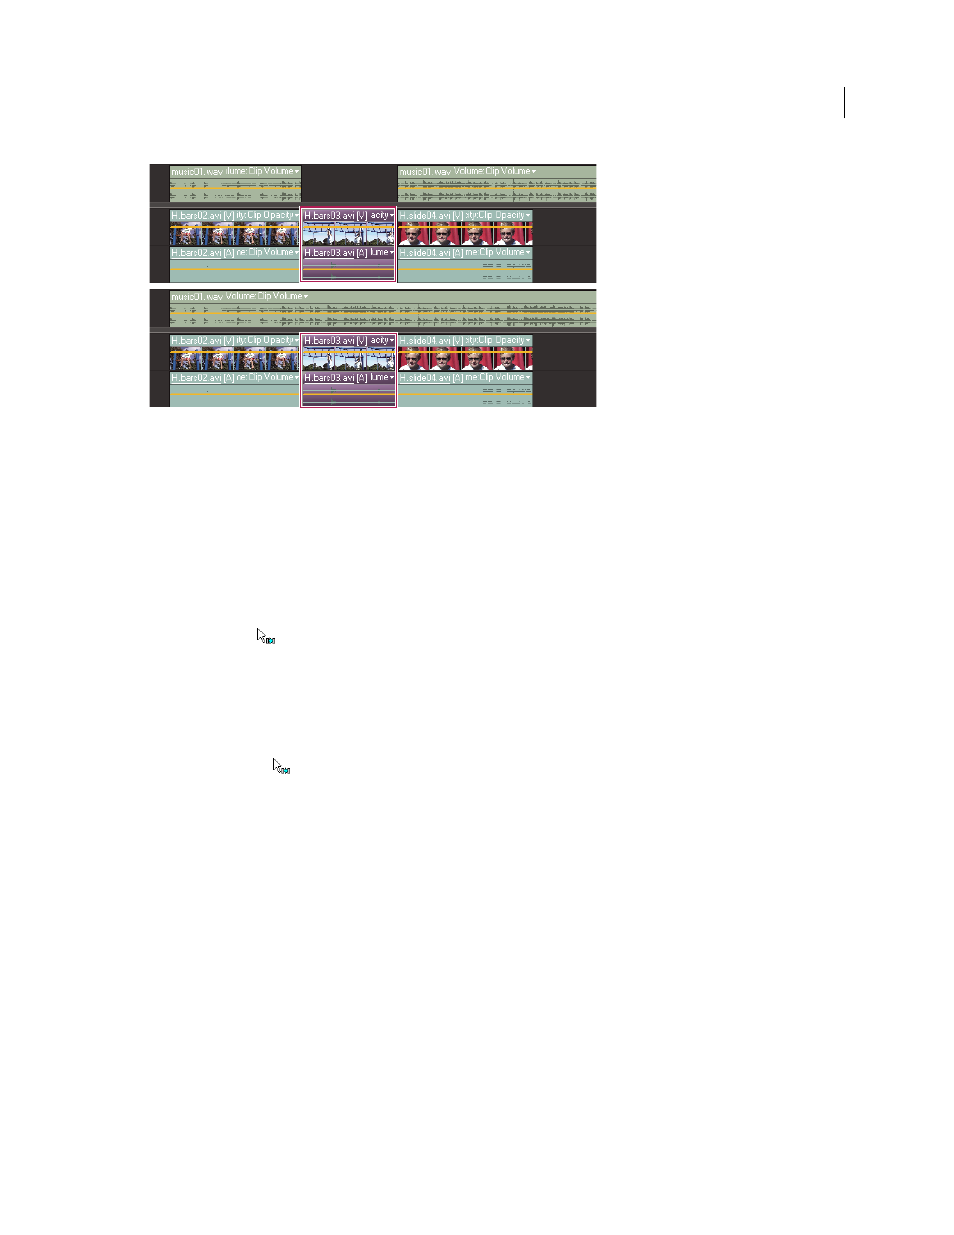
Clips after default insertion (top), and after Alt-drag insertion to target track (bottom). Notice second audio track unaffected by Alt-drag
insertion.
More Help topics
Zoom in or out of the Timeline time ruler
Insert a clip, shifting clips on all tracks in the Timeline
❖
Do one of the following:
•
Drag the clip from the Organize workspace to the desired location in the Timeline. When the pointer changes to
the Insert icon
, release the mouse.
•
Move the current-time indicator to the desired location in the Timeline, select the clip in the Organize workspace,
and then choose Clip
> Insert.
Insert a clip, shifting clips on only the target and linked tracks in the Timeline
❖
Alt-drag the clip from the Organize workspace to the desired location in the Timeline. When the pointer changes
to the Insert icon
, release the mouse.
If you drag a clip into the blank space above the topmost video track (for video) or below the lowest audio track (for
audio), Adobe Premiere Elements creates a new track for the clip. If the clip contains both audio and video, it creates
both a new video and new audio track.
Overlay a clip in the Timeline
The easiest way to replace a portion of a video is to overlay it with other footage. When you overlay a clip, the clip you
add replaces any existing frames starting at the location you designate. If the new clip is 40 frames long, it overlays 40
frames of the existing clip. The frames following the overlay, if any, remain in the same location in the track. Overlays
do not change the length of the movie unless the overlay extends beyond the end of the movie.