Adobe Premiere Elements 8 User Manual
Page 274
269
USING ADOBE PREMIERE ELEMENTS 8 EDITOR
Saving and sharing your movies
Last updated 8/12/2010
4 Select a preset from the menu (JPEG), and click Advanced. If you choose a movie format or animated GIF, all the
frames appear in a single file.
5 In the Advanced dialog, select Export As Sequence.
6 Click OK to save the preset.
7 Select the newly created preset, specify a location for the exported still-image files, specify the filename, and click
Save. It’s best to specify an empty folder set aside so that the sequence files don’t get mixed with other files.
Note: To set the sequence numbering, type a numbered filename. To specify the number of digits in the filename,
determine the digits required to number the frames, and add additional zeroes as required. For example, if you want to
export 20 frames with a filename containing five digits, type Car000 for the first filename (the remaining files are
automatically named Car00001, Car00002, ..., Car00020).
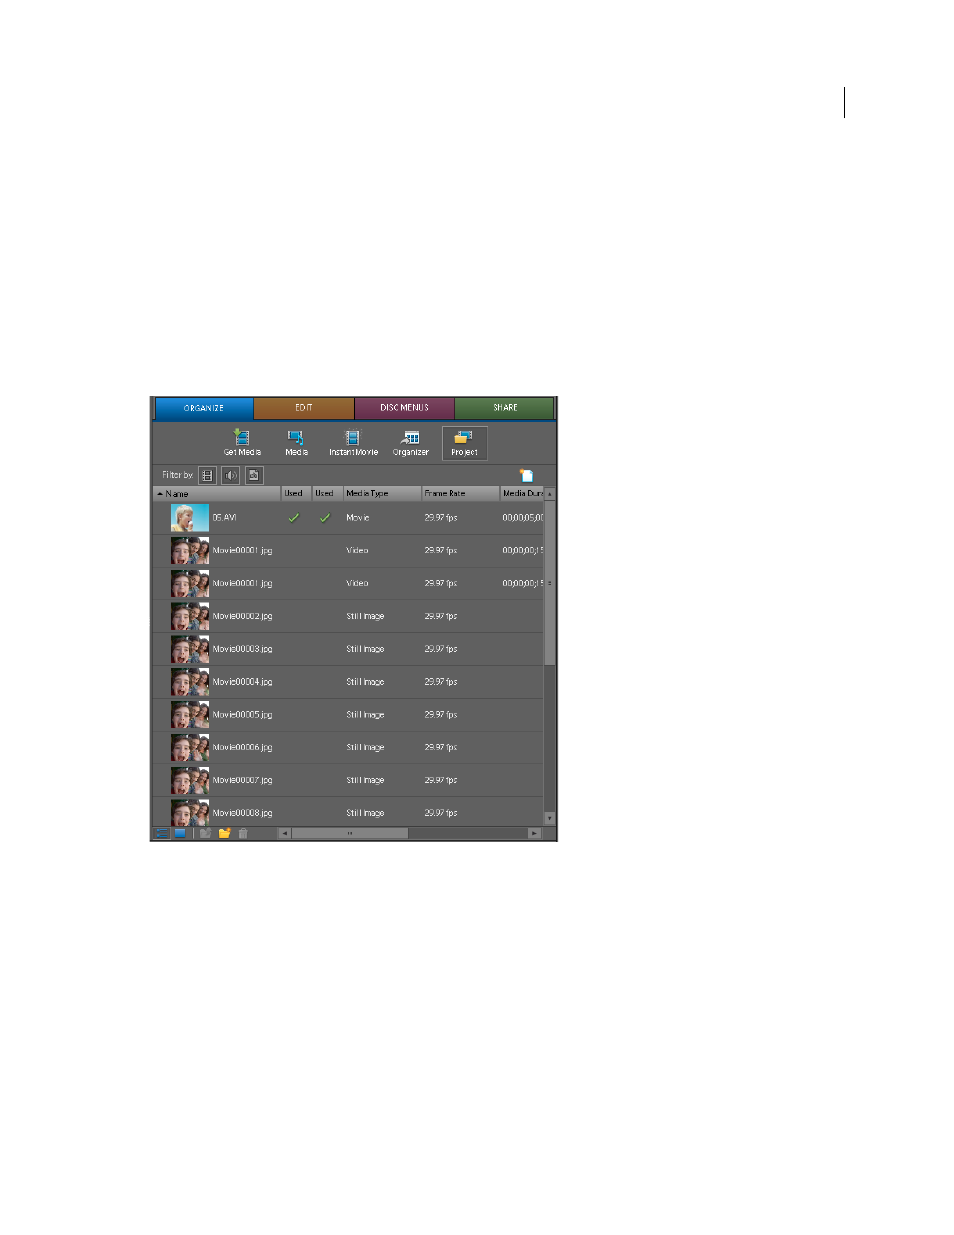
A still-image sequence imported into Project view showing sequential numbering in filenames.
More Help topics
Export only audio using Share > Personal Computer command
You can export only the audio from your movie using the Share > Personal Computer > Audio command. When you
choose this option, Adobe Premiere Elements facilitates saving it as Windows Waveform file (.wav), MP3 file (.mp3),
AAC file (.aac) or AIFF file (.aiff). If you want to save it as an MP3 or AAC file for an audio podcast, export the audio
using Mobile Phones And Players option in the Share view of the Tasks panel.
1 Select the Timeline or Sceneline, and choose Share > Personal Computer > Audio.