Configuring ac 1 and ac 2, N in, Figure 377 – H3C Technologies H3C WX3000E Series Wireless Switches User Manual
Page 359
343
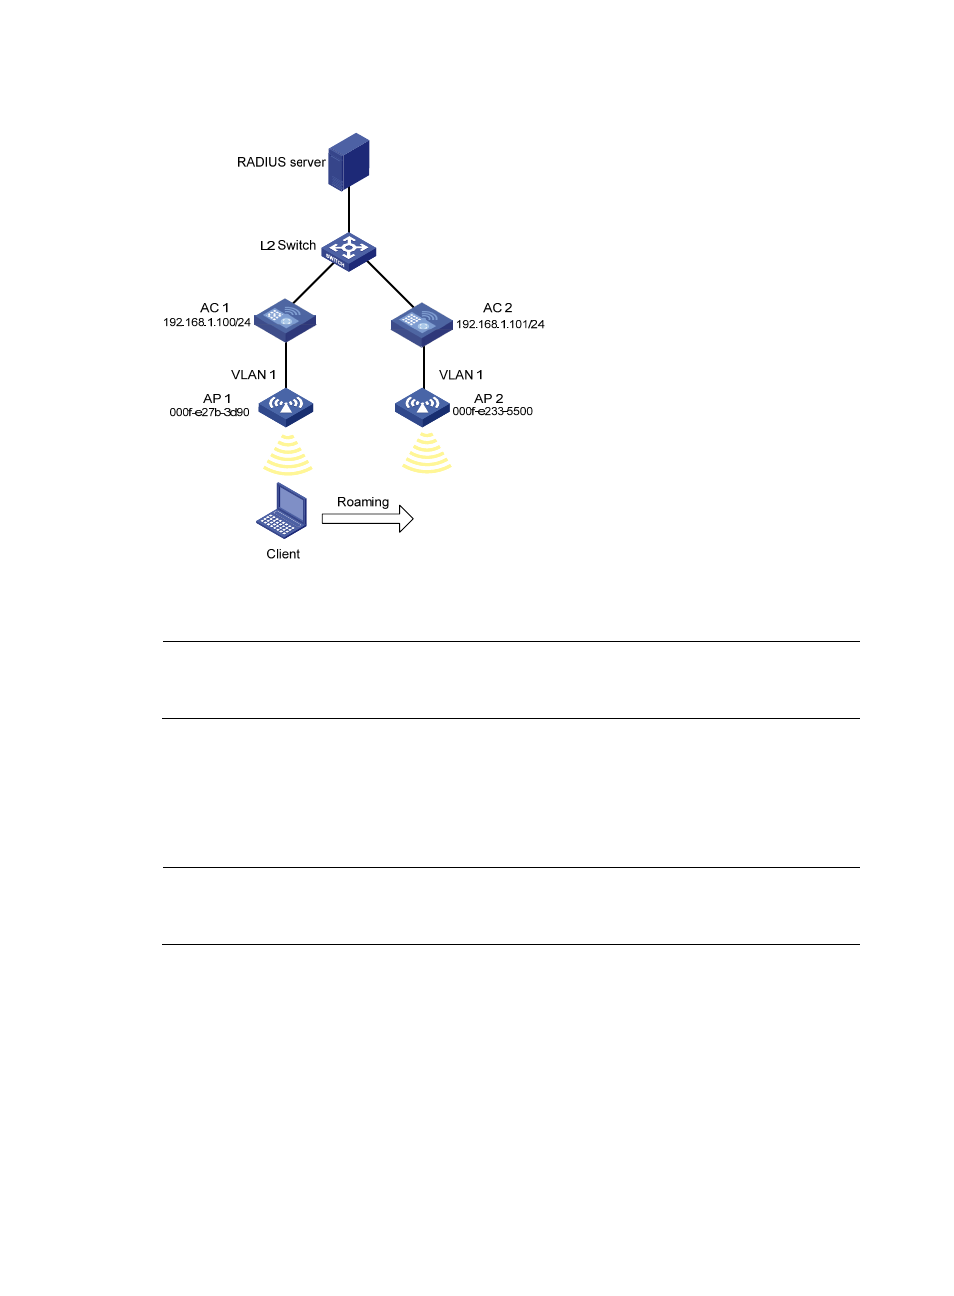
Figure 377 Network diagram
Configuring AC 1 and AC 2
NOTE:
If remote authentication is required in the authentication mode you select, configure the RADIUS server.
For how to configure the RADIUS server, see "AAA configuration."
1.
Establish AC-AP connections:
Configure AC 1 and AC 2 so that a connection can be established between AP 1 and AC 1, and
between AP 2 and AC 2. Only after the connections are established can you see that the two APs
are in the running status. To view the AP status, select Summary > AP or AP > AP Setup.
For the related configuration, see "Access service configuration."
NOTE:
For the configuration of authentication mode, see "Access service configuration." Fast roaming
supporting key caching can be implemented only when RSN+802.1X authentication is adopted.
2.
Configure a roaming group:
a.
Select Roam > Roam Group from the navigation tree.
b.
On the page that appears, select enable from the Service status list, select IPv4 from the IP Type
list, enter 192.168.1.100 for Source address, the IP address of AC 1, enter the IP address of
AC 2 in the member list, and click Add.
c.
Click Apply.