Configuring the ca server, Configuring the ac – H3C Technologies H3C WX3000E Series Wireless Switches User Manual
Page 478
462
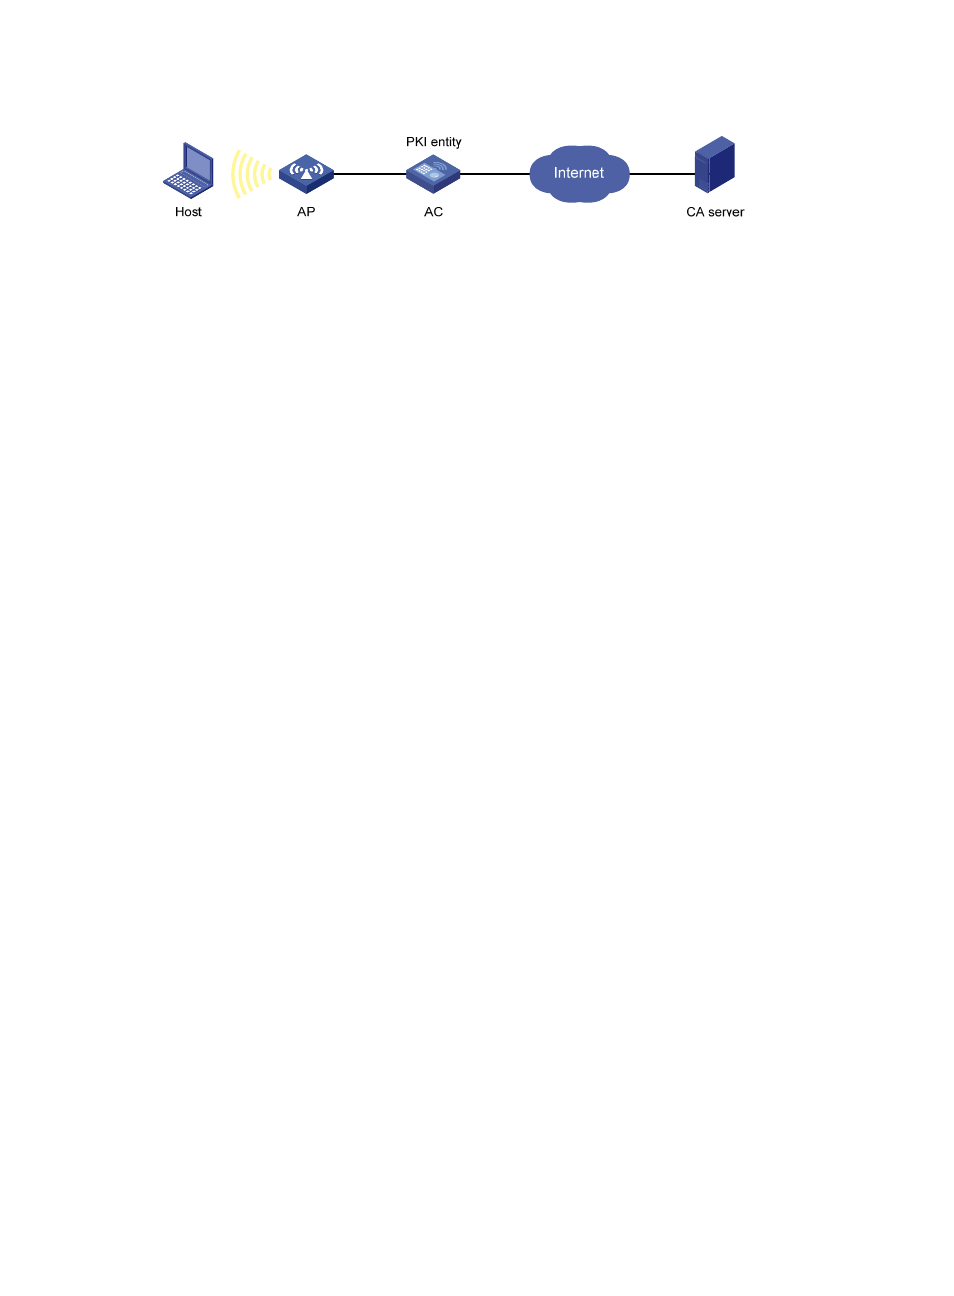
Figure 492 Network diagram
Configuring the CA server
1.
Create a CA server named myca.
In this example, you must first configure the basic attributes of Nickname and Subject DN on the
CA server: the nickname is the name of the trusted CA, and the subject DN is the DN attributes of
the CA, including the common name (CN), organization unit (OU), organization (O), and country
(C). Leave the default values of the other attributes.
2.
Configure extended attributes.
After you configure the basic attributes, perform configuration on the Jurisdiction Configuration
page of the CA server. This includes selecting the proper extension profiles, enabling the SCEP
autovetting function, and adding the IP address list for SCEP autovetting.
3.
Configure the CRL publishing behavior
After you complete the previous configuration, perform CRL related configurations.
In this example, select the local CRL publishing mode of HTTP and set the HTTP URL to
http://4.4.4.133:447/myca.crl.
After this configuration, make sure that the system clock of the AC is synchronous to that of the CA,
so that the AC can request certificates and retrieve CRLs properly.
Configuring the AC
1.
Create a PKI entity.
a.
Select Authentication > Certificate Management from the navigation tree.
The PKI entity list page is displayed by default.
b.
Click Add.
c.
Enter aaa as the PKI entity name.
d.
Enter ac as the common name.
e.
Click Apply.