Configure afu to an ftp server (part 2 of 3) – Epiphan Networked VGA Grid User Manual
Page 204
Networked VGA Grid User Guide
5-4 File and recording transfer
l
Configure AFU using SCP (part 2 of 3)
l
Upload to an external USB drive
Configure AFU to an FTP server (part 2 of 3)
This procedure assumes you have completed the steps in
Enable and configure the frequency of AFU (part 2 of
and wish to continue with configuration of upload to an FTP Server.
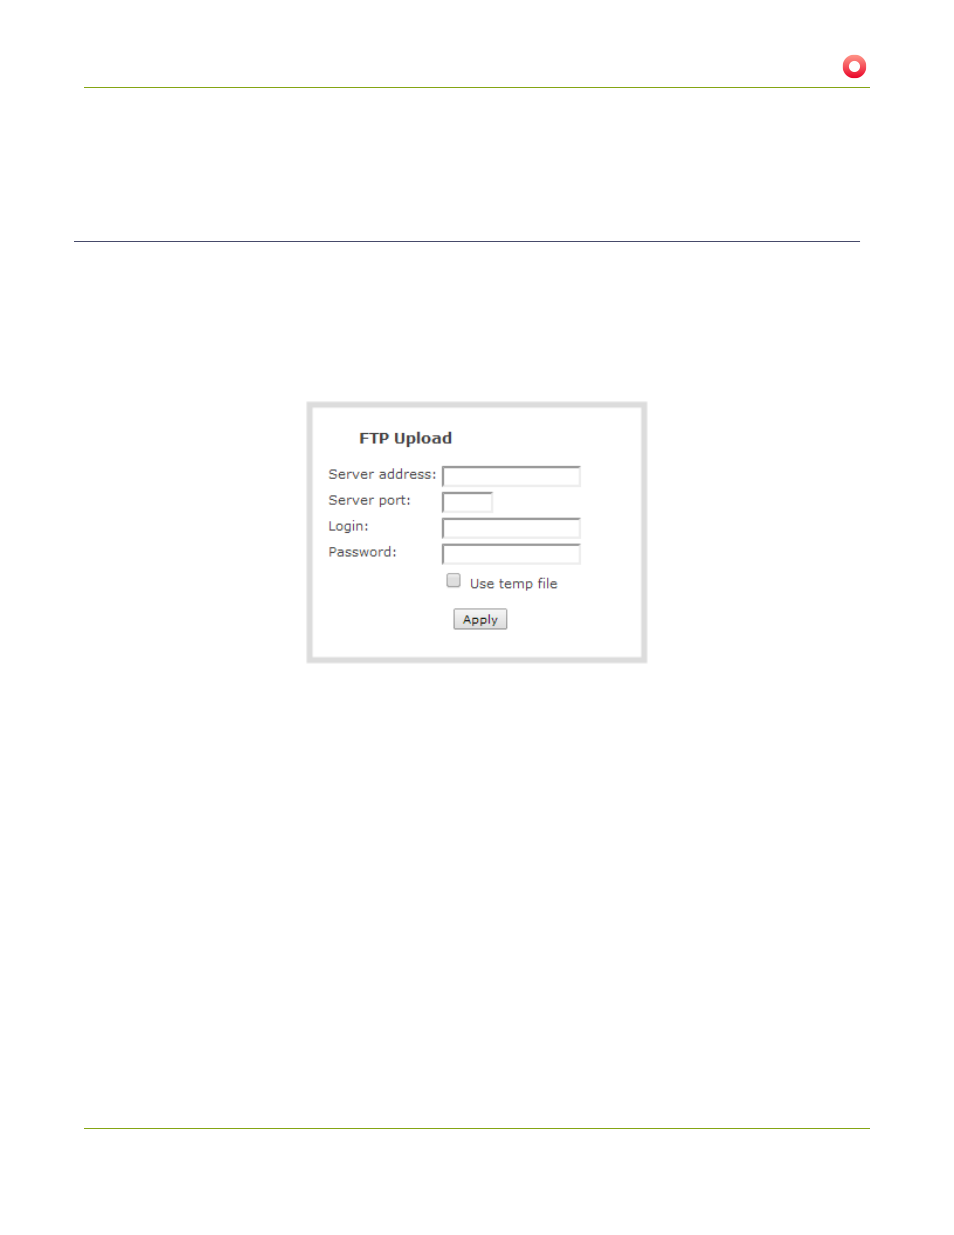
To configure upload to an FTP server:
1. Select FTP Client from the protocol drop down list in the Automatic File Upload configuration page; the
lower half of the page reflects the selection.
2. Specify the target Server address. If your system is configured with DHCP or has a valid DNS
), you can use the server’s fully qualified domain name
instead of the IP address.
3. Specify the Server Port used for the target FTP server. The standard port is 21.
4. Enter the FTP account username in the Login field.
5. Enter the FTP account password in the Password field; the characters are masked with dots.
6. Select Use temp file to name files with a temporary filename extension (.part) on the server until upload
is complete.
7. Click Apply; if there are any problems the system notifies you with a message: One or more parameter
values are not valid and those were not applied!
The following table describes the options applicable to configuring upload to an FTP server.
192