Marker – Hypertherm Phoenix 8.0 User Manual
Page 78
Setups
71
Marker
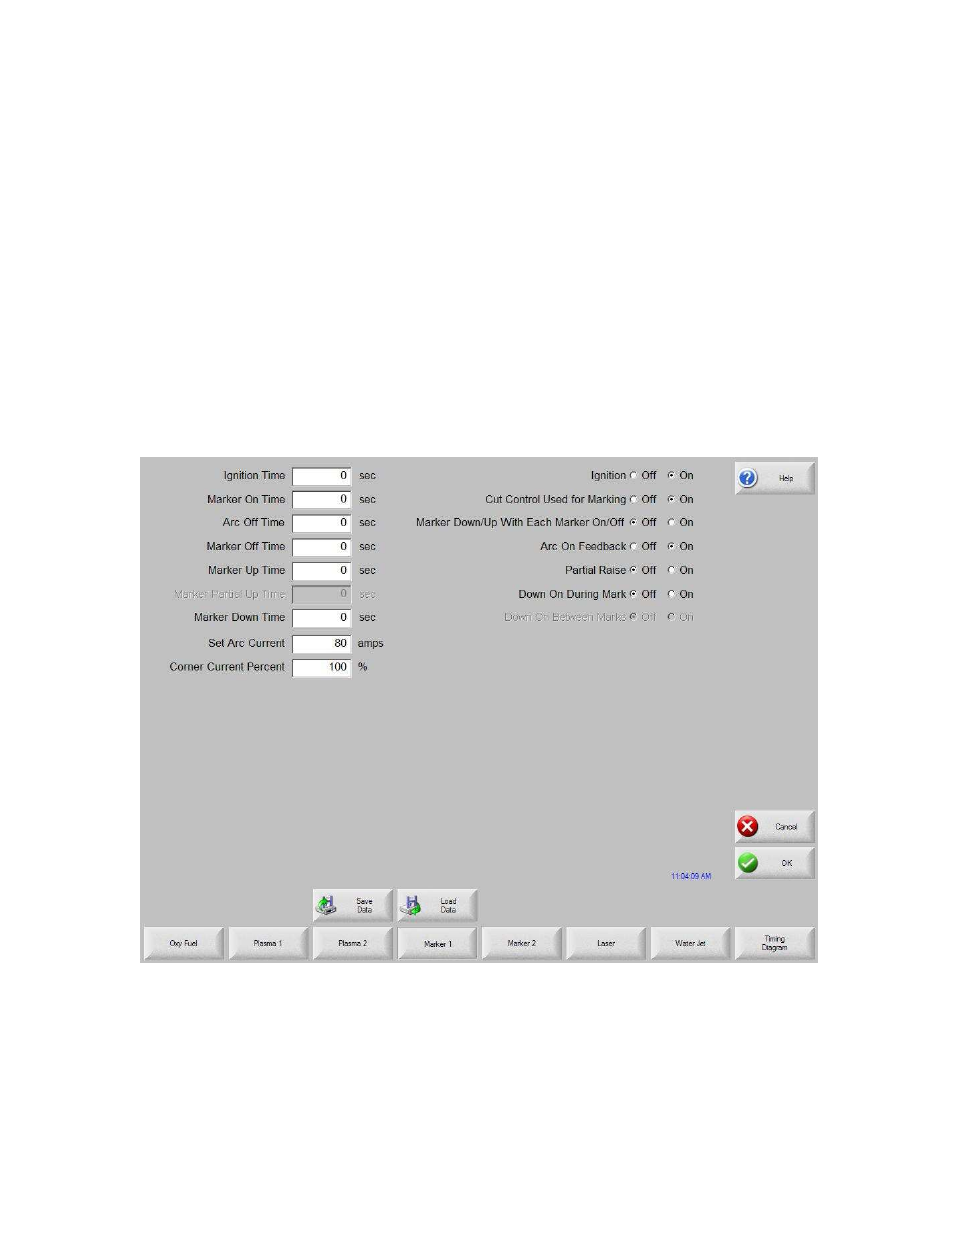
The control comes with the following built in marker control logic for marking. When
marking is selected, the following parameters are available to customize the logic for the
particular metal being marked. As these parameters are changed, the timing diagram
below will change to show the new timing parameters. This screen is located under the
Cut Types soft key in Setups.
Marker Interface
The Marking feature from the control is operated through the use of existing I/O points
for cutting torches on the control I/O connector. These I/O points may be switched from
the cutting torch to the marking tool by use of an external relay(s) activated by the
Marker Output or the Marker Output may be used to activate the marking tool.
Please refer to the Machine Interface section of this guide for exact I/O pinout
information.