Edit pane view options – NewTek TriCaster Studio User Manual
Page 140
Page | 120
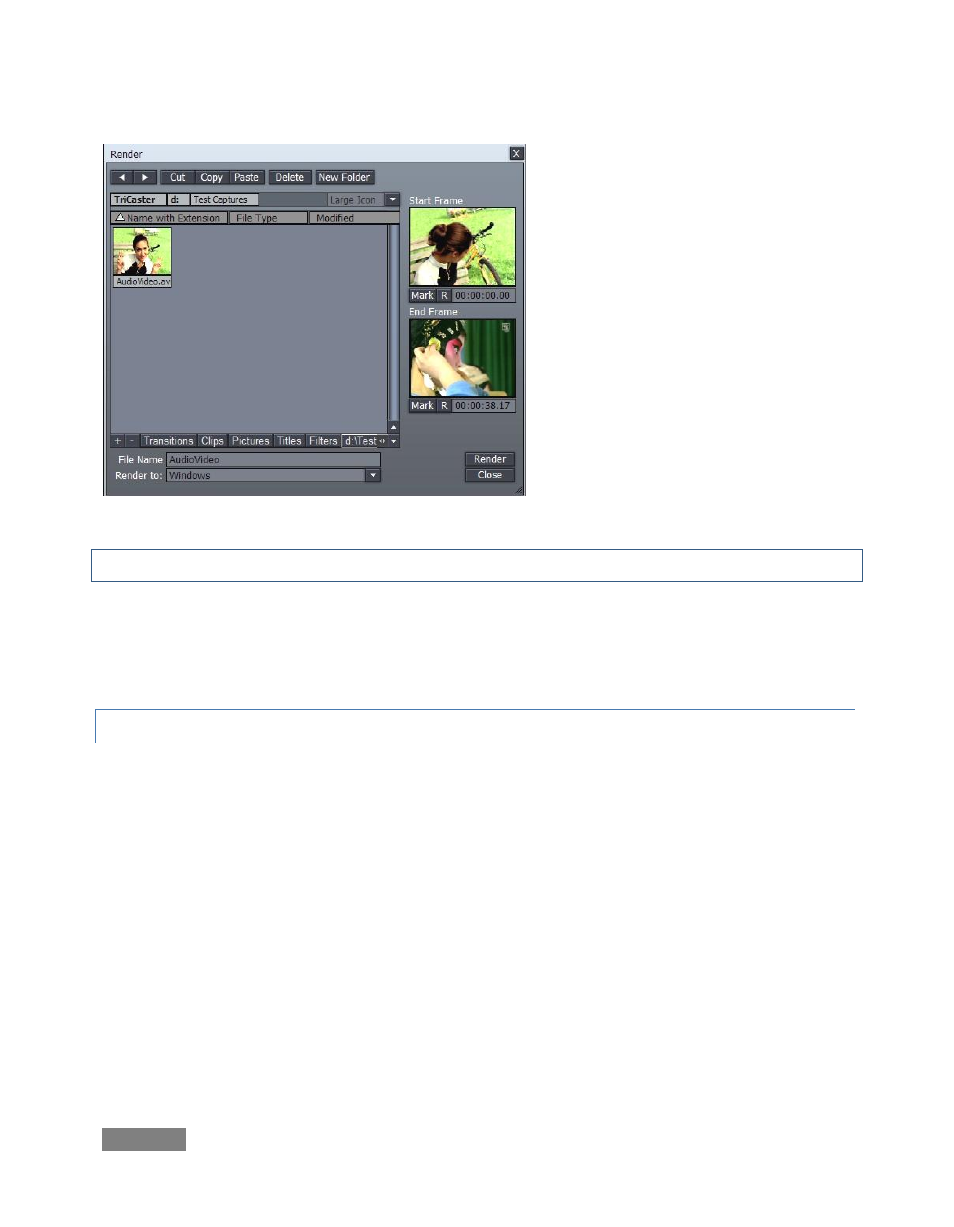
Render - If you wish to render out the
project, consolidating it into a single file
for playback in the DDR, or to archive,
the Render button in this section helps
you do this.
Clicking it presents a file requester
(Figure 133). Find or create the folder
you want to store the rendered file in,
and supply a File Name. The Render To
menu lists many convenient formats
you
can
select,
including
DVD
compatible options, and even formats
for popular mobile devices.
Note the useful “TriCaster Overlay” render option, which preserves transparency.
If you only want to render part of a larger project, drag left or right on the Start and End Frame
thumbnail windows to select suitable frames, then click the Mark buttons beneath. (Clicking the
nearby [R] buttons Resets the frame to the default.)
8.2.2 EDIT PANE VIEW OPTIONS
Just to the left of the Overlay button is a button (the downward triangle) which opens a menu
presenting many options affecting the Edit pane.
The Storyboard option list in shorter, but can be quite useful: choose from several views,
selectively displaying all project components, just the audio or video elements, or only transitions
or overlays.
The list of options is longer for the Timeline view than Storyboard. To reduce system overhead
(or just to suit personal taste) you may separately modify the way image thumbnails appear for
your various project components – Clips, Transitions, Overlays or Effects. At the top of this menu
for both Timeline and Storyboard mode is the Time-Bar Tracking option (the setting is shared by
both edit panes.) By default, Tracking is enabled. This permits the edit pane display to scroll
freely during playback to keep pace with the Edit Line (regardless of the Zoom level.)
Figure 133