Drag copying – NewTek TriCaster Studio User Manual
Page 151
Page | 131
Hint: You can even use this facility before beginning to build your project, adding a bunch of
markers immediately and then entering timecode values for significant edit points decided in
advance.
Centered right above the Marker is a color swatch. Click it to popup the standard Color Picker,
and click a new color for your Marker. (You can use colored Markers to signify certain types of
events, or simply because you’ve an over-developed color sense.)
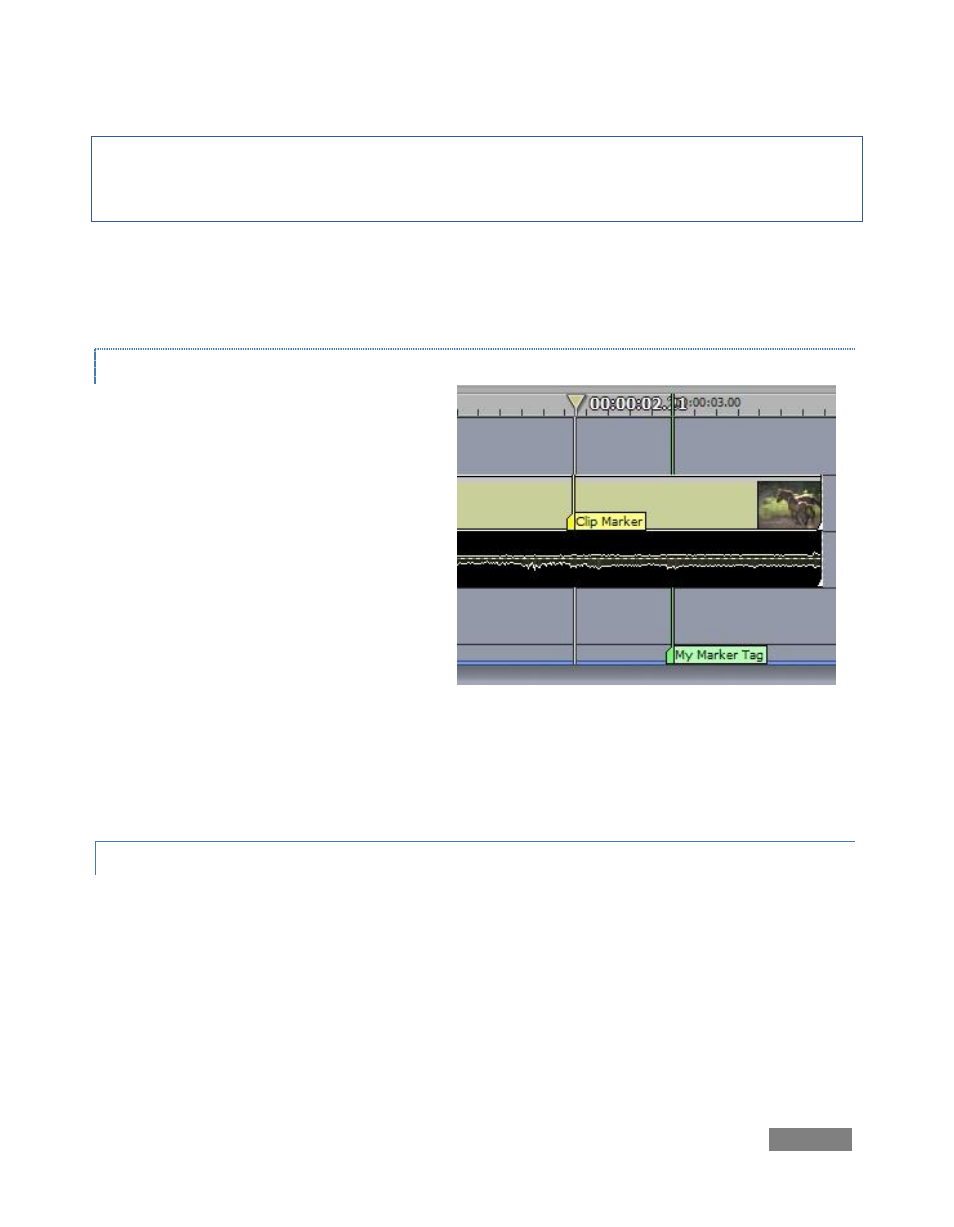
CLIP MARKERS
Let’s discuss the other type of marker – the
Clip Marker. Clip Markers are identical to
Project Markers in every sense, except one.
Whereas Project Markers know their place
in the grand scheme of things, Clip
Markers cling limpet-like to their parent
objects, such as video and audio clips.
Move the clip and the Clip Marker goes
right along for the ride. Also, timecode
shown for a Clip Marker is local to the clip.
To create a Clip Marker, you need to do
only one thing differently – select a clip (or
clips) first, before pressing the m key (or using the menu). In all other respects – naming,
coloring, and so on, Clip Markers work just like their cousins.
8.4.8 DRAG COPYING
Cut, Copy and Paste functions are available in the Edit Menu at right, along with their keystroke
equivalents (Ctrl + X, Ctrl + C, and Ctrl + v). TriCaster offers another great copying convenience: If
you hold down the Ctrl key before you start dragging a clip or selection of timeline items, you
make a copy of the object(s) at the location where you release the mouse button. The source
items remain in place.
Figure 142