NewTek TriCaster Studio User Manual
Page 60
Page | 40
If you connect a camera or deck to TriCaster using IEEE 1394 (known as FireWire
™
, or often
simply “DV”) you have the benefit of capturing audio and video across one cable and the added
advantage of device control for play, pause, fast forward, etc. Let’s capture a bit of video now:
Using a suitable FireWire cable (not supplied), connect your DV camera or deck to a 4 or 6-pin
FireWire connection on the TriCaster (the front connector is marked with the FireWire symbol,
resembling a stylized “Y’).
Figure 33 - TriCaster STUDIO
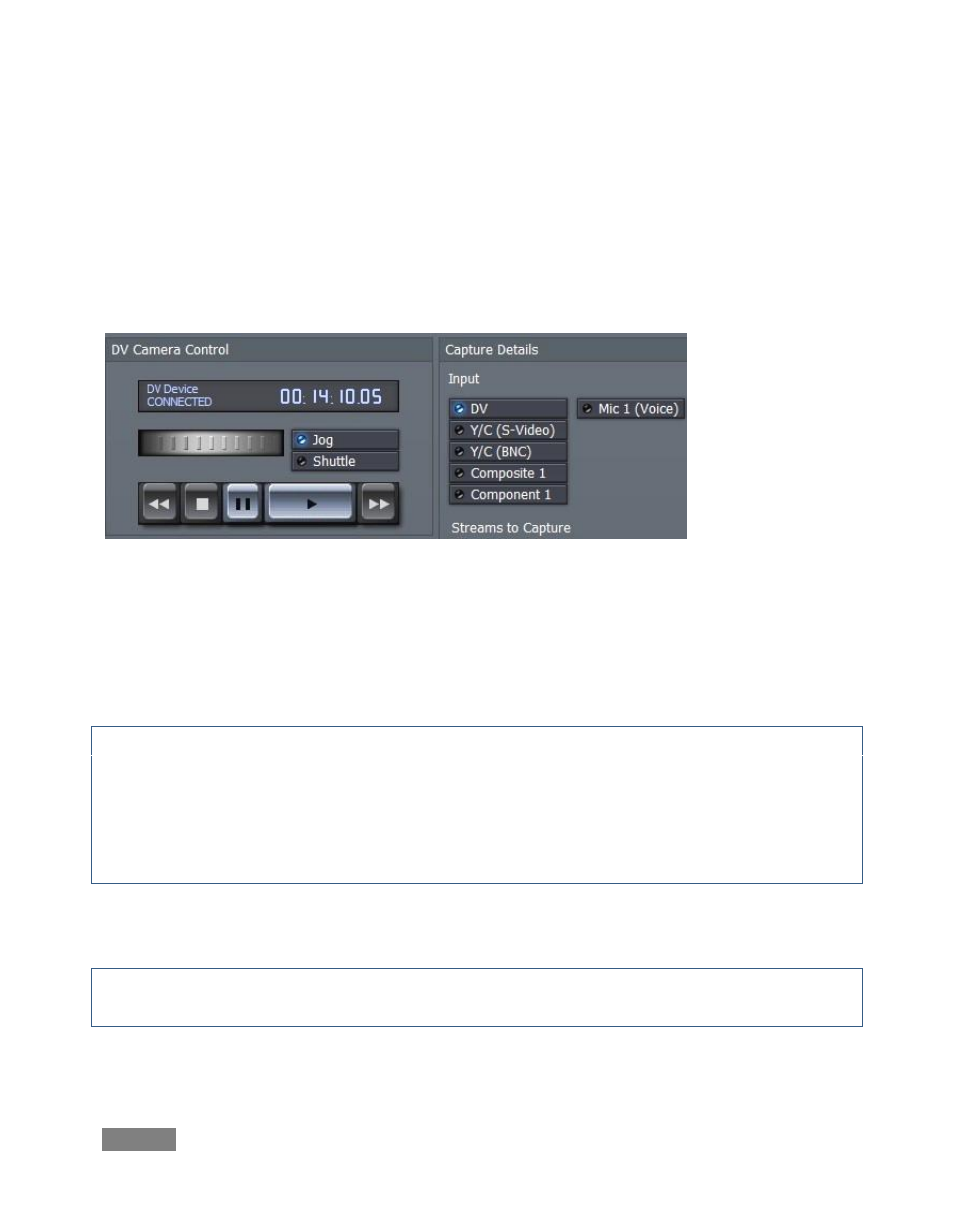
After a moment or two for your system to recognize the new device, the DV Camera Control
pane acknowledges the connection with a confirmation message, and displays the time code
position of the tape at upper right. The transport controls beneath the timecode activate, and
you can now fast-forward, rewind, play and pause on screen.
Note: For analog video captures, you must connect a composite, S-Video or component-video
cable to the first appropriate TriCaster input.
Likewise, connect audio cables to the corresponding Line input connector. Then activate the
proper input (composite, S-Video or component) in the Capture Details. Control your camera or
deck manually, and use the Capture controls as described here.
Ensure that the blue LED-style indicator next to DV is illuminated in the Input (source) selection
of the Capture Details pane.
Hint: It is recommended that you save projects in their own folders; TriCaster has buttons in the
Hotlist area along the bottom of the Media Bin to make it easy to jump to where you need to go.