NewTek TriCaster Studio User Manual
Page 176
Page | 156
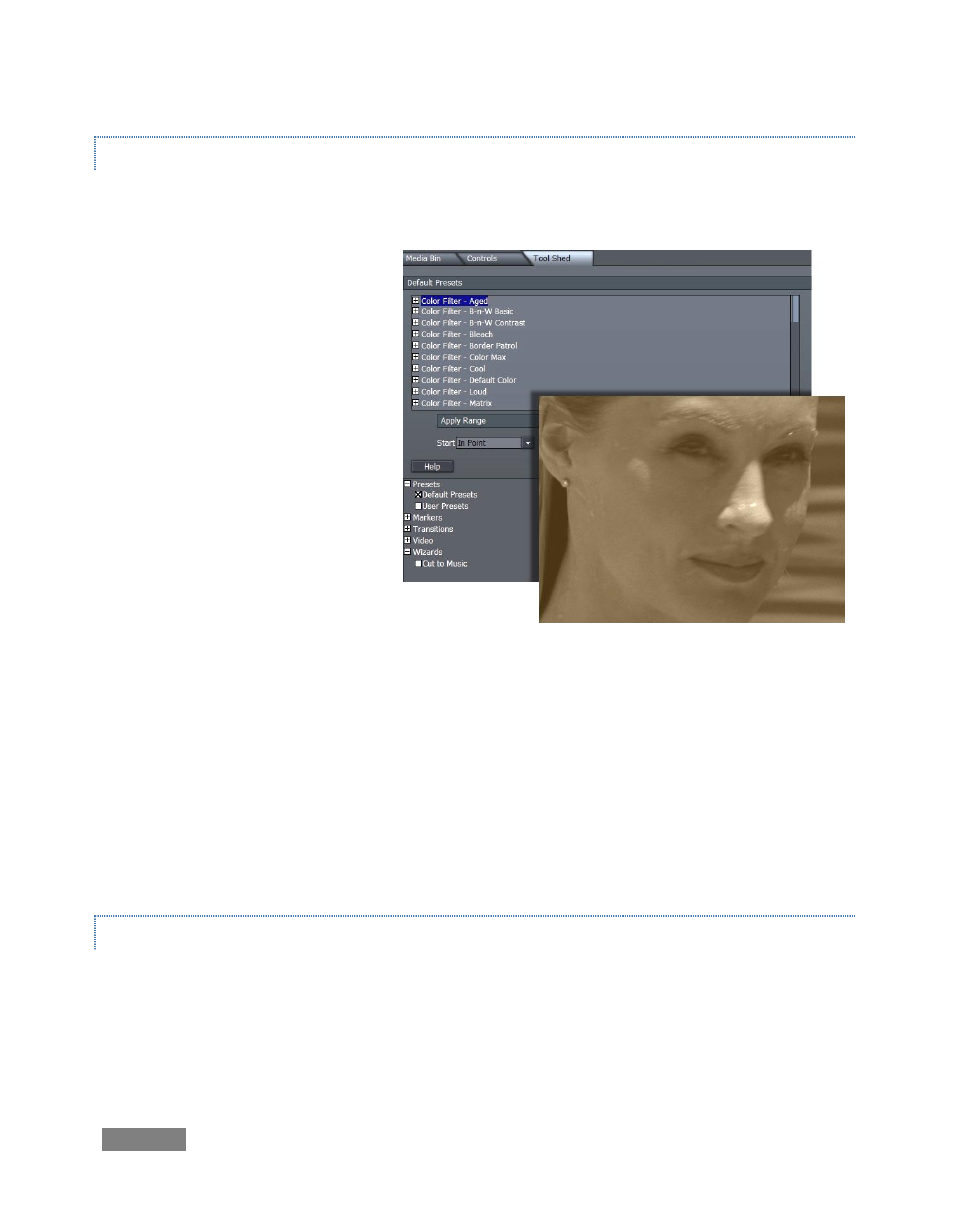
DEFAULT PRESETS
Click the Tool Shed tab, and then click the [+] button to the left of the Presets label in the lower
section of the panel to reveal two options: Default Presets and User Presets.
Choose Default Presets, by clicking
on it, and the upper panel will fill to
overflowing with a list of tools you
can use. Roughly half the entries in
this group are Color Filters.
To demonstrate, highlight a clip in
the editor, and click the Color Filter
- Sepia entry.
Click the Perform button and your
selection is instantly applied (no
downtime rendering effects using
your realtime TriCaster features).
Other tools in the Default Preset listing perform elaborate wipes, as well as various common
scaling routines (the latter are great time savers when you have to modify many clips at once).
The Start and End menus permit you to process just part of the clip. Mode is relevant for Tool
Shed effects that have changing values over time, controlled by keyframes. If your current clip is
longer or shorter than allowed for in the original effect, you can Preserve the original timing
from the start of the clip, or at its end – but more often than not you may want to Scale the
keyframes to perfectly match the new duration.
USER PRESETS
The User Preset section is worth its weight in gold (using the heaviest pixels you can find)
It works like this: Select a clip, and use the Controls pane to do anything you like to it – set up
custom color correction, transparency, a 3D rotation … anything you can think of.
Figure 172