Powering up the analyzer, Menu structure and navigation – Fluke Biomedical Cufflink User Manual
Page 31
Operation
Powering Up the Analyzer
2
2-3
Powering Up the Analyzer
To power up the Analyzer, follow these directions:
1. Attach the supplied power cord to the power cord input on the back panel.
2. Plug the unit into a properly rated outlet.
3. Turn the Analyzer on by pushing the power switch on the back panel to the
ON
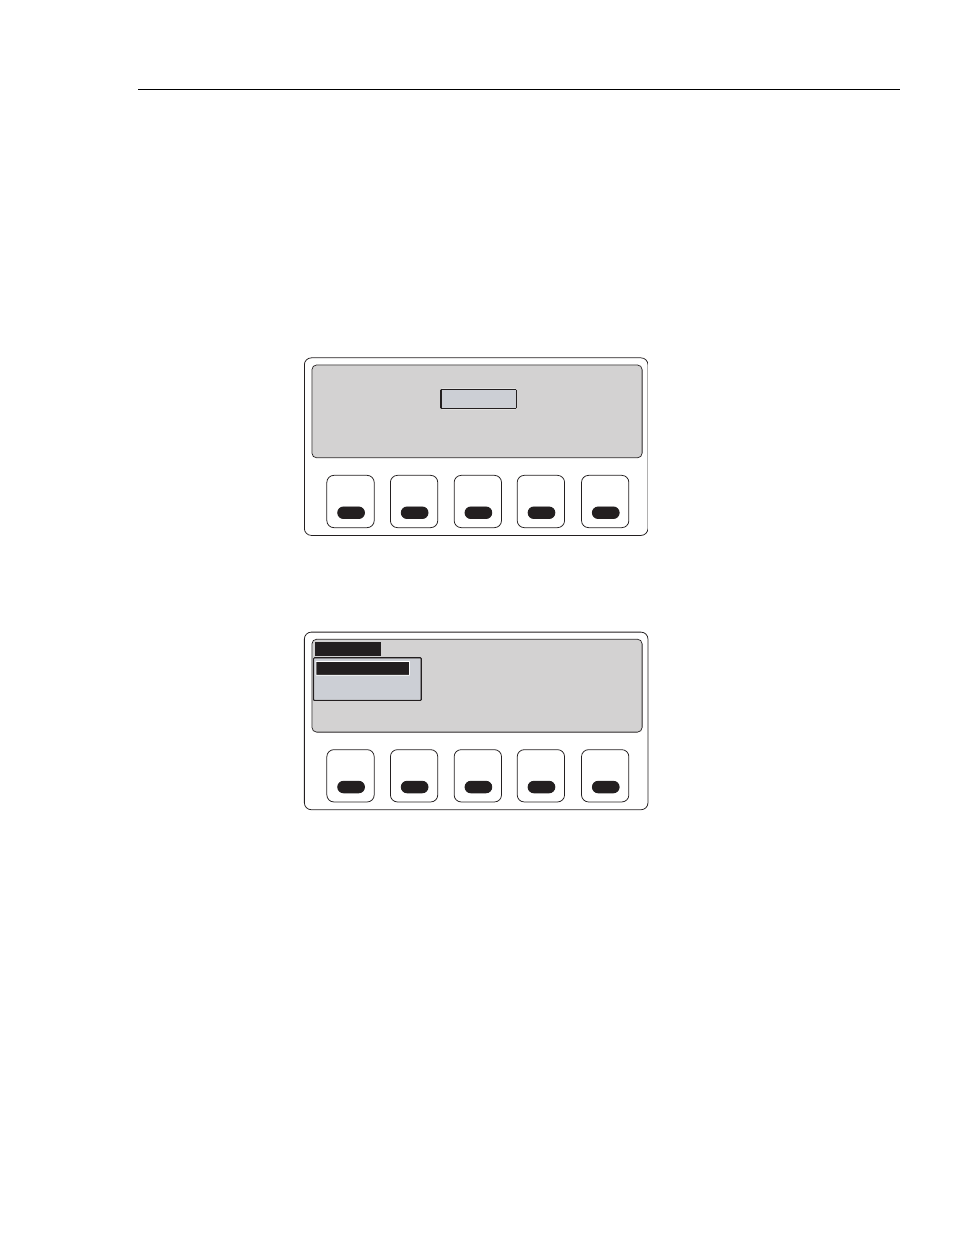
position (marked I). The Analyzer performs a self test and system initialization,
during which the logo display is visible for about five seconds:
F1
F2
F3
F4
F5
16:15:36
09/19/07
CuffLink
3.21, Pump
Non-Invasive Blood Pressure Analyzer
fcv101.eps
The current time and date is in the upper right hand corner, and the software revision,
along with installed options, appears directly below the Analyzer name. After the
five-second logo display, the
Main Menu
displays:
F1
F2
F3
F4
F5
Select BP
Press Util Comm Auto
ADAMS Adult
ADAMS Adult
ADAMS Neonate
Arrythmias
Select adult ADAMS family blood pressure
fcv096.eps
Menu Structure and Navigation
The
Main Menu
options listed across the top of the display are:
•
Select BP
(Select Blood Pressure)
•
Press
(Pressure Tests)
•
Util
(Utilities)
•
Comm
(Communications Ports)
•
Auto
(Auto Sequences)
Each of these options has its own submenu. See Figure 2-1 for a complete menu map.
Along the bottom of the
Main Menu
display is a brief description of the contents or
purpose of the highlighted menu option. If a pull down menu, or submenu, is visible
below the highlighted
Main Menu
option, the menu description refers to what is
available in the highlighted submenu.