Fluke Biomedical Cufflink User Manual
Page 56
Cufflink
Operators Manual
2-28
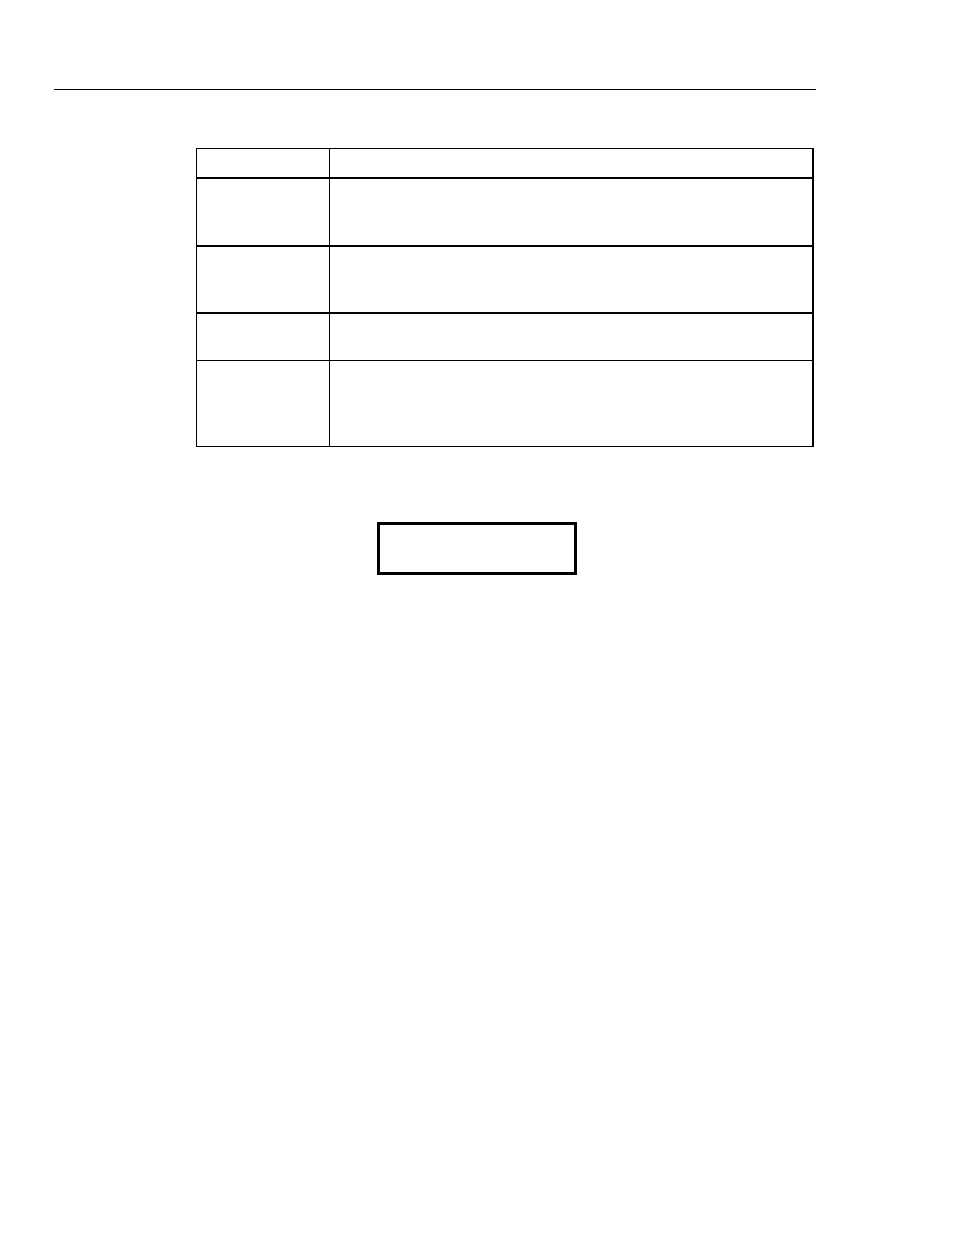
Table 2-9. Display Test Descriptions
Test Description
Short Test
Press F1 to initiate; this test lasts about 15 seconds and displays two
patterns: the Text plane - Character test and the Graphic plane - Solid
fill test.
Long Test
Press F2 to initiate; this test lasts about 1 minute 10 seconds and displays
two patterns: the Text plane - Character test and the Graphic plane - Solid
fill test.
Text plane –
Character Test
This test shows all of the characters or symbols (character set) that the
Analyzer produces, including letters, numbers, and other assorted symbols.
Graphic plane -
Solid fill Test
This test evaluates the display's graphic capabilities. The test fills the entire
grid of 240 by 64 pixels (the tiny dark squares visible on the display during
this test) with a dark blue color. This test demonstrates that all the pixels
may be activated correctly.
6. At the end of the Short and Long tests, the Analyzer briefly displays the following
confirmation:
Display test complete
Hit any key…
7. Press any key to return to the
System
submenu.
ROM Checksums
ROM (Read Only Memory) contains the software that operates the Analyzer. It is located
within an Integrated Circuit chip. This type of memory may be read by the Analyzer
microprocessor. ROM normally cannot be written to or altered in any way, but
information within ROM may occasionally become corrupted for various reasons.
The ROM Checksums function performs an evaluation of the ROM installed in the
Analyzer system to ensure that the integrity of the ROM is intact. A checksum is a
mathematical sum of the code (bytes) in the software program installed in ROM. When
the test is finished, a hexadecimal value is displayed that can be verified by contacting the
Fluke Biomedical Service Center.
Note
ROM Checksums currently can test ROMs U2, U3, and U4, even though U4
has not been installed. Performing a checksum test on ROMs that have not
been installed results in an erroneous value.
To carry out the ROM Checksums Test:
1. On the
System Utilities
screen, highlight the
ROM Checksums
Test
option and
press the
Ent
key. The
ROM Checksums
screen displays.
This display shows the IC to test, the memory range (in hexadecimal) for the IC, and
the calculated checksum value. The checksum values are at xxxx when the ROM
Checksum display first appears.
2. Press
F1
to select U2. The Analyzer displays the following confirmation for a short
period of time while the checksum is taking place: