Saving scanned data to a usb memory – Epson WorkForce AL-MX300DN User Manual
Page 81
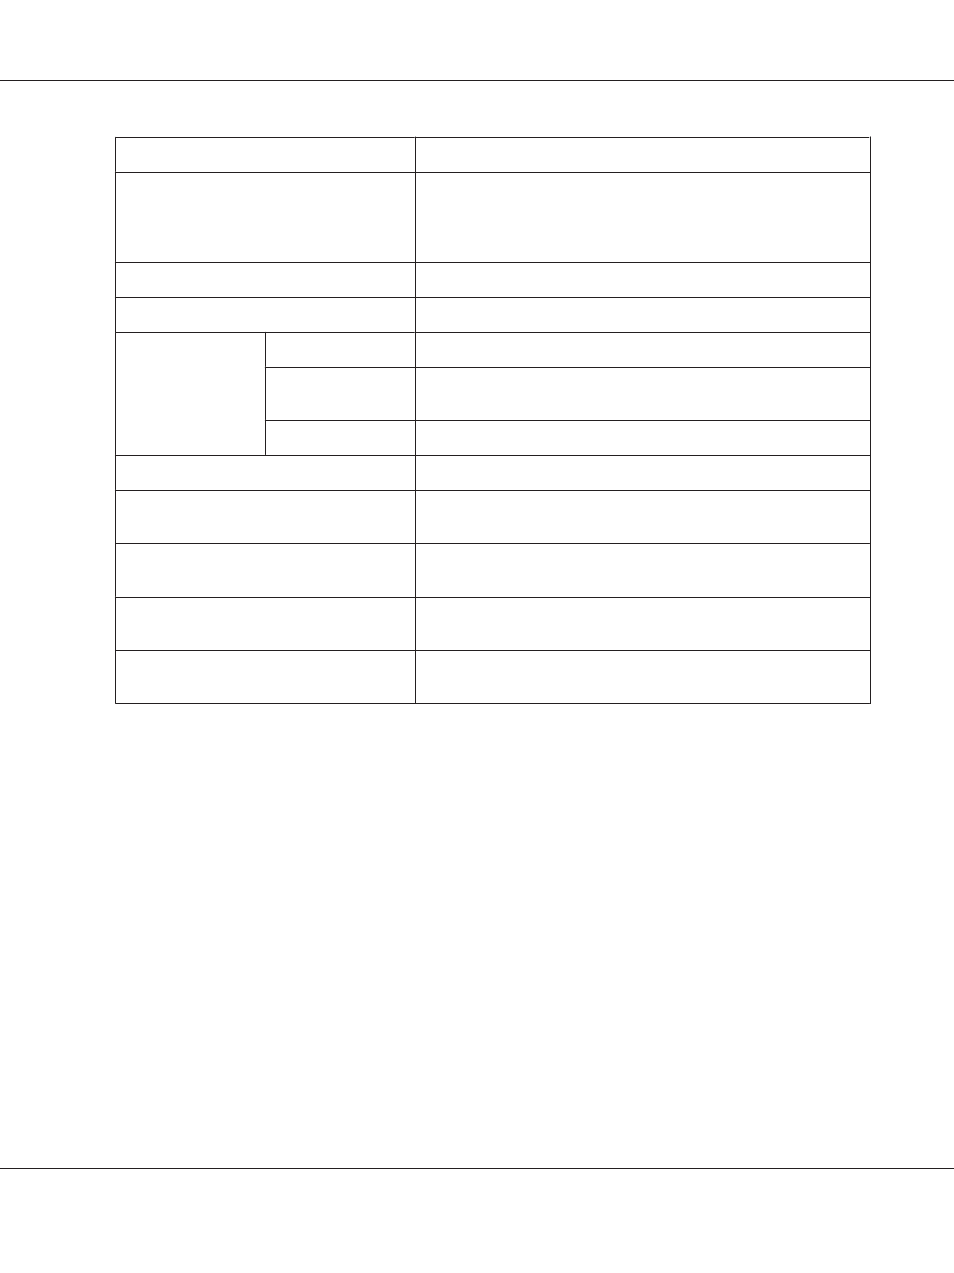
Item
Description
ADF Duplex Selection
Rotates the document direction automatically according to the
Document Type Selection
and Document Direction Selection
when scanning a duplex document to a PDF format, so that the text in
the document is in the correct orientation for reading.
Input File Header
Input the file header. (Up to 20 characters).
Format Setting for Saving
Select the file format for scanned documents.
Detailed PDF Set
Password Setting
Set a password for opening the document.
Authority Setting
Set a password for restricting printing and editing of the generated
PDF.
High Compression
Set this to generate a highly compressed PDF from the scanned data.
Color Mode
Select whether to scan in color or monochrome.
Scan Density
Scanned images get lighter as the value is lowered, and darker as the
value is increased.
Resolution
The higher the resolution, the better the quality, but the scanning time
and the size of the file both increase.
Compression Rate Settings
Set the compression rate of files. The lower the compression, the
better the quality, but the size of the file increases.
Continuous Scan from ADF
Set this to continue scanning additional documents after the current
document has finished being scanned.
Saving scanned data to a USB memory
1. Press the Scan button.
2. Place your original either on the document table or in the Auto Document Feeder. For details on
how to set your original, see “Setting Your Originals” on page 50.
AL-MX300 Series User's Guide
Scanning 81