Using other scanning software from your computer – Epson WorkForce AL-MX300DN User Manual
Page 97
❏ For best results and image exposure, make sure all sides of the marquee are located inside the
preview image. Do not include any areas around the preview image in the marquee.
Adjusting a marquee
You can move the marquee and adjust its size. If you are viewing a normal preview, you can create
multiple marquees (up to 50) on each image to scan different image areas as separate scan files.
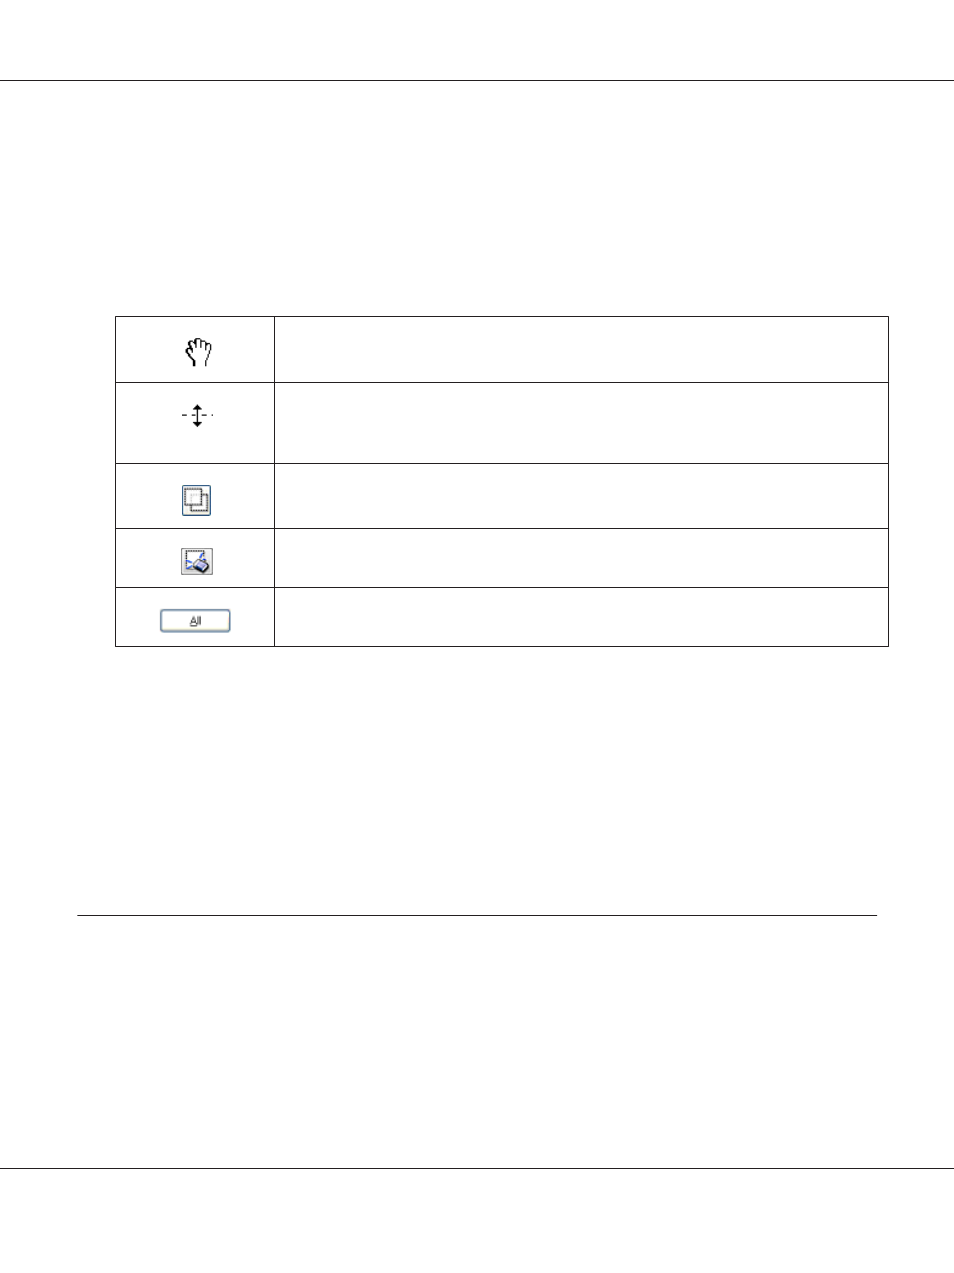
To move the marquee, position your cursor inside the marquee. The pointer becomes a hand.
Click and drag the marquee to the desired location.
To resize the marquee, position your cursor over the edge or corner of the marquee.
The pointer becomes a straight or angled double-arrow. Click and drag the edge or corner to the
desired size.
To create additional marquees of the same size, click this icon.
To delete a marquee, click inside the marquee and click this icon.
To activate all marquees, click this icon.
Note:
❏ To restrict the movement of the marquee to vertical or horizontal only, hold down the Shift key as
you move the marquee.
❏ To restrict the size of the marquee to the current proportions, hold down the Shift key as you resize
the marquee.
❏ If you draw multiple marquees, make sure you click All in the Preview window before you scan.
Otherwise, only the area inside the last marquee you drew will be scanned.
Using Other Scanning Software from Your Computer
You can use any TWAIN-compliant scanning program, such as Adobe Photoshop Elements, to scan
with your scanner. You open the program, select Epson Scan, and scan. When you are finished
scanning, the scanned image opens in your scanning program so you can modify, print, and save it.
AL-MX300 Series User's Guide
Scanning 97