NewTek TriCaster 8000 User Manual
Page 88
Page | 72
FIGURE 57
Hint: DSK
2 appears ‘in front of’ DSK 1 (from the viewer’s
perspective).
DSKs can each have their own transitions, and these can be
set to different durations as well if you like.
12. Click the local Auto button for DSK 1. Since GFX 1 is
assigned to DSK 1, the currently selected item in that
Media Player transitions in to appear above the BKGD
layer.
13. Click Auto for DSK 2. DSK channel content can be individually displayed or
removed from view in this manner.
Hint: DSK (and M/E Key channel) transitions are always in Ping Pong mode. If you fly a
DSK on with one operation, the next transition will always fly it back off again.
That’s all useful, as far as it goes, but what if you want to remove one graphic and
display another simultaneously?
14. Click Take for DSK 2 to remove that video layer from view (DSK 1 should still
be on screen).
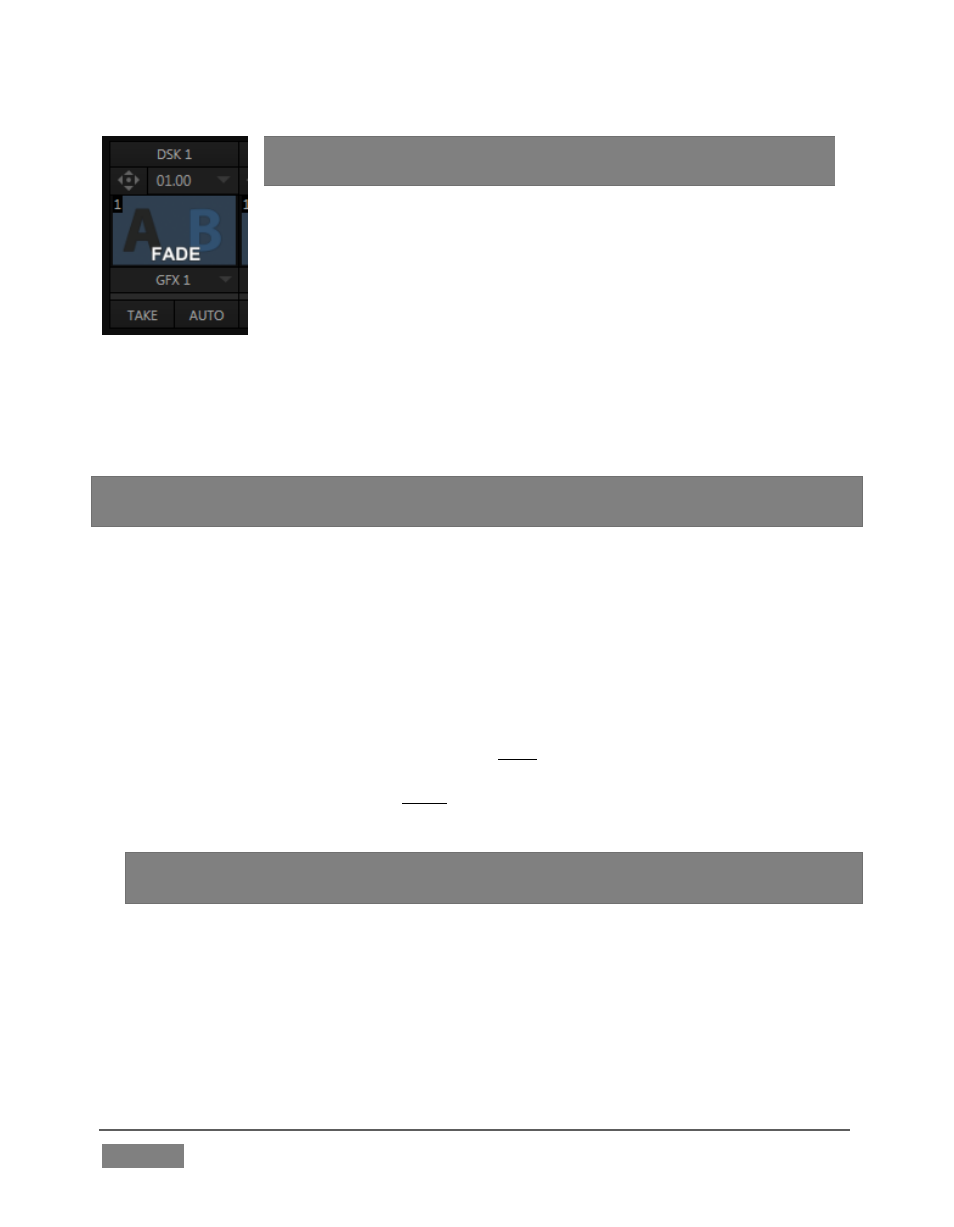
15. In the main Transition control group (Figure 57), click the label of the DSK 1
control. It will turn blue. The main transition controls, including the T-bar,
will now affect the DSK 1 video layer only.
16. Try it out by pressing the main Auto button; then press it again to re-display
DSK 1.
Hint: Note that the progress gauge beneath
DSK 1’s Take button shows that DSK 1
is fully displayed.
17. With the DSK 1 delegate button lit up, press Ctrl on your keyboard, and keep
it pressed while you click the button for DSK 2 – then release it.
Two Transition delegate buttons are now ‘lit’ – DSK 1 and DSK 2.
18. Click the main Auto button again.