Examples using plasma 1 and plasma 2, 7 – plasma setup – Hypertherm V9 Series Phoenix Rev.11 User Manual
Page 152

152
Phoenix 9.76.0 Installation and Setup Manual 806410
7 – Plasma Setup
In general, follow these guidelines for using Plasma 1 and 2 on the CNC:
In a single-torch cutting system, you need only Plasma 1 for Station 1.
In a multiple-torch cutting system where the torches cut parts using the same process and cut chart, select only
Plasma 1.
In a multiple-torch system where the torches are from different plasma supplies, you need to select Plasma 1 and
Plasma 2 so that the CNC makes a second cut process and cut chart available.
Use both Plasma 1 and Plasma 2 when the part program calls for two different cutting processes. For example, the
part program cuts the detail portions of a part with a low amperage consumable and then automatically switches to a
higher amperage consumable to cut the part contour. This type of part program would require two torches: One torch
has a low amperage consumable set while the second torch has a high amperage consumable set. Therefore, use
Plasma 1 for the low amperage cut chart and Plasma 2 for the high amperage cut chart.
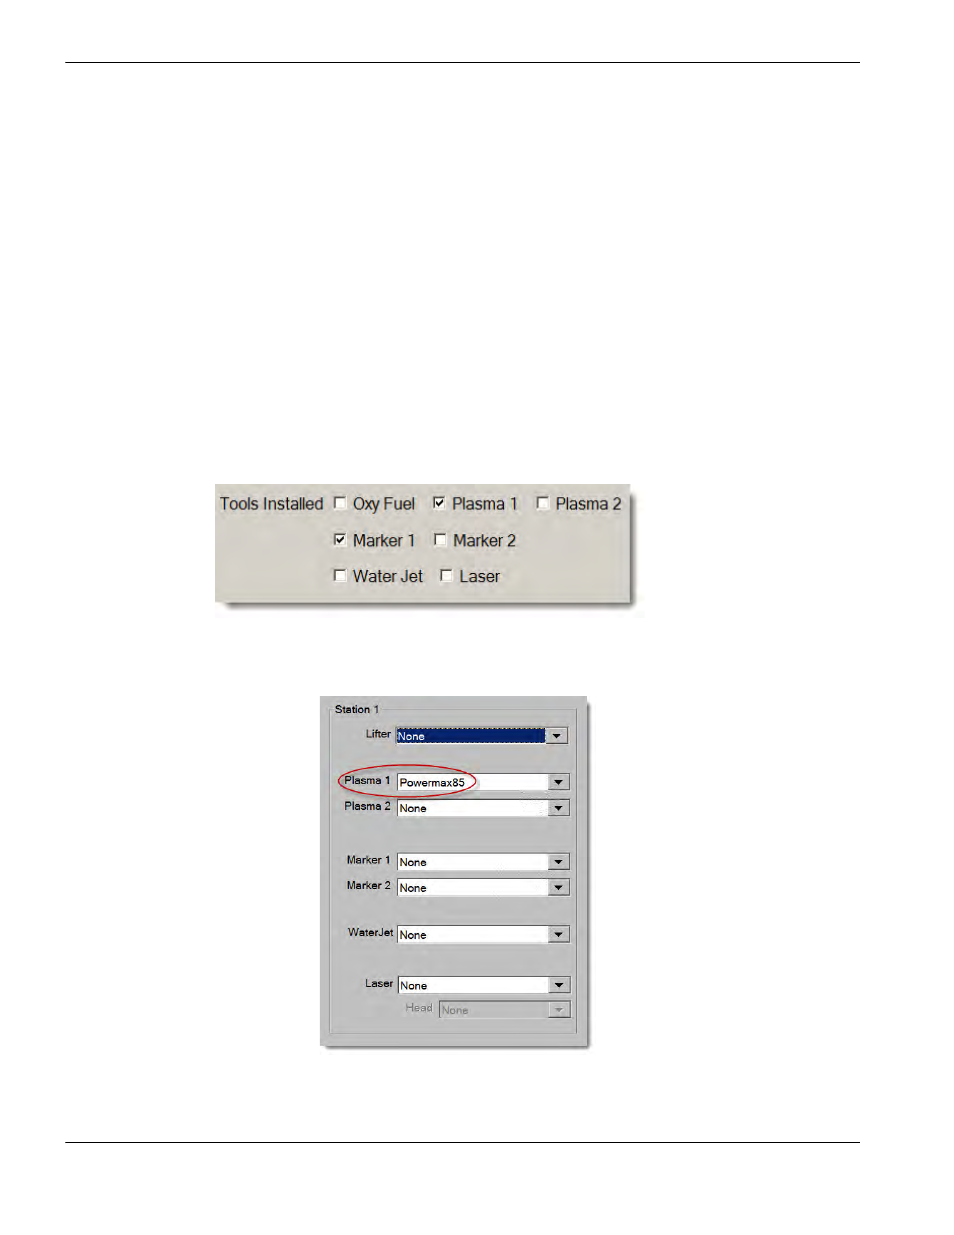
Examples using Plasma 1 and Plasma 2
To set up single torch Powermax85
®
system, follow these general steps on the CNC:
First, in the Special Setups screen, select only Plasma 1.
In the Station Configuration screen, choose the torch height control on the cutting station for the lifter. Next, assign the
Powermax85 to Station 1.