ATEIS UAPg2 User Manual
Page 61
UAPG2 MANUAL
Version EN.24
61
Since there are many combinations audio boards can be fitted or omitted, let's just take a detailed
look to the configuration of the UAPG2 0808. Configurations of other machines are made
respectively to their I/O boards fitted similar to the following instructions below.
By default the UAPG20808 comes with the following boards fitted:
o
Slot A:
Analogue Input
o
Slot B:
Analogue Output
o
Slot C:
Analogue Input
o
Slot D:
Analogue Output
Tips: If you are not sure about the hardware configuration of your UAPG2:
•
BLACK Audio connectors = OUTPUT,
•
GREEN Audio connectors = INPUT
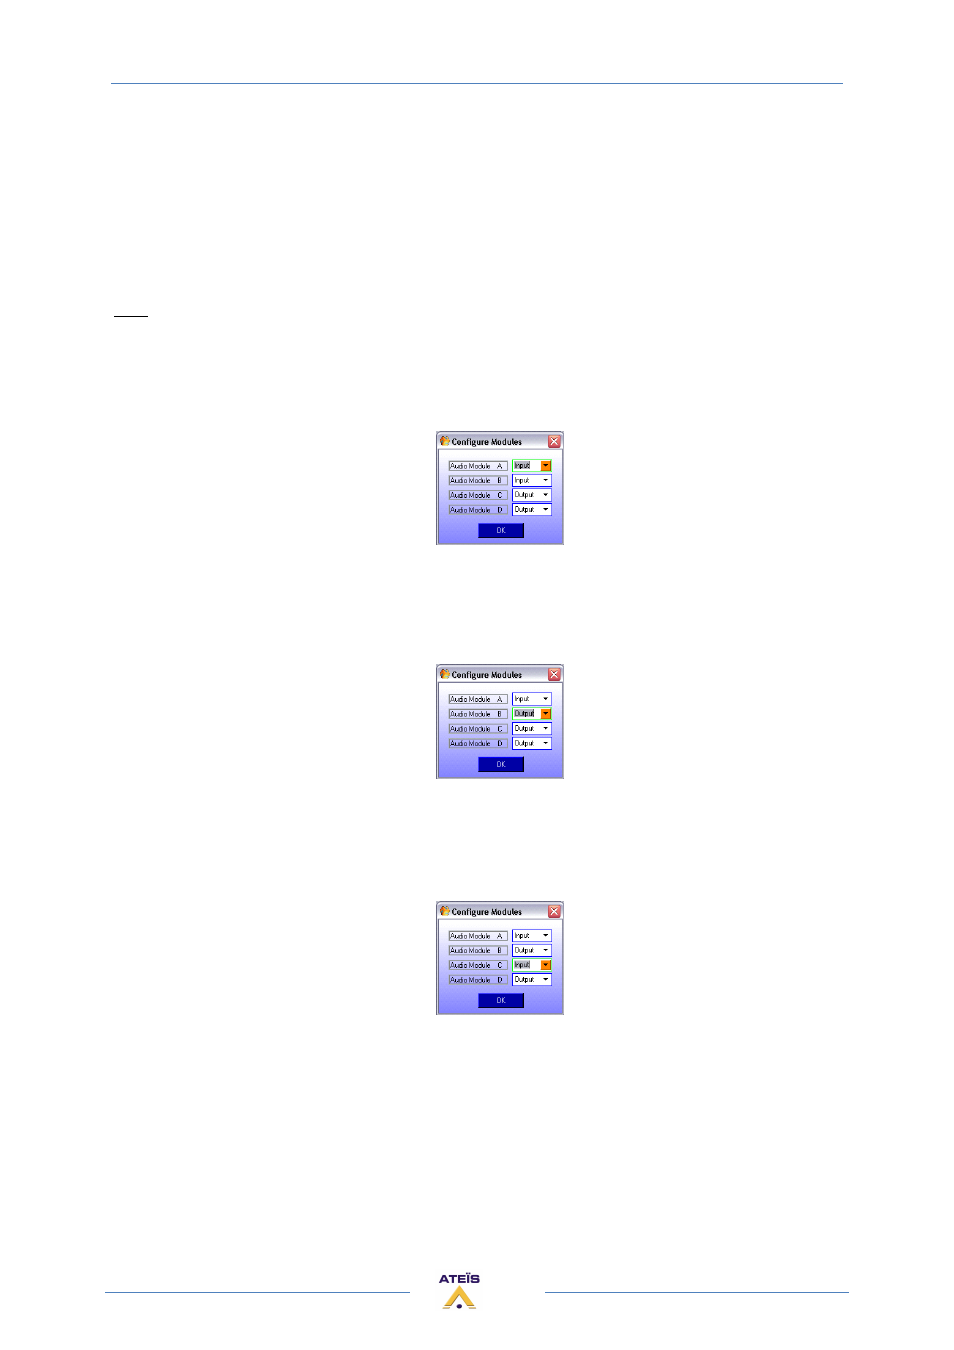
To choose these settings you can click into the scroll menu and select the corresponding board. But
there is a much more efficient way to do this:
•
Press the [Tab] key on your keyboard.
The scroll menu of 'Audio Module A' is highlighted allowing you to select the audio board type by
using the keyboard's arrow keys. As the UAPG20808 comes with an analogue input board fitted to
slot 'A' no action is required.
•
To go on press the [Tab] key on your keyboard again.
The schoolmen of 'Audio Module B' is highlighted.
•
As the UAPG20808 comes with an analogue output board fitted to slot 'B', select the audio board
type 'Output' using the keyboard's arrow key.
•
Go on pressing the [Tab] key on your keyboard.
The schoolmen of 'Audio Module C' is highlighted.
•
As the UAPG2 0808 comes with an analogue input board fitted to slot 'C', select the audio board
type 'Input' using the keyboard's arrow key.
•
Go on pressing the [Tab] key twice on your keyboard.
Since the setting of the 'Audio Module D' corresponds to the default UAPG20808 audio board
configuration no selection is necessary. Hit the [Tab] key a second time to activate the [OK] button.
Finish up the 'Configure Modules' dialogs by hitting [enter] or by clicking the [OK] button.