Printing a document secured with a, Pin (secure print)(p. 166), Step 1: sending secure data from a computer – Canon imageCLASS LBP674Cdw Wireless Color Laser Printer User Manual
Page 174
Printing a Document Secured with a PIN (Secure Print)
95W3-03U
With Secure Print, you can set a PIN to a document on the computer and send that document to the machine to be
printed. Printing is performed after that PIN is entered on the machine.
Secure Print can prevent unattended printed documents and information theft. You can also confirm the print data
before printing to prevent unwanted printing.
The print data sent with a PIN (secure data) is temporarily saved in the memory of the machine. If printing is not
performed after a set period of time, the secure data is deleted automatically from the memory, and you can no
longer print the data.
Step 1: Sending Secure Data from a Computer(P. 166)
Step 2: Printing Secure Data by Entering a PIN or Password(P. 168)
●
You can change the period of time that the secure data is saved. Changing the Time Period That Print
Data with a PIN (Secure Data) Is Saved(P. 169)
Step 1: Sending Secure Data from a Computer
You can send secure data from a computer to the machine using a printer driver.
In Windows, you can send encrypted secure data (using Encrypted Secure Print), thereby preventing eavesdropping
during communication. Secure data is encrypted with an alphanumeric password instead of a PIN.
For details about sending secure data using the Encrypted Secure Print function, see the manual of the driver at the
online manual site.
https://oip.manual.canon/
When Using Windows(P. 166)
When Using macOS(P. 167)
◼
When Using Windows
This section describes how to send regular secure data.
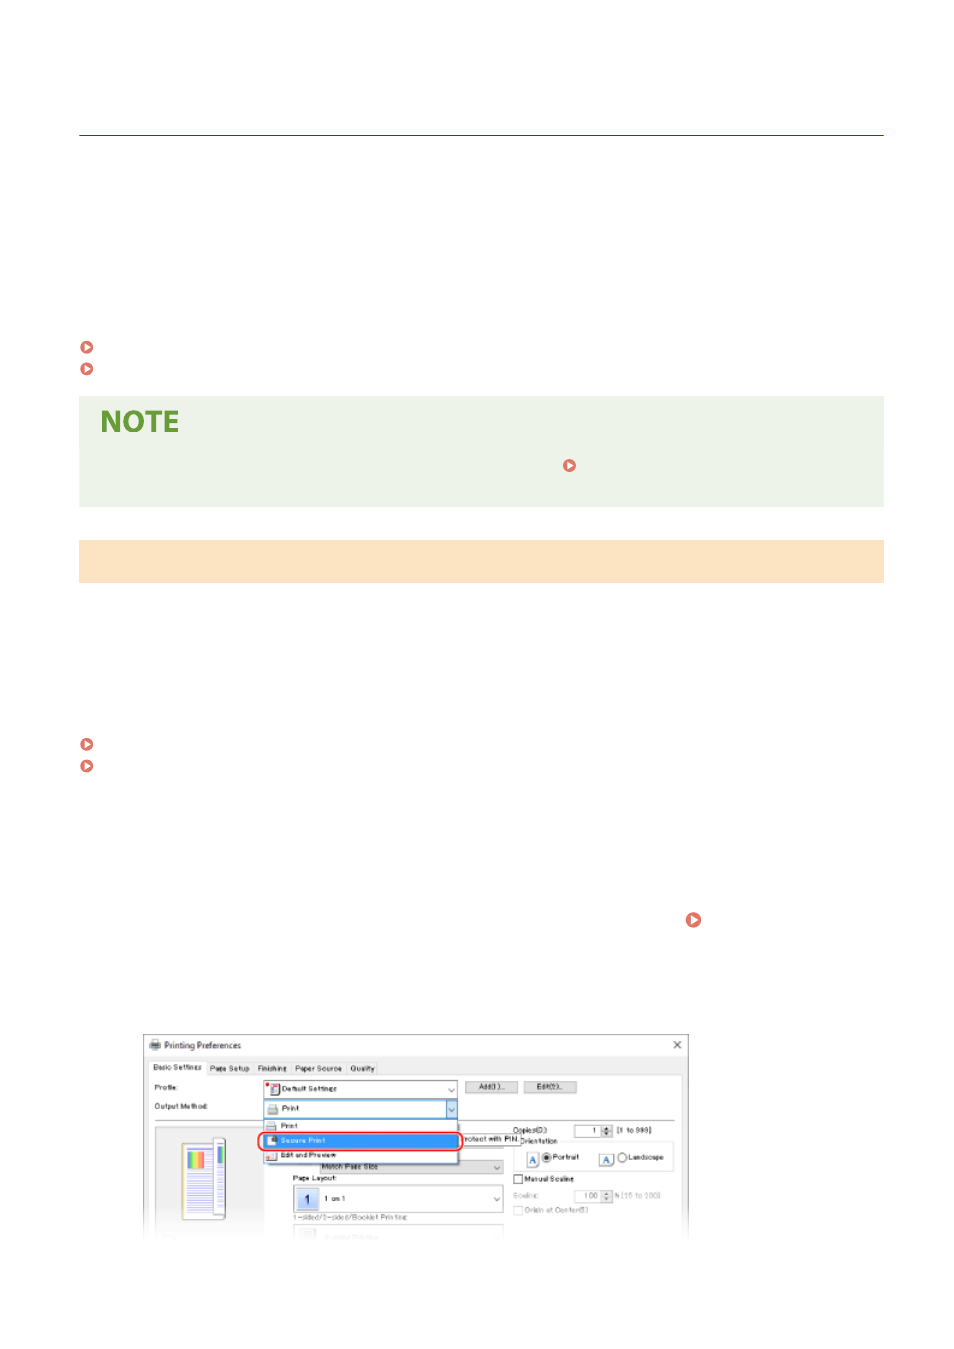
1
Display the [Printing preferences] screen of the printer driver. Printing from a
Computer(P. 161)
2
In [Output Method], select [Secured Print].
➠
The [Information] screen is displayed.
Printing
166