Tutorial #3: how to configure a display manually, Figure 25: display configuration – Daktronics Venus 1500 Ver 3.x User Manual
Page 35
The Venus 1500 Administrator
21
Tutorial
A display cannot be programmed if a network is not configured previously. Refer to Tutorial
#1 for instructions on configuring a network. Configuration settings may vary for every
installation.
Note: If a display has been configured through the Display Wizard, then the following steps
are unnecessary. Refer to Tutorial #4 for directions on configuring a display using the
Display Wizard.
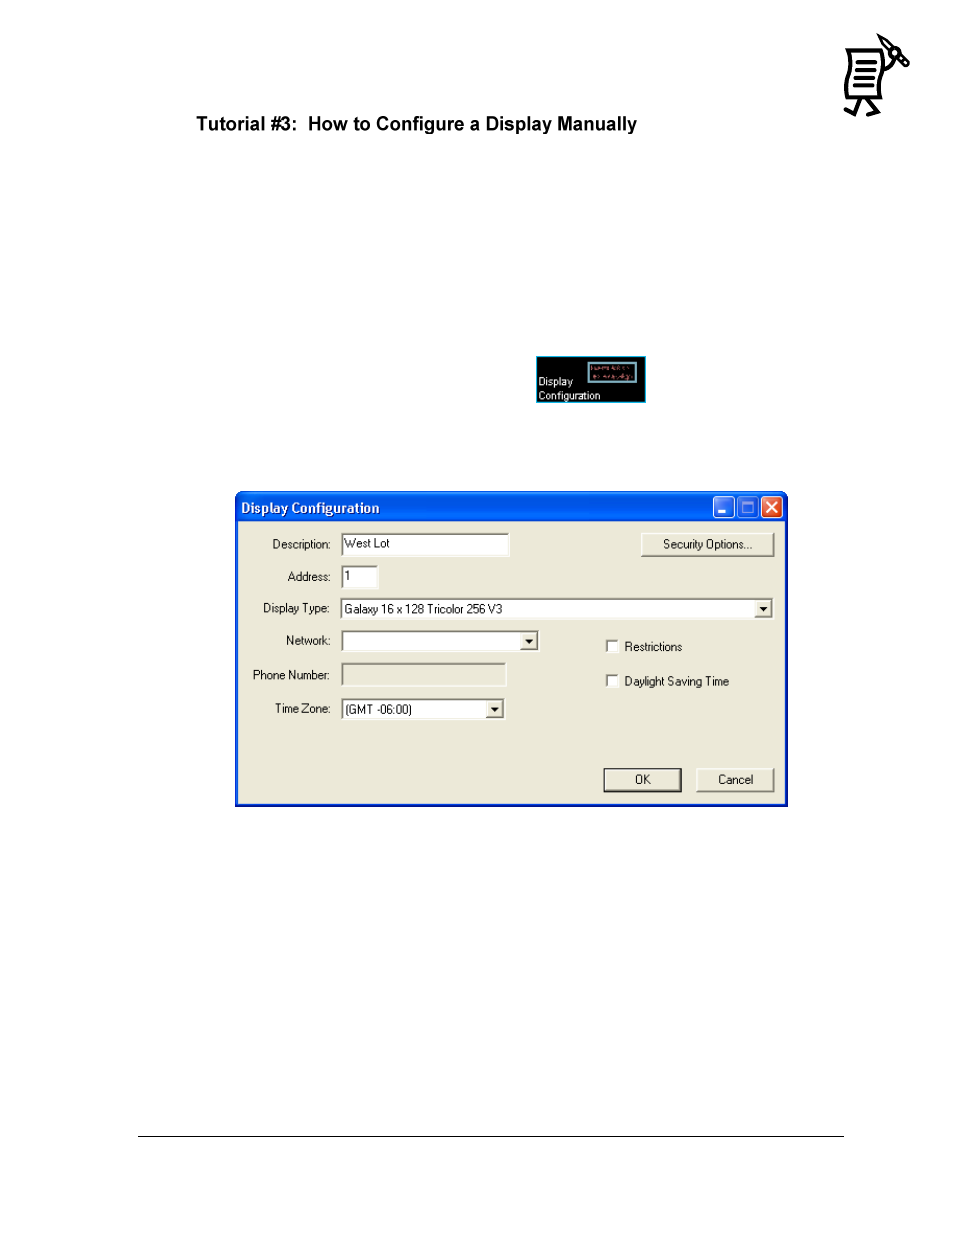
The Manual Display Configuration is used to set up communication with displays. The
following steps are instructions for configuring a display:
1.
Select the Display Configuration button
in the Venus 1500
Administrator.
2.
From the Edit menu, select New > Display. The Display Configuration dialog box
appears (Figure 25).
3.
Enter a Description for the display. This can be a number or a brief description of its
location. In the example, the display was named ―West Lot.‖
4.
Enter ―1‖ for the display’s network Address.
5.
From the drop-down menu for Display Type, choose the appropriate type.
6.
Select the type of network that has already been configured.
7.
If the display has a modem, enter the Phone Number of the modem. If not, the field
will be disabled (grayed).
8.
Select the correct time zone for the display by clicking on the down arrow.
9.
If restrictions need to be applied, check the restrictions box. Refer to Tutorial #13 for
information on setting restrictions.
10.
Select the Daylight Saving Time box if the time needs to be adjusted automatically
during this period of the year.
Figure 25: Display Configuration