A post-miostrip, pre-haloverb insert – Metric Halo Mobile I/O User Manual
Page 179
MIO Console Overview
179
• Send To: This menu shows the available output connections.
• Return From: This menu shows the available input connections.
• Bypass: When the I/O insert is bypassed, signal will continue to be routed to the “Send To” output,
and the original audio will passed unmodified to the next insert slot. Any audio present on the “Return
From” input will be ignored.
Connections that are already in use (for example, outputs used in the Monitor Controller) will be unavailable.
There are three ways to use the I/O insert:
• Send and return: Select the “Send To” destination and the “Return From” source. Audio will be routed
to the “Send To” output and be received from the “Return From” input, interrupting the original audio
and creating a virtual insert point in that slot.
• Send only: Set the “Send To” for whatever output you need, and leave the Return From set to “Thru”.
The audio will be sent to the selected output and will also pass through the strip. This essentially uses
the I/O insert as another direct output.
• Return only: Set the “Return From” to the desired input, and leave the “Send To” set to “No Send”. The
audio will be received from the selected input and will replace the audio from the strip's source. This
allows you to override the strip's source and route audio from one source through the processing and
routing of another.
One of the most common uses of the I/O insert is to create a virtual insert point for using external devices.
As an example, let's look at how to insert an external analog processor on a channel. We'll connect the
processor using Analog 3/4:
1. In the channel strip, insert the “I/O” plug-in.
2. Select “Analog 3/4” in the “Send To” menu and connect the Analog 3/4 outputs to the inputs
of your device.
3. Select “Analog 3/4” in the “Return From” menu and connect the outputs of your device to the
Analog 3/4 inputs of the interface.
4. Adjust the input and output gains in the I/O Control tab of the Console window for the proper
send and return levels.
The flexibility of the I/O insert allows you to accomplish more advanced routing with less mixer channels:
• The I/O insert can be instantiated anywhere in the insert slots, so it can be used to route audio pre-
some effects and post- others.
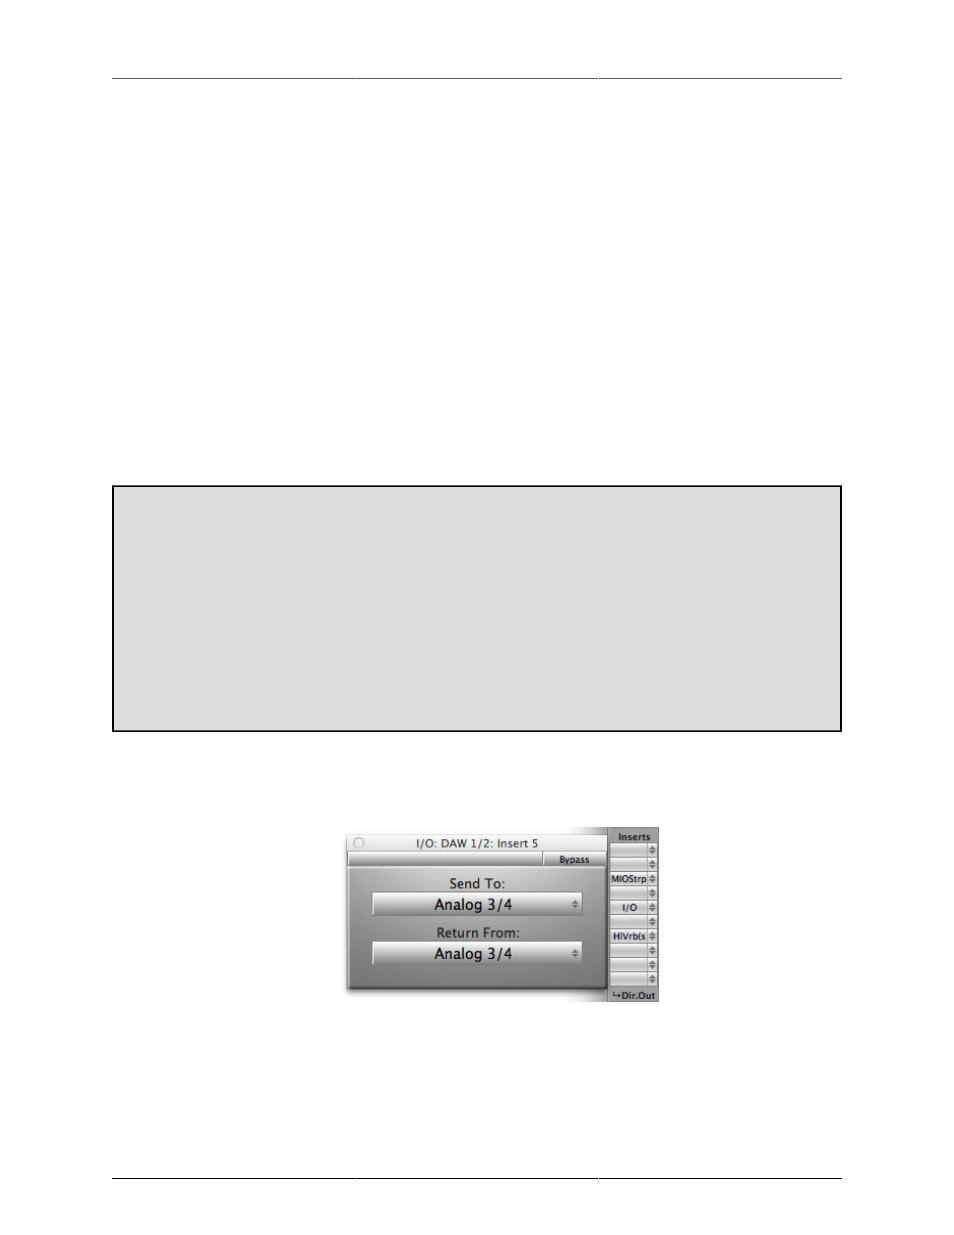
Figure 11.43: A post-MIOStrip, Pre-HaloVerb insert
This same configuration could be used as a send-only, to provide an output that includes MIOStrip but
not HaloVerb by selecting “Thru” in the “Return From” menu.
• Instantiate the I/O insert after a MIOLimit as a second post-insert direct out to feed two external recorders
while tracking.