The lio-8 and surround, Surround mixer – Metric Halo Mobile I/O User Manual
Page 41
LIO-8 Quick Start Guide
41
You should now be in a good position to fire up a native DAW and put the LIO-8 through its paces. Select the
LIO-8 as your audio interface; the analog inputs will be inputs 1-8, digital inputs will be 9-16 (as determined by
the FW channel assignments). Send your DAW’s signal to outputs 1/2 and it will come into the LIO-8 on DAW
1/2. By using the FW channels to send audio to your DAW and the DAW input returns from your computer
you have a virtual patchbay to route audio between your DAW and the LIO-8.
The LIO-8 and surround
If you’re working in surround, it’s easy to configure the LIO-8 for monitoring and processing. Go to the Mixer
menu and select “Configure Mixer”. At the top of the pane you’ll see the “Main” bus, which is stereo and a
Master. Master busses are routed to outputs, while Aux busses are routed back into Master busses (for returns,
subgroups, etc. ). If you click on the bus type you can change it from “Stereo” to whatever width you need ;
let’s say you’re working in 5.1. Select “5.1” and hit configure. Voila! All the mono channels now have joysticks
instead of pan knobs, and the Main bus is automatically routed to Analog 1-6. Your DAW is still coming in on
two channels, but that’s easy to change. Go to the top of the DAW 1/2 channelstrip and click on the assignment
pulldown. You have the choice of a mono channel, or a 6 channel strip. By selecting DAW 1-6, your audio will
come into the LIO-8 as positioned by your host. Your other choice would be to make this channel mono, and
add five more channelstrips via the Mixer menu. This way you can position your audio with the MIO Mixer.
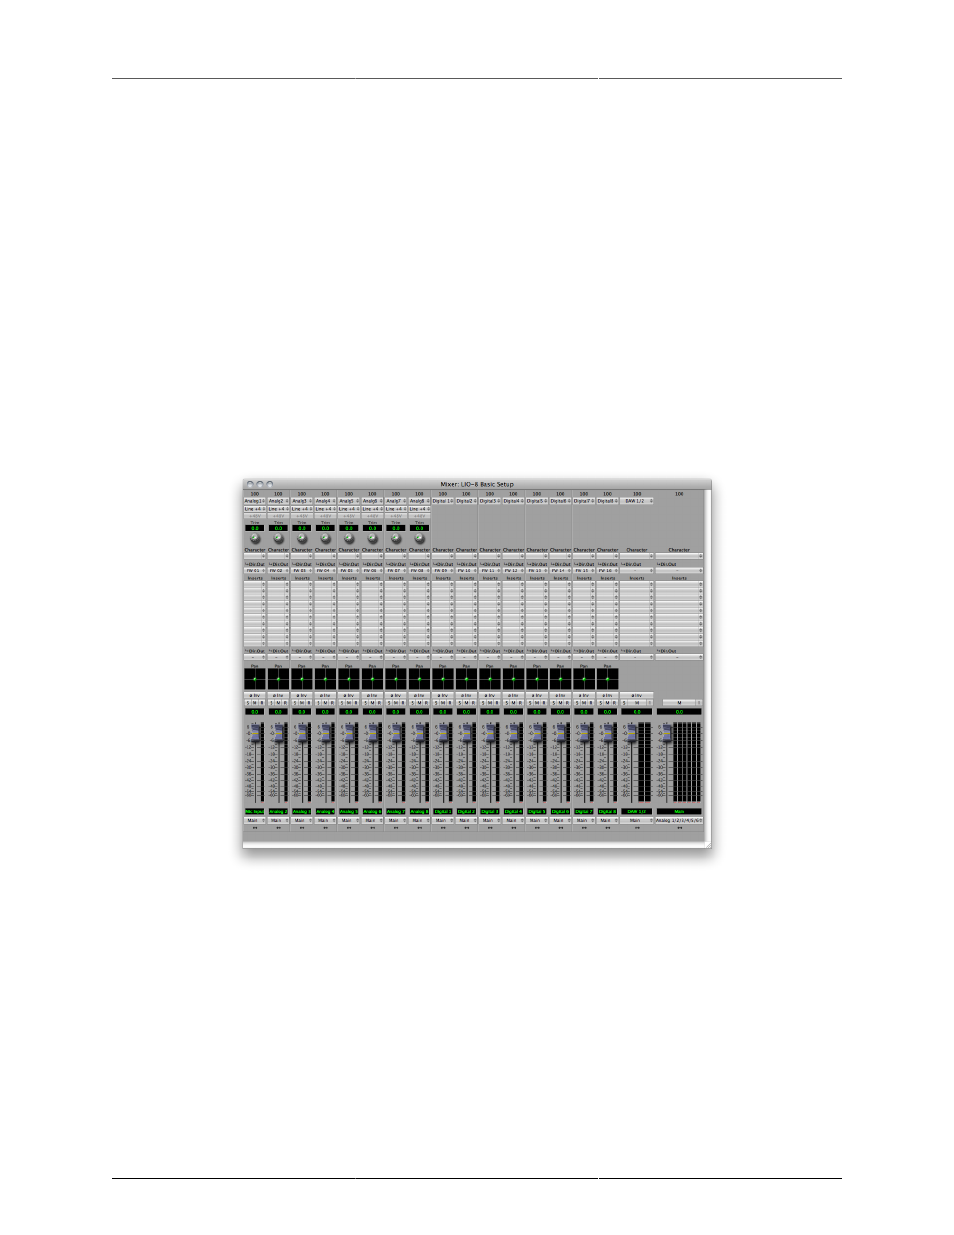
Figure 3.5: Surround Mixer
To make it easier to monitor in surround, let’s use the Monitor Controller. Click on the assignment pulldown at
the bottom of the Main bus and select “N/C” to remove the assignment to the analog outs. Now hold down the
shift key and click the pulldown again; the Main bus was “multed” to the headphones in the template which
means it was routed to Analog 1/2 and the Cans at the same time. Now that we’re working in surround, the
Cans aren’t as useful. By holding down Shift and clicking on the Cans-Digital 4 line, we clear the mult. Now
click on the pulldown one more time and select “Add to Monitor Controller”. Go to the Window menu and
select “Show Monitor Control Window”.
The Monitor Controller shows the Main bus is the Monitor Source, but we need to define an output. Click the
“Configure” button to open the MC pane. Click “+” under Monitor Paths and you’ll have the option to add a
Monitor Output. Give the path a name (like “Surround”) and select 5.1 as the bus type. Now you can assign