Monitor control interface and basic operation, Monitor controller window – Metric Halo Mobile I/O User Manual
Page 190
Monitor Controller
190
3. Click the ‘+’ button in the Monitor Paths section at the bottom of the Configure Monitor Controller
sheet. The Add Monitor Output dialog appears.
4. Enter the name of the new Monitor Output Path.
5. Select the Bus Type of the new Monitor Output Path.
6. Click OK. The new path will appear in the Monitor Path list.
7. Click the pop-up menu in the “Output” column for the Left Channel of the path. Select the appropriate
output channel from the list. This includes Physical Outputs and Firewire channels.
8. Repeat step 7 for each of the channels that make up the bus.
9. Click Ok. The Monitor Controller now has your Bus Output configured as its Monitor Source, and the
Output Path configured above.
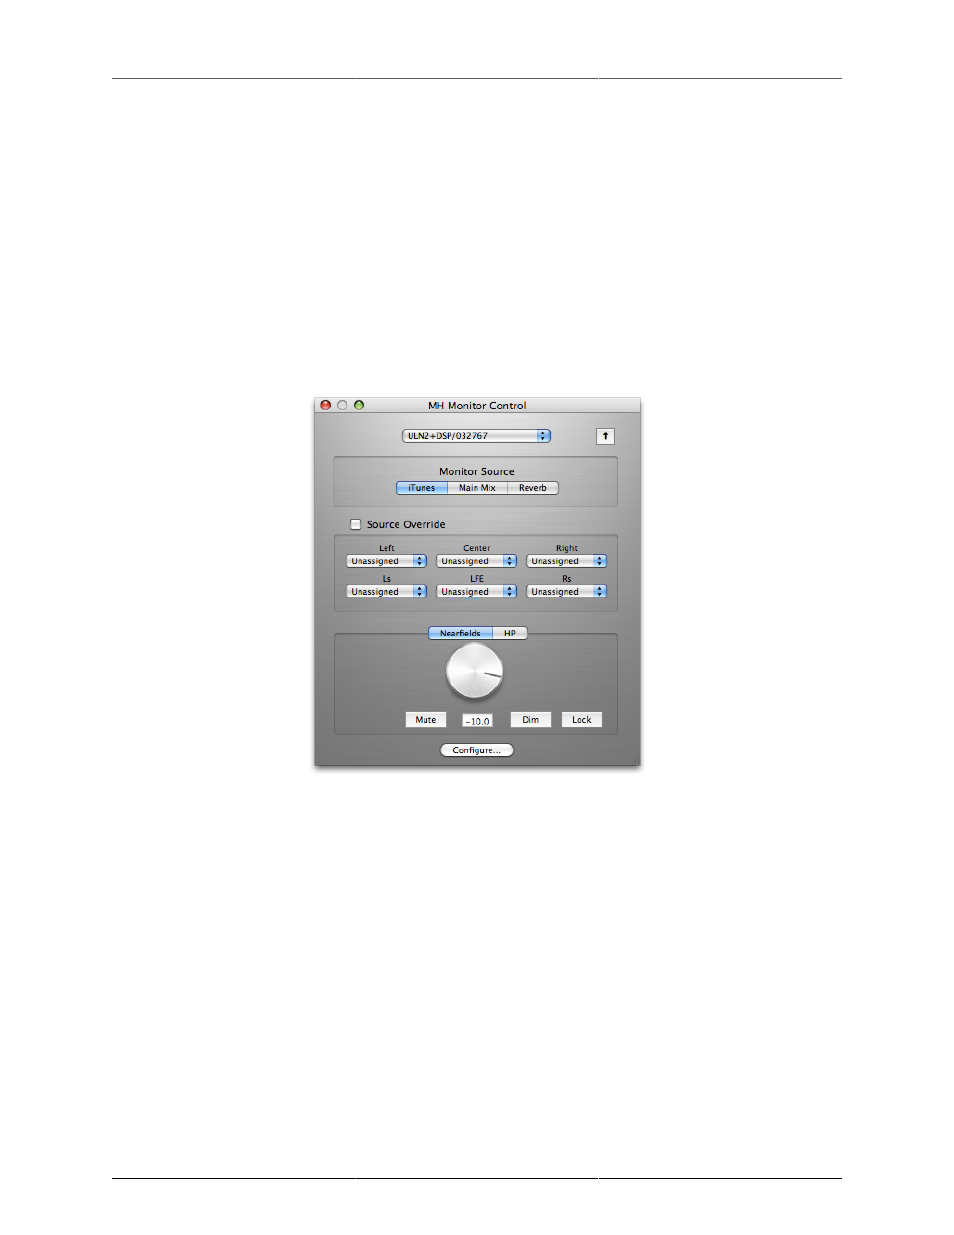
Monitor Control Interface and Basic Operation
The Monitor Control window interface has four sections:
Figure 12.2: Monitor Controller Window
• Global Functions: Includes Mobile I/O selection pop-up menu, Utility and Configure buttons
• Monitor Source: Includes tabs to select between defined Monitor Sources
• Source Override: When this box is checked, the sources selected in the Source Override pop-up menu
will be routed to the Output Path instead of the selected Monitor Source.
• Output Section: Includes tabs to select between defined Output Paths as well as the monitor controls
themselves.
In order to use the Monitor Controller, you’ll need to do the following:
1. Configure one or more Monitor Sources
2. Configure one or more Monitor Output Paths
3. Select a Monitor Source to monitor
4. Select an Output Path for your monitored signal
After completing these tasks, you can use the Monitor Control window to control all the monitoring functions
for the selected Monitor Source, which you will hear via the selected Output Path.