Display a preview image – Kyocera TASKalfa 2552ci User Manual
Page 88
2-21
Installing and Setting up the Machine > Touch Panel
3
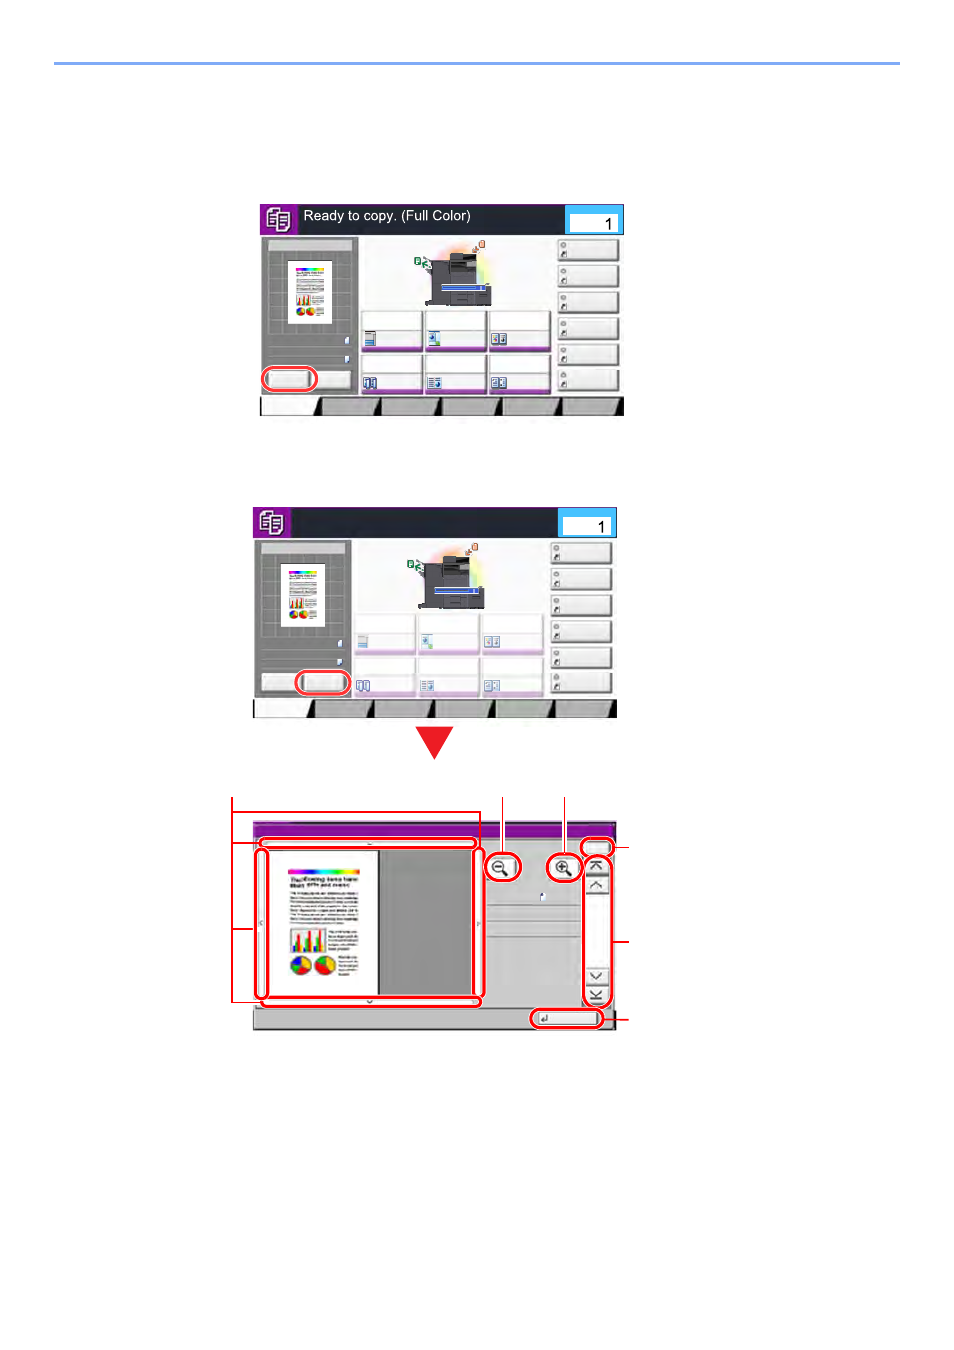
Display a preview image.
1
Select [Preview].
The machine starts scanning the original. When scanning is completed, the preview image
appears on the panel.
2
Select [Detail].
You can check the finished image in greater detail.
1 In magnified view, you can
move the range of display.
2 Zoom out.
3 Zoom in.
4 In multiple-page documents,
you can change pages by
entering the desired page
number.
5 In multiple-page documents,
you can use these buttons to
change pages.
6 Close the Preview screen.
Color/
Image Quality
Org./Paper/
Finishing
Quick Setup
Layout/Edit
Advanced
Setup
Shortcut 1
Shortcut 4
Shortcut 3
Shortcut 2
Shortcut 6
Shortcut 5
Program
:
:
:
100%
A4
A4
Preview
Original
Zoom
Paper
Preview
Proof Copy
c010101_01
Staple
/Punch
Normal 0
Color
Selection
Paper
Selection
Auto
Zoom
100%
Off
1-sided
>>1-sided
Duplex
Off
Combine
Copies
Color/
Image Quality
Org./Paper/
Finishing
Quick Setup
Layout/Edit
Advanced
Setup
Shortcut 1
Shortcut 4
Shortcut 3
Shortcut 2
Shortcut 6
Shortcut 5
Program
:
:
:
100%
A4
A4
Cancel
Original
Zoom
Paper
Preview
Detail
c010101_03
Staple
/Punch
Normal 0
Color
Selection
Paper
Selection
Auto
Zoom
100%
Off
1-sided
>>1-sided
Duplex
Off
Combine
Copies
Press Start key to start printing.
Press [Cancel] to change settings.
Close
Preview:
No.
1/6
2015101010574501
Status
Size
Density
Color
:
:
: Full Color
Normal 0
A4
100%
c0301
1
2
3
4
5
6