Enabling the dhcp relay agent on an interface, Enabling the dhcp relay agent, On an interface – H3C Technologies H3C WX3000E Series Wireless Switches User Manual
Page 199: D in, Table 74
183
Table 74 Configuration items
Item Description
Server Group ID
Enter the ID of a DHCP server group.
You can create up to 20 DHCP server groups.
IP Address
Enter the IP address of a server in the DHCP server group.
The server IP address cannot be on the same subnet as the IP address of the DHCP
relay agent. Otherwise, the client cannot obtain an IP address.
Enabling the DHCP relay agent on an interface
1.
Select Network > DHCP from the navigation tree.
2.
Click the DHCP Relay tab to enter the page as shown in
3.
In the Interface Config field, click the
icon of a specific interface to enter the page as shown
in
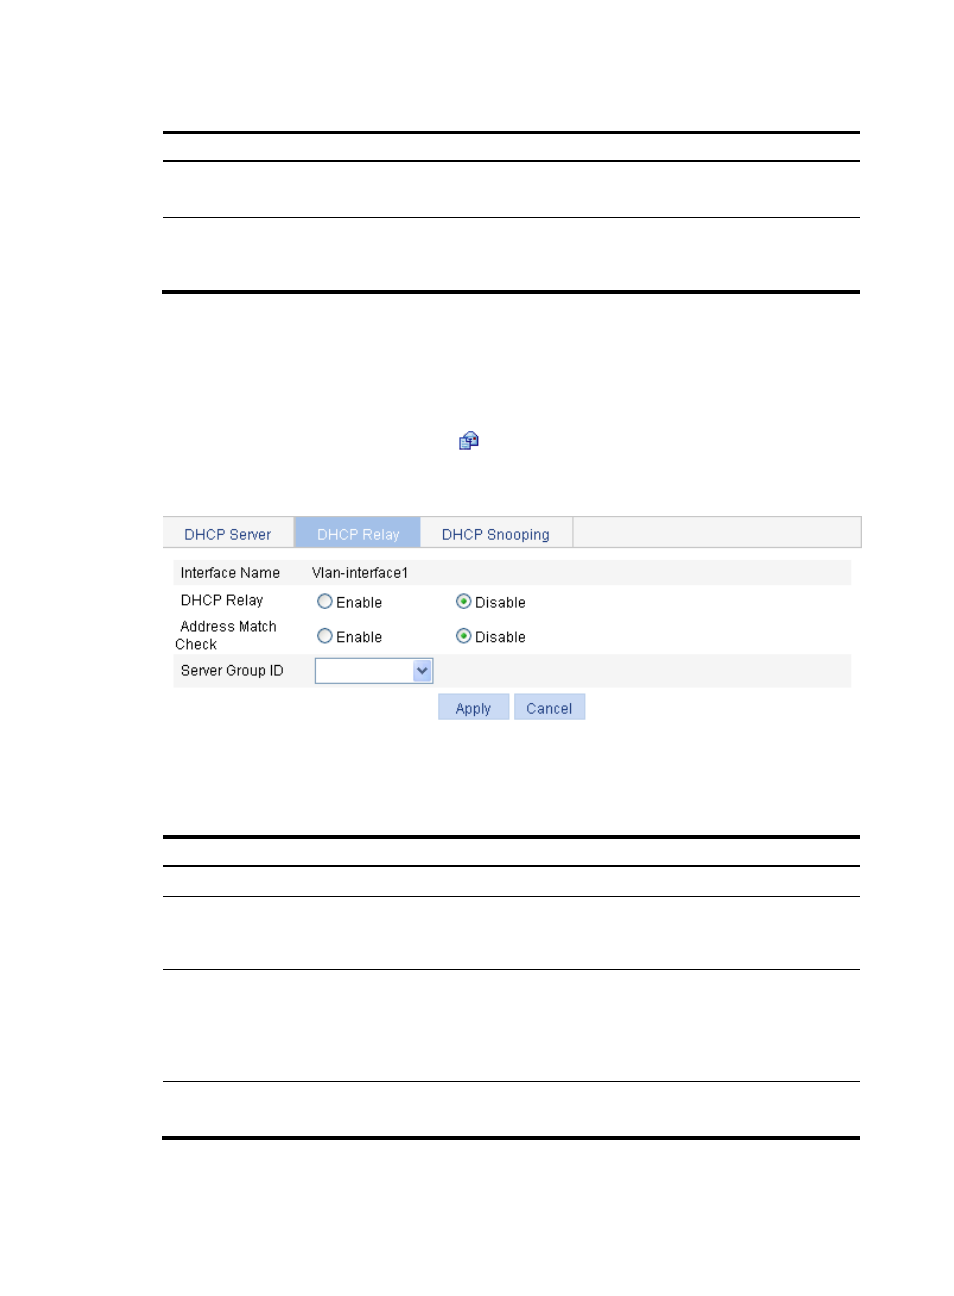
Figure 163 Configuring a DHCP relay agent interface
4.
Configure the parameters as described in
.
5.
Click Apply.
Table 75 Configuration items
Item Description
Interface Name
This field displays the name of a specific interface.
DHCP Relay
Enable or disable the DHCP relay agent on the interface.
If the DHCP relay agent is disabled, the DHCP server is enabled on the
interface.
Address Match Check
Enable or disable IP address check.
With this function enabled, the DHCP relay agent checks whether a requesting
client's IP and MAC addresses match a binding (dynamic or static) on the
DHCP relay agent. If not, the client cannot access outside networks via the
DHCP relay agent. This prevents invalid IP address configuration.
Server Group ID
Correlate the interface with a DHCP server group.
A DHCP server group can be correlated with multiple interfaces.