Configuration guidelines, 1+n backup configuration example, Network requirements – H3C Technologies H3C WX3000E Series Wireless Switches User Manual
Page 606: Configuring ac 1
590
The value for the State field becomes Running, which indicates that Client is connecting to AC
2 through an active link.
4.
When AC 1 recovers, AC 2 still acts as the active AC and AC 1 becomes the standby AC. AC 1
establishes a backup link with the AP and backs up the client status.
Configuration guidelines
•
The wireless services configured on the two ACs should be consistent.
•
Specify the IP address of the backup AC on each AC.
•
AC backup has no relation with the access authentication method; however, the authentication
method of the two ACs must be the same.
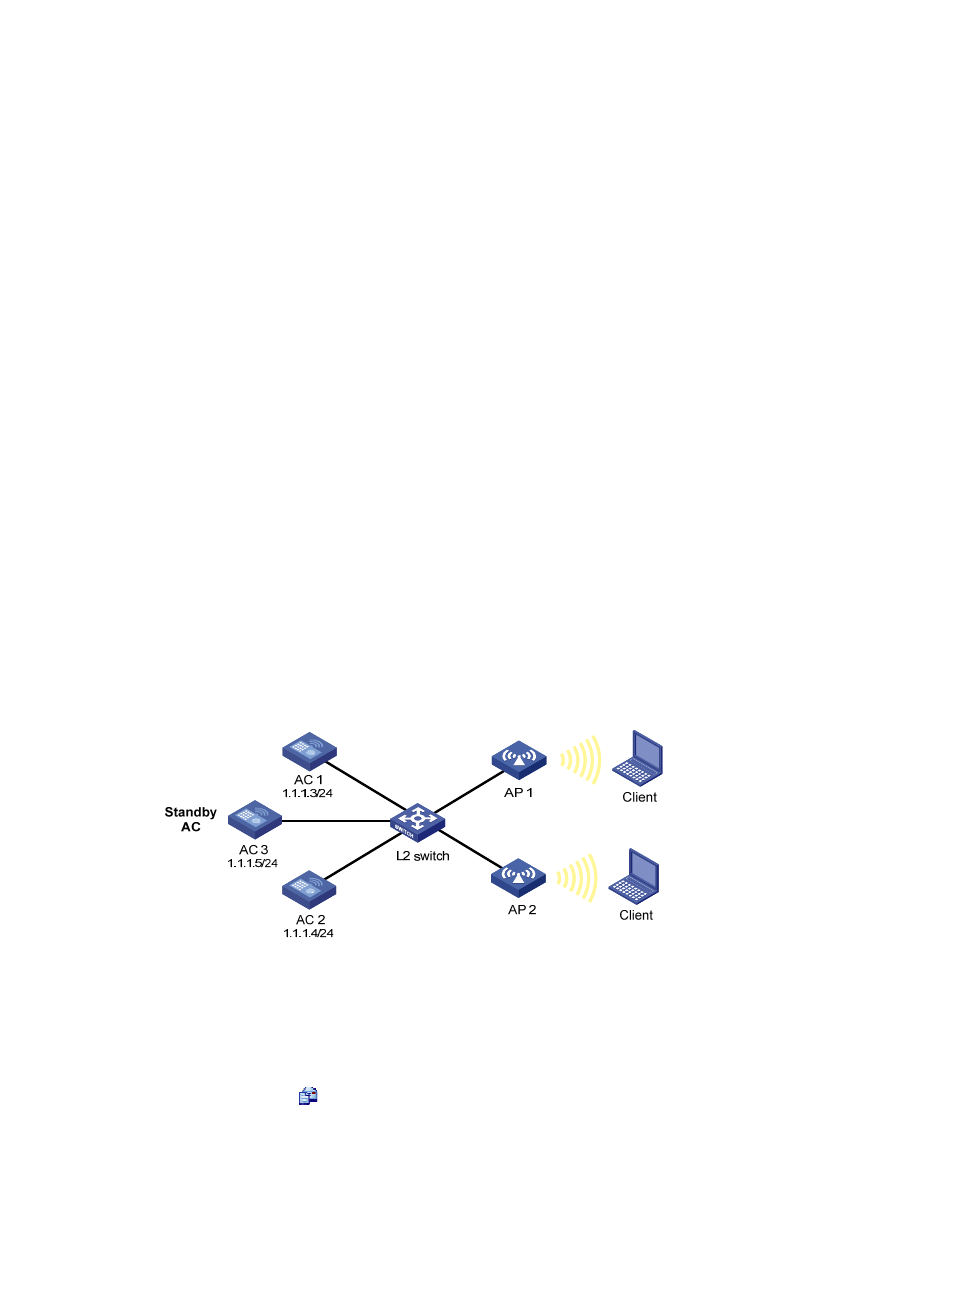
1+N backup configuration example
Network requirements
As shown in
, AC 1 and AC 2 are active ACs and AC 3 acts as the standby AC. When an
active AC fails, AC 3, the standby AC, takes over to provide services. As soon as the active AC recovers,
the AP connects to the original active AC again.
•
AP connects to AC 1, AC 2, and AC 3 through a Layer 2 switch. The IP addresses of AC 1, AC 2 and
AC 3 are 1.1.1.3, 1.1.1.4, and 1.1.1.5 respectively.
•
Assign the highest AP connection priority of 7 on AC 1 and AC 2, to make sure AP 1 establishes
a connection with AC 1, and AP 2 establishes a connection with AC 2.
•
If any of the two active AC is down, AC 3 becomes the new active AC.
•
When the faulty AC recovers, AP that connects to AC 3 automatically connects to the original active
AC. This is because the AP connection priority on the active AC is the highest. In this way, AC 3 can
always act as a dedicated standby AC to provide backup services for AC 1 and AC 2.
Figure 625 Network diagram
Configuring AC 1
1.
Configure AC 1 so that a connection is set up between AC 1 and AP 1.
For more information about configurations, see "Configuring access services."
2.
Select AP > AP Setup from the navigation tree.
3.
Click the icon
corresponding to the target AP to enter the configuration page.
4.
Expand Advanced Setup.
5.
Set the connection priority to 7.
6.
Click Apply.