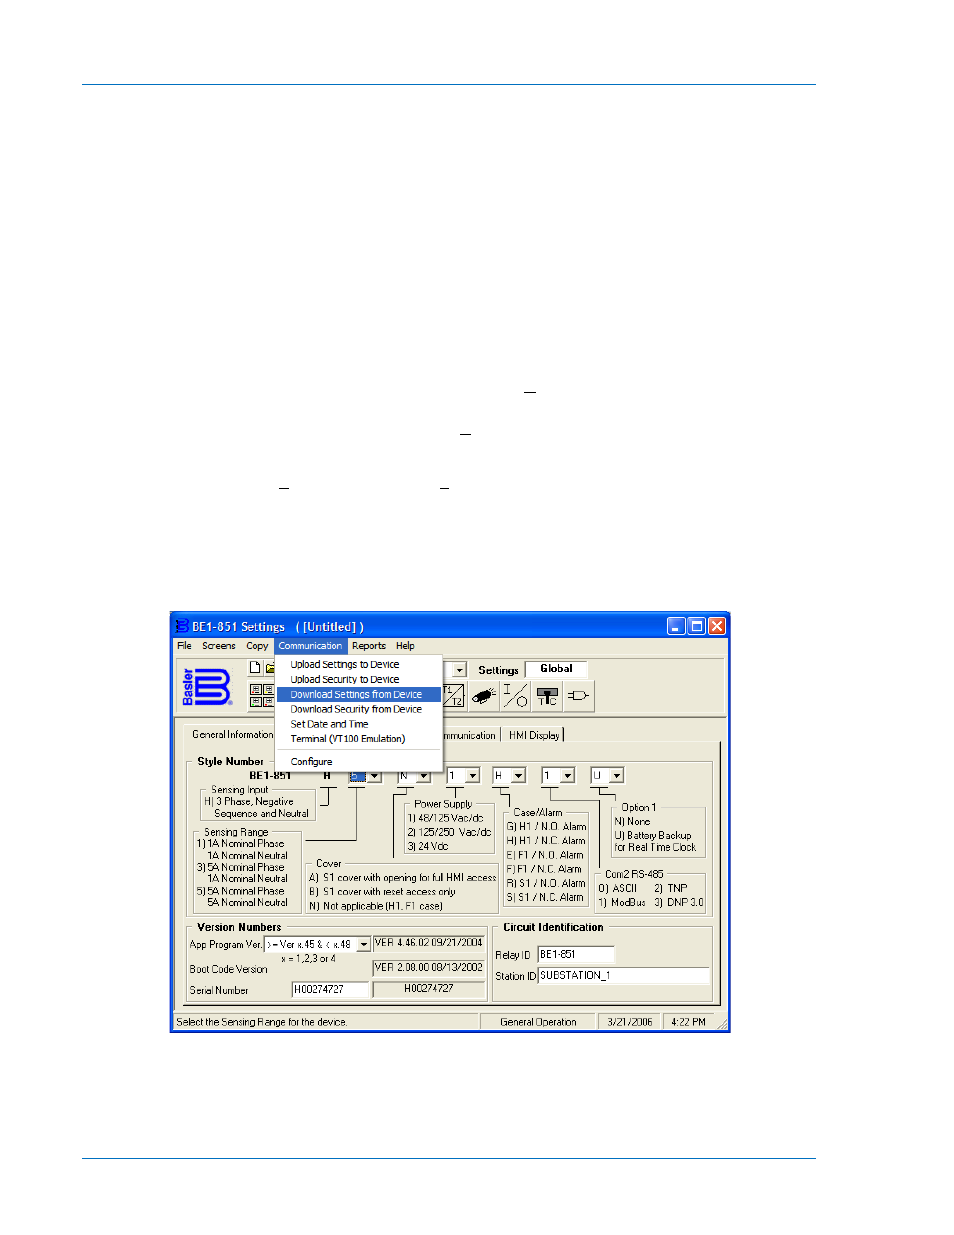
Getting started, Getting started -6, Figure 2-2. communications pull-down menu -6 – Basler Electric BE1-851 User Manual
Page 36
Getting Started
Refer to Section 12, Installation, for typical external connection diagrams. If your relay has power supply
option 1 or 2, it can be supplied by normal 120 Vac house power. These two power supply options (1 and
2) are the midrange and high range AC/DC power supplies. The contact sensing inputs are half-wave
rectified opto-isolators. The default contact recognition and debounce settings enable their use on ac
signals as well as dc signals.
The relay measures the A phase, B phase, and C phase current magnitudes directly from the three
current sensing inputs on Circuit #1 (this is dependent on style configuration). Circuit #2 measures the A
phase, B phase, and C phase current magnitudes directly from the three current sensing inputs. The
neutral and negative sequence magnitudes are calculated from the fundamental component of each of
the three-phase currents. When evaluating the negative sequence functions, the relay can be tested
using a two-phase current source. To fully evaluate the operation of the relay in the power system, it is
desirable to use a three-phase current source.
Using a serial cable, connect a computer to the relays front RS-232 port. Install BE1-851 BESTCOMS
according to the procedure given in Section 14, BESTCOMS Software. Once BESTCOMS is installed,
apply power to the relay. From the Basler Electric program group on your windows Start menu, select
BESTCOMS for BE1-851 to start BESTCOMS. From the Communication pull-down menu, select
Configure and verify communication is configured correctly.
Once communication settings are correct, from the Communication pull-down menu select Download
Settings from Device (Figure 2-2). This command will transfer the relays current settings to the
BESTCOMS software, allowing the settings to be viewed easily in a windows environment. Before
continuing, select the Save As command from the File menu. The File Properties Screen for the file you
are saving will appear. Refer to Figure 2-3. Type in any comments about the file and select OK. The Save
As dialog box will appear. Give the file a unique name that you will recognize at a later date and select
Save. This action does not send the settings to the relay but rather saves them in a BESTCOMS settings
file with a .bst extension. Once saved, the settings file may be retrieved, modified, and transmitted to the
relay at any time.
Figure 2-2. Communications Pull-Down Menu
2-6
BE1-851 Quick Start
9289900990 Rev R