13 configure genlock, Configure genlock – NewTek TriCaster 300 User Manual
Page 51
Page | 35
3.13 CONFIGURE GENLOCK
1. If the Live Desktop isn’t already open, launch a TriCaster session from Startup.
2. Access the Output Configuration panel by clicking the Configure button (gear icon) that
appears at upper-right when you move the mouse over the main Program Output
monitor on the Live Desktop.
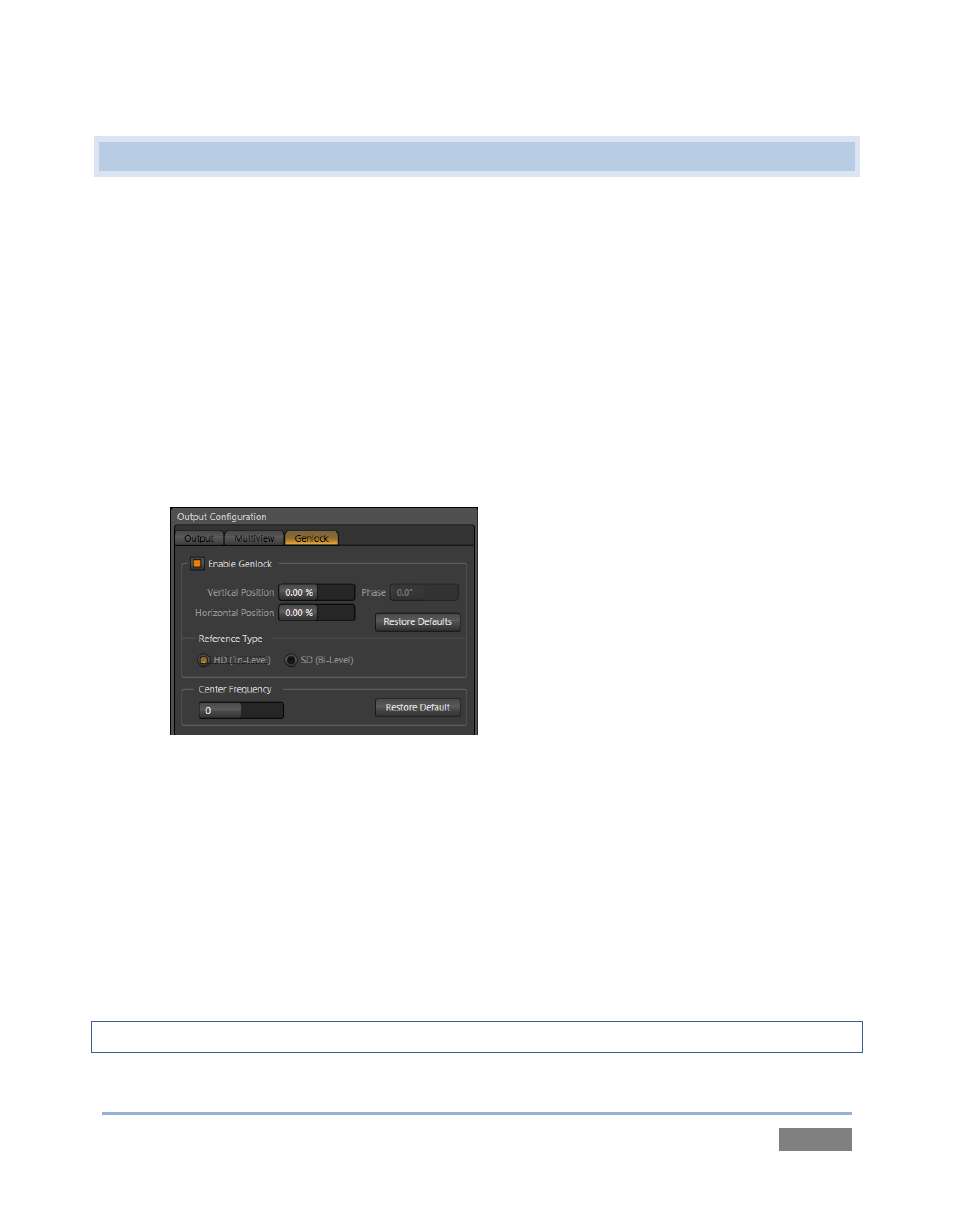
3. Click the Genlock tab in the Output Configuration panel (Figure 27).
4. The default Reference Type in the Genlock settings is SD (Bi-level), as this is currently the
most common reference signal type. However, if you supply an HD reference signal to
the Genlock input, you may want to change the setting to HD (Tri-level).
Figure 27
5. With the aid of downstream Waveform and Vector Scopes, adjust TriCaster’s Horizontal
and Vertical Position and Phase settings in the Genlock section of the I/O Configuration
panel.
Ideally both the cameras and the TriCaster™ should be genlocked. If they are not genlocked to
the same reference signal as the TriCaster™ output, a TBC (Time Base Correction) operation is
automatically applied. Time Base Correction may drop or insert occasional frames as necessary
to maintain sync, hence is a less desirable approach.
Note: For a deeper discussion of genlocking, please see Section 7.1.5.