Configuring cameras – NewTek TriCaster 300 User Manual
Page 67
Page | 51
The Preview row selection is normally cued up for the next Take (cut) or Transition operation.
Either operation, once completed, results in the original Program and Preview row selections
exchanging places. (Of course during a transition, portions of both the Program and Preview row
selections can be seen in varying amounts.)
The BKGD layer composition can include other content as well, as we’ll see later in Sections 4.9
(LiveMatte) and 4.10 (Virtual Inputs).
Hint: By default, selecting a tabbed module (DDR1, Still, etc.) on the Preview row automatically
shows the corresponding control panel in the tabbed panes below. Click the Desktop Options
button (gear), at extreme right just above the tabbed panes, to enable or disable this behavior.
CONFIGURING CAMERAS
Let’s try out some of these concepts, shall we?
(If you previously configured some cameras, feel
free to skip ahead to the next sub-heading – The
Utility Row).
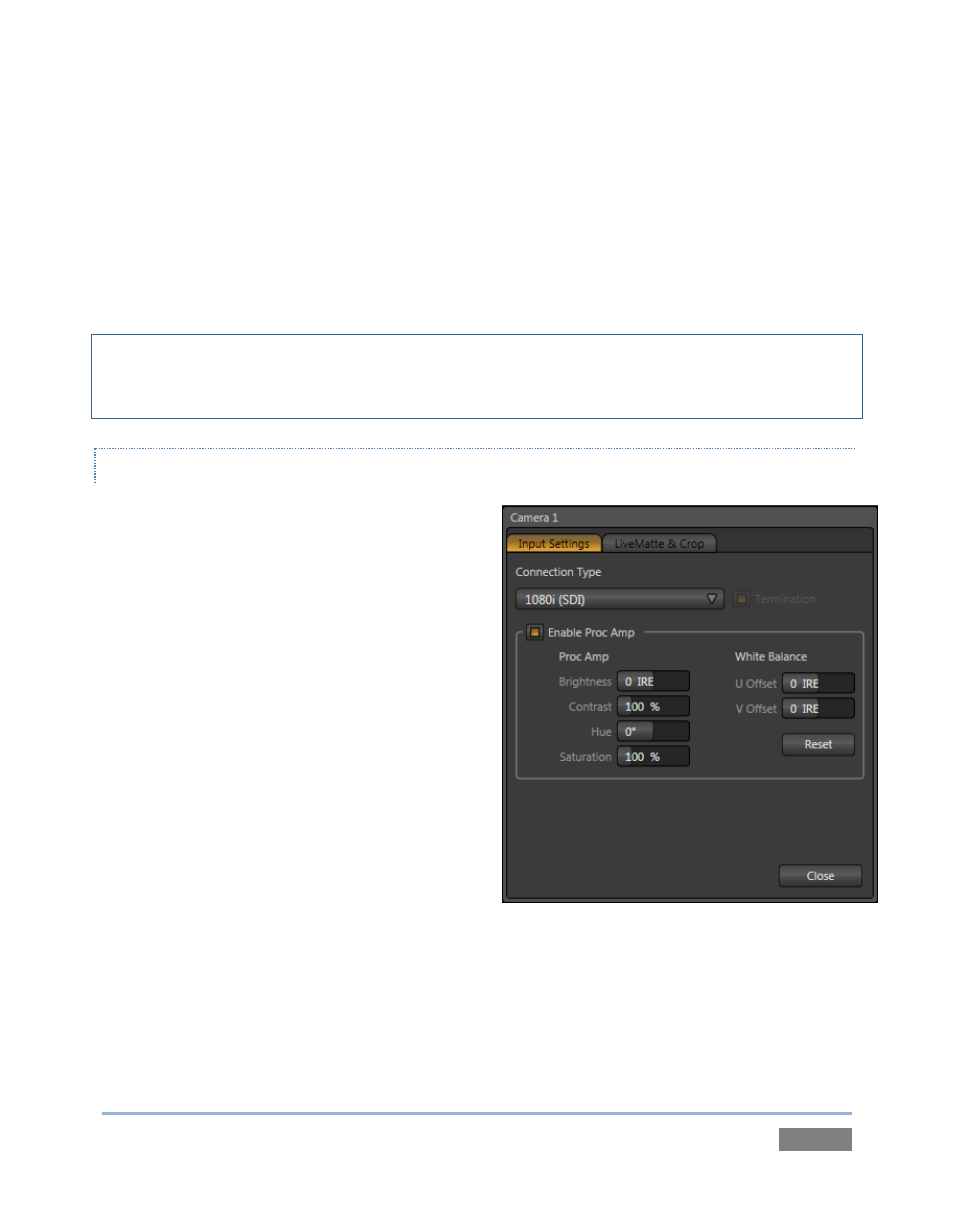
1. First, confirm that the Connection Type
selected for your video sources is
correct.
a. Move your mouse over an Input
monitor (All Monitors view).
b. Open the Configuration panel for
that video source by clicking the
Configure
button
(gear)
that
appears in the monitor’s titlebar.
c. Choose a Connection Type setting
that is appropriate for the
camera.
d. Close the Configuration panel.
2. Repeat the steps above for all connected cameras.
Figure 42